Showing posts with label grilling. Show all posts

21 June, 2012

Walkerswood Jerk Seasoning

I've tried a lot of Jamaican-style jerk seasonings in search of something really authentic, without too much luck. But recently, my friend Roger discovered Walkerswood Traditional Jamaican Jerk Seaoning, and I think my search is at an end.


Unlike so many other jerk seasonings out there, Walkerswood is a paste made up of hot peppers, scallions, black pepper, onions, salt, allspice, nutmeg, cane sugar, and thyme. It's made in and imported from Jamaica, and it's the most authentic jerk seasoning I've found.

It's easy to use - just rub some into the meat and let it sit a few hours (though overnight is best) before grilling or roasting. I've used it on chicken and pork so far, and it's AWESOME. (I'm considering making some beef jerky with it to see how it turns out.)

Walkerswood also understands that not everyone has a high tolerance for hot and spicy food., so they make a mild version that has the same authentic jerk ingredients with a little less hot pepper added to the blend. Don't get me wrong - Walkerswood idea of "mild" still might ring your bells if you are a complete pepper wuss, but it does have quite a bit less kick than the hot and spicy stuff.

Availability varies depending on where you live. I had never noticed it at all until just a little while ago, when Roger brought some back for me from a recent out-of-state trip. Since I've actually started looking for it, I've found it in a couple of ethnic markets (like Food Zone International on Belmont Avenue in Springfield MA) and supermarkets (I think ShopRite carries it in Enfield CT.) If you're a fan of jerk cooking, it's well worth the search.

19 June, 2011

Wings on the Grill

The original Anchor Bar recipe for "Buffalo Wings" calls for the wings to be deep-fried until crispy.  Most home recipes ditch the deep fryer (does anyone besides me do any deep frying at home anymore?) and instead roast the wings at 425 F in the oven.

For me, though, grilling the wings over coals is definitely the way to go. I like the flavor of charcoal-grilled wings a lot more than fried or oven-roasted.
Wings don't have a lot of intramuscular fat, but they do have a lot of skin in proportion to their size, and skin is quite fatty. For this reason, wings have a tendency to "flare" and burn on the grill (especially when you're a fan of charcoal!) and they have to be looked after a little more carefully than the typical burgers or hot dogs.  Here's some tips:
  • If you use a gas grill, preheat the grill on high, but turn the burners down to low when your put the wings on. The wings will take a little longer to cook on low, but they'll be easier to tend and they'll cook more evenly.
  • With a charcoal grill, give the coals time to burn down a little before you put the wings on. I like to let my coals settle for about 5 - 7 minutes after I dump them from the chimney into the grill itself. 
  • You can carefully arrange the wings on the gridiron if you like and then check and turn them frequently.  I'm not that fussy, though.  I just dump the wings all over the damn grill and then turn batches of them over with a big-ass spatula every now and then as they cook.  It's king of like stir-frying on the grill, and it keeps the wings moving around over the coals so that no one spot collects a lot of grease to catch on fire.
When the wings are all crispy and delicious, get 'em off the grill, douse 'em in your favorite sauce, and serve 'em up.

24 June, 2010

Kielbasa on the Grill


Here are some things I really like about summertime:
  • My trusty Weber kettle grills, which save me from having to stand in a hot kitchen over a hot stove.
  • Hardwood charcoal, which burns hot and clean and which I prefer over briquettes or propane.
  • Awesome kielbasa, made right in my hometown by the Janik Sausage Company, which has been in business here since the 1920's.
And here are my summertime wishes for you:
  • That even if you have an air-conditioned kitchen, you take an occasional opportunity to cook outdoors this summer
  • That you are happy and content with your choice of cooking medium, whether you prefer charcoal, briquettes, or gas
  • That you too have a locally owned and operated company that makes and smokes their own sausages so that you don't have to settle for a lowest-common-denominator national product.
.

21 August, 2009

Why I'm Buying Imported Charcoal

I don't like using charcoal briquettes. It's not that I'm some kind of "barbecue snob" or anything, I just prefer plain hardwood charcoal (it's usually labeled as "lump charcoal" on the bag) because it burns hotter and cleaner and it's kind of cool to see real wood embers in the bottom of the grill or fire pit or whatever.

Last year, I wrote about my disappointment with a charcoal company that seemed to have some pretty low quality-control standards (I kept finding rocks in the bags of charcoal I was buying from them.) I stopped buying that brand and switched over to buying World Classics Trading Company lump charcoal and Kingsford Charwood. World Classics is pretty good stuff, I have to admit, but it's pricier than most of the other brands. And unfortunately Kingsford - the number-one brand of charcoal - seems to have quality-control problems of their own; they don't seem to be able to pack bags of charcoal without letting in chunks of firebrick. Cooking over live coals is expensive enough as it is without getting shorted because the bag has heavy chunks of brick hidden inside, and whether it's accidental or not, I still get irritated when I'm cleaning out the ashes and find rocks and firebrick.

But recently I found a brand that I can recommend without reservation: Amigos lump charcoal, manufactured by a company called Charcoal International, Inc. in Paraguay and imported to the US by the company's offices in Miami. I first gave them a try because of the price - a full 20-pound bag was around $12.00 at a local market, a good deal because it's hard to find lump charcoal in bags larger than 8 pounds around here. And unlike most of the other lump charcoals I've used, Amigos is made of natural wood: branches, logs, tree limbs. Not scrap oak flooring or old pallets or hunks of plywood (Yeah. Plywood. Quite a surprise the day I was pouring out some of that shitty Cowboy Charcoal and got a 9-inch by 18-inch piece of perfectly carbonized plywood, like some kind of fossilized Home Depot artifact.) Although I sometimes have to give the Amigos lumps a good whack to break them into pieces that will fit into my charcoal chimney, that minor inconvenience is more than compensated for by the natural purity of the product. Charcoal International products are guilt-free, too. The wood they use is sourced from environmentally responsible, sustainably-managed plantations and mill yards.

Check this out. It's a fairly typical example of what you get when you reach into a bag of Amigo charcoal. There's no sense of scale to that picture, but the big piece standing up on the left side of the pic was almost eight inches in diameter. The branch alongside was about 10 inches long and a little over three inches in diameter. There are plenty of smaller pieces and bits in the bag too, but the large hunk of obviously natural wood set this brand apart from most of the others I find in my area.


Links:

Charcoal International Company's website.

Kingsford Charcoal website - They're a great source of info for barbecue and grilling, including recipes if you need them. Click here to go to the Kingsford Charwood page directly.

World Classics Trading Company products - an info page at Big Y (a locally-owned supermarket chain in my region.) World Classics Trading Company maintains a "placeholder" site here, but you'll get more information by either clicking on my Big Y link or by checking with a supermarket near you that carries the brand.

.

28 August, 2008

Lokkii BBQ Briquettes - Expensive and Disappointing.

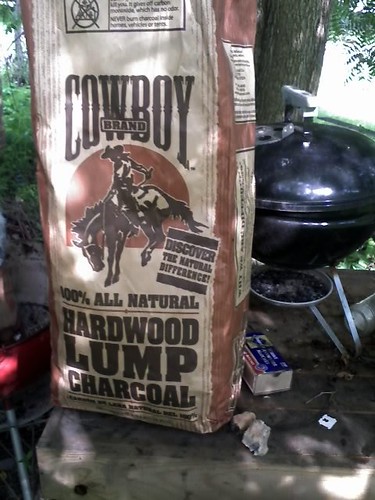
I just tried a so-called "miracle product" that is the most useless pile of shit I've ever bought for my grill: Lokkii brand BBQ Briquettes. They are individually-wrapped custom formed briquettes made of charcoal, anthracite, and an "ignition layer" which are supposed to provide up to 2 hours of heat per briquette; the package claims that two of them yield enough heat to barbecue a whole 2½-pound chicken in about 40 minutes.

They certainly are an intriguing item. Each briquette is about four inches in diameter and an inch tall with a spoke-like pattern of holes running through it. The top layer is the "ignition layer" and is a different composition than the rest of the briquette. Prepping the grill for cooking is easy: Just unwrap a couple of Lokkii briquettes, place them ignition-side up on the charcoal rack in the grill, light them, and let them burn up to cooking temperature (about 10 or 15 minutes.) Once lit, Lokkii claims that they'll provide heat for cooking for up to two hours, delivering 11,500 BTU per briquette.

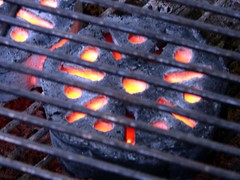
The ignition is pretty fascinating. Touch a match to the center of the briquette, and it begins to burn brightly, quickly spreading to the entire top surface with a large and active flame that sparkles and hisses like burning gunpowder. The fire jumps at least eight inches high, and there's no need to individually light any briquettes that are close enough to touch the first one you fire, because the coating is very flammable and the fire will easily race to the next one. After a few minutes, the ignition phase is over and the briquettes settle down to their slow cooking burn. Within 10 to 15 minutes, the interior of the briquettes are glowing bright cherry-red and the grill is ready to use.

This is where the frustration starts.

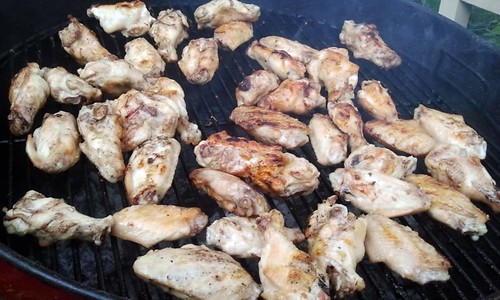
To begin with, 11,500 BTU sounds pretty impressive when you're looking at a ventilated hockey puck made of charcoal. But when you spread that 11,500 BTU over a two-hour cooking time, you're looking at a cooking temperature of 350° F, (as noted on their own website) and that is frustratingly low when compared to lump charcoal or even decent-quality charcoal briquettes. Lokkii briquettes burn at such a low temperature that when I checked to see if they were ready for cooking, I was able to hold my hand an inch above the cooking rack without feeling any discomfort for several moments. I was dubious, but the inside of the briquettes were glowing brightly, so I continued the trial; I placed three average-sized split chicken breast portions directly over the briquettes, rib side down, in my Weber kettle grill.

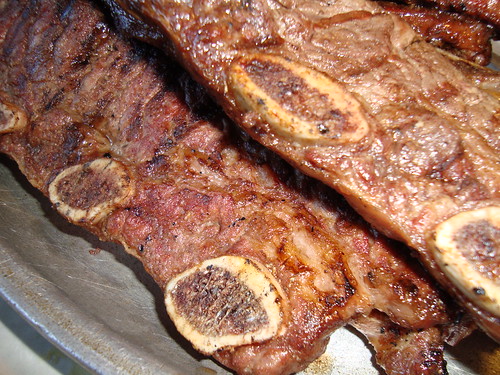
Each breast portion was one-half of a chicken breast, skin on, and bone in (rib bones and half the breast bone,) about 10 to 12 ounces per portion, rinsed, patted dry, and seasoned but otherwise as taken from the package (no trimming, no pounding flat, no filleting, etc.) Normally when grilling split breasts I put lump charcoal in a strip down the center of the Weber and use the high but indirect heat to cook the chicken on either side of the fire, then I finish them up with a nice crispy browning on all sides directly over the heat. They are generally done in 20 - 25 minutes depending on the size of the portions, how much charcoal I've actually put in the grill, and how many of them I'm doing.

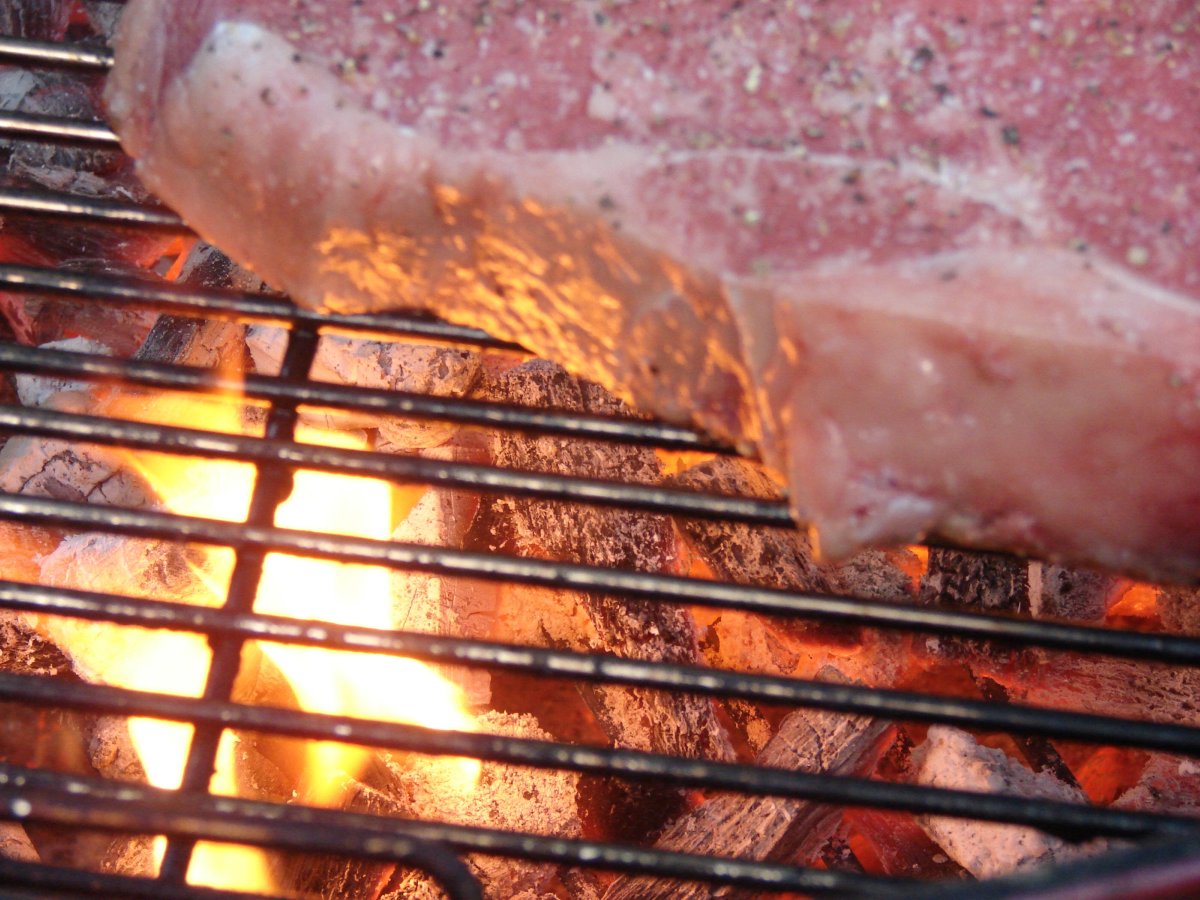
The Lokkii briquettes burn so much cooler than real charcoal that I placed the chicken direct above them. They took awhile to start cooking, but once the meat started to warm up and the fat in the skin started to render, cooking seemed to proceed nicely. There were very few flares, as the heat of the briquettes seemed to be near the center of them, and a cooler coal topping prevented excessive flame.

I checked the breasts frequently as they cooked over this unfamiliar medium, and they were finally ready to turn over in 15 minutes. I left them, skin-side down, to cook for another 15 minutes, but they were still quite underdone. Finally, after cooking them for a little over 45 minutes, they seemed ready. A temperature probe to the center of the breasts registered 160° F, which is just about right despite the panicky BS you might have read about making sure poultry is 180°.

Ah, but it turns out that the chicken was properly cooked only in the center. In the section close to the breastbone, the chicken was just barely turning translucent, and was very sashimi-like. Back out to the grill it went for an additional 15 minutes for a total cooking time of full hour. For split chicken breasts! Completely unacceptable.

In addition to their inabilty to cook properly, I have an issue with their price. The standard packaging available around here is a corrugated box containing two briquettes which retail for $3.99. Lokkii claims that two briquettes are equivalent to 5 pounds of charcoal; therefore, you would need to spend $16 on Lokkii briquettes equivalent to a 20-pound bag - twice the cost of charcoal. Crappy performance at double the price.

Lokkii makes a big deal about their "patent pending" ignition system which is not reliant upon "petrochemicals" or "harmful ignition fluids." I use a charcoal chimney that I ignite with newspapers or fatwood sticks. No petrochemicals or harmful ignition fluids there, either. And despite whatever claims Lokkii might make about "environmental friendliness," their briquettes contain anthracite coal, which is not carbon-neutral. Pure lump charcoal is a better choice for anyone actually monitoring their carbon footprint.

But they cross the line from "marketing hype" to "liars who are full of shit" when they make this claim on their website: "Greenhouse friendly: No Harmful Petro Emissions or Chemical emissions are released in the atmosphere." They also claim their briquettes are "non toxic." Dream on. Made of charcoal and anthracite, burning the briquettes is guaranteed to release carbon monoxide into the air, and these are no safer nor less toxic than burning any other kind of charcoal.

I should also note that Lokkii briquettes carry the logo of the National Barbecue Association on their label and claim that they have been "endorsed by the NBBQ." Visiting the NBBQ's website reveals that they are a trade association concerned primarily with promoting barbecuing-related industries, not with furthering any actual culinary arts. The certification is as much a worthless gimmick as the product itself.

Bottom line: Lokkii briquettes are an expensive, poor-quality product which will not make your grilling experience better, cleaner, less toxic, or more enjoyable.

Update (1 Sept 2008):
I'm turning off additional comments for this entry. Apparently, there are a number of people out there who think that because I don't like this product, I must be an employee of a charcoal company. I'm not. Every product I review in this blog is a product I have purchased at a retail outlet. I don't get paid to post, and I'm not in anyone's pocket, and quite frankly if you get this butthurt over my dislike one of your favorite shitpiles, you can take your issues, stick them up your ass, and click on someone else's blog.


16 July, 2008

Cowboy Charcoal Company Cheats Customers

There are two reasons I like to cook outside on my charcoal grills. First, of course, is that so many things taste better when they're cooked over live coals. And second, when it's a hot summer's day, I prefer to cook outside and not add any more heat to the kitchen from running the stove or the oven.

Economy, however, is one thing that doesn't enter the equasion. No matter how you look at it, using charcoal outside is more expensive than using the stove or the oven. And because the cost is already higher than indoor cooking, it pisses me off that a company would deliberately game the system in order to cost me even more money.

But that's what Cowboy Charcoal does. There have been rocks packed in with the charcoal in two consecutive bags I purchased. I don't usually find them when I'm pouring the charcoal into the chimney to light it. I find it later, when I'm emptying ashes or raking out unburned charcoal to re-use. They're not small pieces, either - one of the rocks I found was a pound-and-a-half chunk of sandstone. That might not sound like a big deal, but it's a good percentage of an eight-pound bag of charcoal.

I sent the company email last week, asking if they were having some problems with quality control (after all, it has to be a mistake, right? Right??) but they've ignored me so far. So the hell with them. Whether it's a deliberate attempt to short their customers or just a problem with their process, I don't give a damn any more. They've lost my business permanently.

Here's an example of what I'm finding in my grill after the charcoal has burned off. The rock on the left is a piece off of a much larger chunk of quartz that was cracked and split by the heat. The piece on the right is a chunk from a large piece of sandstone that was indistinguishable from a large chunk of charcoal when it was poured from the bag.

Their website is w­ww.co­wboycharcoal.com. I'm not going to make it a link, because they don't deserve it.

13 June, 2008

Flanken ribs on the grill?

"Flanken ribs" are a cut of beef short rib from the chuck primal, usually sold as a slab rather than as individual short ribs, and containing meat from the first five ribs. They're considered a little less desirable than short ribs, and because they include the tough gristly areas around the rib they're normally sold for braising.

At the Stop & Shop supermarket in my town, though, they rarely sell flanken ribs in big thick slabs that would braise appealingly. Instead, they slice them less than half an inch thick and sell them without any type of cooking instructions at all, usually at prices starting at $4.99 a pound and up. They're not very big sellers.

Yesterday, when I walked past Stop & Shop's meat case, I noticed a bunch of one- to two-pound packages of flanken had been marked down. I checked out the packages carefully, and noticed that many of the cuts were beautifully marbled and had some potential to cook like a steak instead of by a long, slow braising. So I bought four packages and went home to light the grill.

A charcoal fire is hot and the meat was cut thin, so I kept a careful eye on the meat as it sizzled over the coals. There were a fair amount of flareups - like many rib cuts, there is a good amount of fat in flanken. Since I had a lot of pieces, I cooked them to a range of doneness, from blue (cool and purple inside, rarer than rare) to medium; I love my steak as rare as possible, but my wife likes hers warm and just pink in the middle.

I was pleasantly surprised with the results. The maximum tenderness was achieved by cooking the meat rare - blue was extremely tough, and medium was acceptable but a little on the dry side. Although they were admittedly too thin to result in a really stellar steak experience, for the price (about 99 cents a pound) they were great. And even though they weren't the most tender cuts in the meat case, they were loaded with delicious beefy flavor, very rich and satisfying.

I have seen suggestions on the web that flanken can be marinated before grilling to give a more tender and flavorful result, but I'm not sure I want to do that. There isn't anything a marinade can add to the tenderness of the cut when it's prepared correctly, and too many marinades simply overpower the natural flavor of meat rather than enhancing it.
.

09 June, 2008

Double Dog

A sub roll is too big for just one grilled hot dog, but if you cut two slices in the top and set in two grilled hot dogs side by side...it transcends ordinary hot-doggedness and becomes A DOUBLE DOG!

.

23 May, 2008

Grillin'.

That right there is one of the things that makes being a carnivore worthwhile: an inch-and-a-half-thick USDA Choice porterhouse steak grilling over a natural hardwood charcoal fire.

.

20 May, 2008

Giovanni Rana Fresh Pasta and AMAZING LASAGNE!

I don't usually make lasagne with "no boil" noodles because I had never found a "no boil" lasagne noodle that I really liked. Mostly, they've been just standard dried pasta in slightly larger sheets, and I don't generally care for the results.

But all that has changed, thanks to this amazing fresh pasta by Giovanni Rana which has recently hit the shelves in my local Costco and in several area supermarkets.

Each 250g package of Rana's No Boil Lasagne contains six sheets - perfect for a deep, six-layer lasagne in a standard small pan. Two packages are just right for a large roasting-pan-sized batch, and gaps between sheets as they are layered are easily filled because the noodles cut with scissors to fit.

Besides being easy to work with, they have the most delicate egg-noodle flavor and tender texture - perfect all around. I can't wait to find other Rana products and give them a try.


Amazing Lasagne starts, of course, with amazing ingredients. Some of you might look at this photo and ask what is so amazing about some of this stuff (especially the Ragu brand pasta sauce.) Bear with me - all will be explained.

Clockwise from the top:

Giovanni Rana fresh pasta - I've gushed enough about this stuff already. Suffice it to say that it's the best fresh pasta I've ever had.

Ragu Traditional pasta sauce - Before you scoff at this choice, read the labels. No high-fructose corn syrup. No fillers. A minimum of salt. There isn't anything in most varieties of Ragu that I wouldn't put in homemade sauce, and that is more than I can say for the majority of other national brands.

Ricotta Cheese - I use a store brand (Stop & Shop to be precise - a local Northeast US chain.) Stop & Shop ricotta cheese contains only three ingredients: Milk, starter culture, and salt. That's it. next time you're in the store, check out some of the big national brands and see what's in your ricotta cheese: Guar gum. Xanthan gum. Modified food starch.

Shredded mozzarella cheese. Here again, I buy my cheese from a local company that uses all-natural ingredients. No additives or preservatives, and - most importantly to me - no antibiotics added as "mold inhibitors."

Fresh eggs from a local farm.

Fresh parsley.

Italian sausage, made locally at an Italian market/deli, cooked and finely diced.


Start by combining the ricotta, eggs, and parsley in a large bowl. If you want some extra flavor, add about half a cup of finely grated Parmesan or Romano cheese (or a mixture of both.) Season with a bit of salt and a very generous grind of black pepper. Beat with a wooden spoon until the ingredients are well-combined and light and fluffy. Set it aside, but keep it handy.


Spread some tomato sauce on the bottom of the roasting pan. On top of this, place two sheets of the pasta side by side, covering the sauce. Follow the pasta with a generous spread of the ricotta cheese mixture, carefully spreading it in a layer about half an inch thick from edge to edge. Add a light sprinkling of the shredded mozzarella. Top this with a liberal layer of the chopped sausage.


Spread some tomato sauce over the sausage. Follow the sauce with another layer of lasagne noodles, then another layer of ricotta, another sprinkling of mozzarella, and yet another spread of tomato sauce.

Continue layering ingredients like that until the final layer of noodles are about 3/4 of an inch from the top of the pan. Spread the noodles with some more sauce, and add a very generous sprinkling of mozzarella over the top.

You should have a little bit of tomato sauce left in the jar. Pour about 5 ounces of water into the jar and swish it around, picking up all the remaining tomato sauce in the jar. Now pour that tomato water evenly over that top of the cheese. The extra water is necessary to give the lasagne noodles something to cook in. Even though your lasagne may look too "wet" at this point, it will be fine after it bakes.

Cover the roasting pan loosely with foil and bake the lasagne for about an hour or so in a 350 F oven. When you take it out of the oven, you'll notice that the lasagne comes right up to the top of the pan! The noodles swell up as they cook and absorb liquid from the cheeses and sauce.

Remove the lasagne from the oven and allow it to sit for half an hour or so before you cut it - This helps give it time to "set" so it won't be so drooly when it's served. Of course, you can still cut right into it right away if you like drooly lasagne, or if the delicious smell has been driving you insane and you simply MUST HAVE AMAZING LASAGNE RIGHT NOW.


Did you know you can bake lasagne on your grill? Use indirect heat by placing charcoal to the left and the right of the grill, leaving the center empty. Place the lasagne in the center, cover the grill, and walk away for about an hour , just as though you were using the oven. It works great, and if you loosen the foil on the top of the pan for the last ten minutes of cooking, you'll gain a subtle smoky flavor to the top layer of cheese.

.

08 April, 2008

First Grilled Steaks of the Season!

It was sunny and mild today - a perfect day to fire up the charcoal grill. I picked up two 18-ounce porterhouse steaks on the way home and we enjoyed perfectly-cooked charbroiled beef for supper.

These are my suggestions for a perfect grilled steak:
  • Start with well-marbled steaks from the loin, short loin, or rib section of the beefer. They should be at least an inch thick, though 1½ to 2 inches is even better - that will be an 18- to 24-ounce steak
  • Use a kettle grill, iron hibachi, or other "deep" grill design that allows a thick bed of very hot embers to quickly sear the meat while the interior temperature of the cut rises. Remember that searing the meat doesn't "seal in the juices" but instead forms a caramelized crust that is loaded with flavor. That's the real reason for searing.
  • Use real hardwood charcoal, not briquettes. It doesn't matter whether the charcoal you are using is old scrapwood (pallets, oak flooring scraps, etc.) or sawn aged wood. What does matter is that briquettes contain a lot of garbage in them, including chemicals to help them burn slowly and evenly. Natural hardwood charcoal burns hotter and cleaner and meats cooked over it taste better.
  • Don't use petroleum lighter fluid! Light your charcoal in a charcoal chimney using paper, fatwood, or a commercial lighter cube which won't impart off odors or flavors to the food.
  • Use a clean grilling surface. Scrub the gridiron to remove old grease and bits of carbonated foods, but don't work too hard to try and get a perfectly chromed surface. A little bit of seasoning to the grill will help keep foods from sticking just like it does in a cast-iron pan.
  • Let the gridiron heat up a few minutes before putting on the steak. Remember that part about "searing!"

.