Showing posts with label cooking at home. Show all posts

02 September, 2014

My Rice Milk Adventure

James Cagney laughing it up with
Virginia Bruce and a glass
of milk in Winner Take All, 1932
Dairy products have always been my friend. Cheese...milk...butter...half-and-half in my coffee...whipped cream. I've had to give most of that stuff up since my bypass (I still eat cheese - I'm only human) but the only thing I really miss is milk. Whole milk. Before my surgery, milk was my beverage of choice with meals. Part of that, of course, is due to childhood habits, but there's some social conditioning going on there too. Milk is deeply ingrained in American culture; just pay attention when you're watching old movies. When you start noticing little details in films you'd be surprised how many scenes there are where people drink milk. When the hospital dietitian came around to discuss the "cardiac diet" I was henceforth expected to follow, I was told that rich dairy products were right out...but I could drink all the SKIM milk I wanted. Skim milk is good for me. Whole milk is poison.

To hell with that. I really can't stand the taste or mouthfeel of skim milk. It's nasty shit. I'd rather never drink milk again than drink skim milk. So I started looking for a substitute. I found that most brands of soy milk are pretty good. My favorite "grain milk," though is rice milk. Commercial rice milk is pretty amazing - Not only does it have a consistency very close to dairy, it also tastes like the milk that's left behind in the bowl after eating Rice Krispies (which is basically the best flavor that milk can be except for chocolate and malt.) Naturally, we've been going through a lot of Rice Dream, at like three bucks a container. It gets expensive fast, so I decided to try making my own because I am a cheap bastard thrifty. The ingredients in Rice Dream are pretty simple, too: filtered water, partially milled brown rice, veggie oil to provide a bit of body, and some added vitamins. How hard can this be, right?

It turns out that it's not that hard to find rice milk recipes on the web. In fact, there are so many that it can be kind of overwhelming. The first time I asked Chef Google for her recommendations, the top results called for using brown rice and a long initial cooking time. So that's what I did:


Rice Milk (Cooked Rice #1)

1 cup brown rice
8 cups water
1/4 cup canola oil
dash of salt
additional water
sugar to taste

Combine the rice, water, oil, and salt in a heavy pot and bring to a boil. Turn down to a very low simmer, cover, and allow to cook for 3 hours or longer (a slow cooker or cockpot is excellent for this.) When the rice has cooked enough, it will look kind of like a soupy rice sludge.

Measure the sludge into a blender. For every cup of rice you put in, add 2 cups of fresh water (put in rice and water alternately so you don't overfill the blender.) Whirl the mixture on high for at least five minutes. (If you have a Vitamix or Ninja this will probably be enough; if you have a standard blender, you'll need to leave the blender on for somewhat longer.)

She likes green beans, though.
The rice milk will now be somewhat thinner than when it came from the pot, and it needs to be filtered. Use a very fine-mesh strainer - or a strainer lined with a piece or two of cheesecloth - to pour the rice milk through and into a big bowl. Scrape along the inside of the strainer every now and then to help the stuff flow through.

When done, you will have some thick rice milk (more like "rice heavy cream" in viscosity) in the bowl, and a strainer full of disgusting mushy rice bran. You can throw the bran out, or eat it if you want some fiber in your diet. If you have chickens, give it them. (I gave mine to my parrot. She didn't like it.)


When you cook rice this long, it gets thick and gummy. Even after thinning it in the blender and removing a lot of solids with the filter, the rice milk - although a very lovely white color - was still too thick to comfortably drink. Starting with a measured 36 ounces of the thick stuff, I gradually added water, sampling as I went, until I arrived at a quaffable consistency. I wound up getting about 56 ounces of rice milk for every 36 ounces of thick liquid I measured into the blender. If you try this method, you'll need to experiment to find the right consistency for you. The heavily-cooked rice had developed a somewhat bitter aftertaste and I added a little sugar to round off the flavor. It wasn't all that bad, but it wasn't exactly good, either. No matter what I did, I couldn't get rid of the gumminess. I made something like four batches of this cooked-brown-rice rice milk because even though I wasn't that happy with the end result, I wanted to tinker with it AND I wanted to use up all of the brown rice. My final batch of cooked white rice milk was made with white rice. It was sill gummy, but there wasn't nearly the quantity of dregs in the strainer. I learned two lessons from this:

  1. Cooking the rice into a paste is NOT a good way to start rice milk.
  2. Screw brown rice. If all I'm doing is skimming off the bran anyway, why the hell am I spending more money on brown rice vs. white? 

Despite being kind of unhappy with the results, I couldn't call these first attempts at homemade rice milk a failure. The milk turned out exactly as the online recipes said it would, I just didn't care for the results.

Next, I tried using cooked rice left over from a meal. The rice was cooked, but not cooked until it's soul departed for the Elysian Rice Paddies.


Rice Milk (Cooked Rice #2)

1 cup leftover cooked rice
4 cups water
Dash of salt
Sugar to taste

Combine rice, water, and salt in a blender and whirl until smooth. Add sugar to taste and blend a little bit longer. Pour through a fine strainer or a few layers of cheesecloth to remove any chunky bits. Serve chilled, shake well before serving.

If you use white rice, like I did, you'll find that there are a lot less solids that need to be filtered out, because there isn't any indigestible bran to remove from the milk.


This turned out a little bit better, but still had that cooked-rice gumminess that I really didn't care for. Why was the Rice Dreams commercial rice milk so smooth and clean-tasting, while mine was gummy? I looked up more recipes and found that some people were making their rice milk from raw rice. Could this be the answer?


Rice Milk (Raw Rice)

1 cup raw rice
8 cups water
Pinch of salt
Sugar to taste

Some recipes recommended toasting the rice as a first step, to help develop a better flavor. Put the dry rice into a skillet over medium heat and stir it frequently as the rice toasts and browns slightly. Remove from heat when fragrant and lightly browned.

I made batches with both toasted and untoasted rice. I couldn't tell the difference between the two.

Combine the rice and the water and allow to soak for 8 to 10 hours. I just put the stuff together in the blender before I left for work. When I got home that evening, the rice was soaked and already in the blender.

Whirl the soaked rice/water mix at high speed for 10 minutes to destroy the rice and incorporate as much of it as possible into the rice milk. Add salt and sugar to taste, sipping and adjusting as needed.

Pour through a cheesecloth-lined fine strainer, serve chilled. Rice milk will separate in the fridge; shake well before serving.


The flavor of this version is pretty much what I was looking for...and yet, it still wasn't right. My Ninja blender, as efficient and deadly as it is, couldn't grind the rice fine enough for efficient processing. Worse yet, the milk had some fine particles still floating about - too fine for the cheesecloth to catch, but coarse enough to make it feel like I was drinking a glass of sand. I solved this problem by pouring the rice milk through a nut milk bag - an extremely fine-meshed nylon back that is used to filter...well, homemade nut milk.

Finally! I had a decent homemade rice milk. Now I wanted something faster.

That's when I decided to use rice flour instead of whole rice grains. I don't have a grain mill, and obviously my blender is not the right tool for grinding rice. After some trial and error, I have a recipe now that works beautifully, and is proportioned to the 46-ounce juice bottles that I use to store the milk:


Dave's Rice Milk

46 ounces water
1 cup rice flour
1/2 tsp salt or salt substitue
1/4 cup canola oil
3 to 4 tbsp demerara sugar or regular sugar

Combine all ingredients in a blender and whirl on high speed for 8 to 10 minutes. Pour through a nut milk bag, carefully squeezing out all the liquid you can from the bag.

Shake well before serving; serve chilled.


This turns out the most awesome homemade rice milk of all, much cheaper than buying the commercial stuff. Someday, I'm going to find a grain mill at an estate sale or thrift shop and I'll mill my own rice flour from whole rice and the milk will be even cheaper, but for now buying rice flour in bulk (or from the Bob's Red Mill section at Ocean State Job Lot) will have to do.



05 August, 2011

Shrimp Egg Rolls

Home made eggrolls. Still akin to magic, BTW
When I was a kid, I considered egg rolls to be something akin to magic.  They were filled with shredded cabbage, but they were delicious! Not at all like the nasty cabbage my mother would make. There were other things in there, too - things I only saw inside egg rolls and had no hope of identifying.  And sometimes, there were shrimp, except much tinier than any other shrimp I'd ever seen.

Couple all that with the fact that Chinese food in general was totally mysterious (no one could ever in a million years figure out how to make it as good as the stuff you got in a Chinese restaurant!) and there you have it:  Egg rolls. So delicious and so rare, because they could only be obtained via takeout.

That was many years ago, and Asian food is not such a mystery to me any more. Good recipes on the internet, an excellent Asian supermarket nearby, and some practice have all helped me learn how to make some top-notch Chinese food.  Even the most delicious and rare delicacy of them all, the egg roll.

This recipe makes a lot of egg rolls - like thirty or more. The last time I made them, I made twenty of them right away (which were totally nommed in no time at all) and then used whatever filling was left to make another 20 which disappeared just as fast. I had originally intended to make a huge batch of them and freeze some for later, but...  damn, these things are so good you'll be eating the filling out of the pan with a fork.

Shrimp Egg Rolls
Makes about 30 rolls or so

¼ cup sesame oil
3 eggs, beaten
2 pounds of baby bok choy, finely shredded
1 cup of finely shredded cabbage
8 ounces bean sprouts
1 small carrot, finely julienned
1 can (8 ounces) shredded bamboo shoots
1 cup dried wood ear mushroom (aka black fungus) rehydrated
3 finely sliced scallions
2 tablespoons soy sauce
3 tablespoons Chinese Shaoxing cooking wine
1 teaspoon salt
1/2 teaspoon MSG
1 12-ounce package of frozen salad shrimp, thawed
Egg roll wrappers

Heat a few tablespoons of oil in a large skillet or wok. Pour in beaten eggs and cook without stirring until the eggs set firmly. Turn this "egg pancake" over and cook just long enough to firm up the other side, about half a minute. Slide the egg pancake onto a plate and allow to cool; when cool slice into thin strips and set aside.

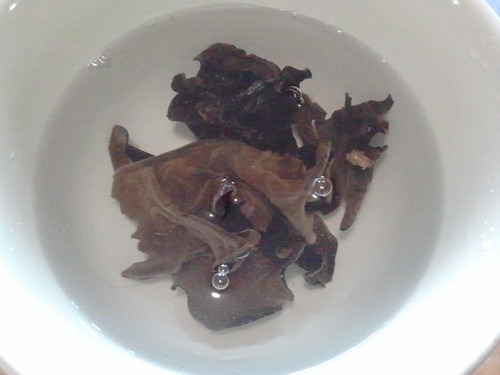
Soaking the wood ear
Rehydrate the dried wood ear mushroom by allowing it to soak in a bowl of water while you are prepping the other ingredients (shredding cabbage and cooking the eggs.) When the mushroom is soft, cut it into very fine shreds.

Heat the remaining oil in the skillet or wok and add all of the vegetables - bok choy, cabbage, bean sprouts, carrot, bamboo shoots, mushroom, and scallions. Stir fry quickly to wilt the cabbages and then, as you toss the veggies in the pan over the fire, add the soy sauce, Shaoxing wine, salt, and MSG. Continue to cook until the veggies are softened.  Add the egg and shrimp and stir over the fire for a few minutes so they pick up the flavors from the seasonings. When this stir fry is ready, transfer the mixture into a pan and put into the refrigerator to chill.

To actually make the egg rolls:

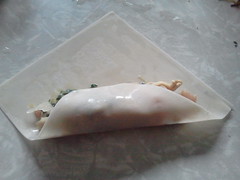
Lay an egg roll wrapper on the table in front of you with one corner pointing at you.  Dip your finger in water and wet the entire edge of the wrapper. Take a quarter-cup of the filling and spread it in a line in the center of the wrapper, leaving plenty of room at the edges for folding.

Tightly roll the bottom point of the wrapper over the filling.  Then take the side corners and fold them inward to the center, so that the egg roll kind of looks like an overstuffed envelope.  Continue to roll the wrapper up from the bottom, pressing the top corner of the wrapper to the body of the roll to seal it.

When you have a bunch of egg rolls made up and ready to cook, heat up about half an inch of oil in your skillet and fry the rolls brown on all sides by turning them frequently with a pair of tongs until you get them a nicely bubbled golden brown. Set them aside on newspapers or paper towels to drain for a minute or two, and serve hot.

A note about cooking: I like to roll these up six or so at a time, then fry the six I've made before making another six. This way, the rolls don't have time to dry out before I can fry them, and having just six on hand ready to fry means I won't overload the skillet and have too many rolls to keep an eye on. You may, if you choose, deep fry your egg rolls, or bake them (be sure to brush them with a bit of vegetable oil before they go into the oven at 400 F for 10 minutes on the first side and 8 minutes after turning them over.)

A note about wood ear mushrooms: You may omit these if you like, but if you can get some, don't leave them out - they really contribute an awesome flavor note to the finished egg rolls. You should be able to find them at any Asian market - they're one of the most common ingredients Western cooks aren't at all familiar with.


14 July, 2011

Millie's Arroz con Gandules

I have a friend at work named Millie.  She and I have this sort of informal food exchange at lunchtime. If I'm bringing leftovers in for lunch, I usually pack enough for her, too.  And when she's got leftovers for lunch, she usually packs enough for me.  Sometimes I think I'm getting a much better deal than she is, because I will tell you this:  Millie is an amazing cook.

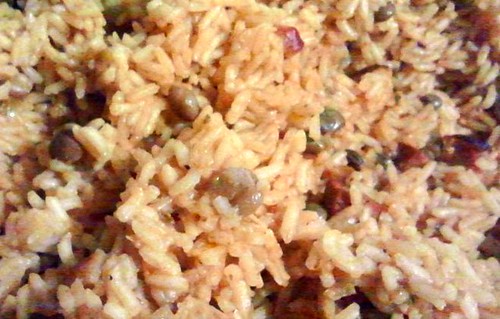
One of the absolutely incredible things she makes is Arroz con Gandules - Rice with Pigeon Peas. It is so delicious that if I had to choose a last meal, it would be a plate of Millie's Arroz con Glndules, because then I could die with a smile on my face. Seriously, I could eat that stuff every damn day. But, of course, she won't make it for me every day so I had to learn how to do it for myself.

She cooks like I do - "some of this, some of that" so the "recipe" she gave me was a little sketchy, but I managed to get a fairly good grip on it and got the ingredients down to a proportion that winds up tasting really good.  Not as good as Millie's, mind you, but as close as I think I'm going to get.

Millie Gonzalez's Arroz con Gandules
About 12 servings

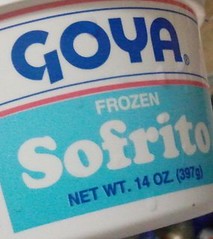
7 ounces (half of a small tub) Goya frozen sofrito
¼ cup oil (Millie uses corn oil, I prefer olive oil)
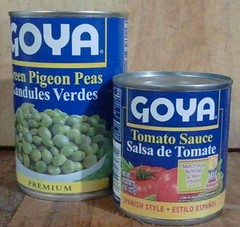
1 14-ounce bag of frozen pigeon peas (gandules) OR 1 15-ounce can of them, drained
Leftover meat, diced (whatever you have on hand)
8 ounces (1 small can) tomato sauce
7 cups water
4 packets Sazon Goya
Pimiento-stuffed green Manzanilla  olives (optional)
1 pound long-grain rice (about 4 cups)


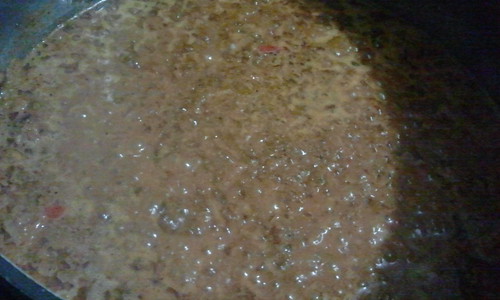
Sofrito and oil simmering in the
pan. There are no words to describe how awesome this smells.
In a large Dutch oven, combine the sofrito and oil over medium heat.  Heat until the mixture is bubbling and sizzling.  Add the pigeon peas and meat  and olives if you care to use them and saute over very low heat until the meat is heated through.

Stir in the tomato sauce, water, and Sazon Goya into the pot.  Taste the broth and adjust the season accordingly.

Thoroughly stir in the rice, cover tightly, and cook over low heat for about 20 minutes, or until the rice is done and has absorbed the liquid.  Serve it up hot.

A note about meat for this dish:  Use anything you've got left over. Ham is traditional, but leftover pork chops or chicken are great, too. For extra flavor I usually dice up a couple of chorizo sausages to throw in.


05 July, 2011

Mexican Lasagna

A couple of weeks ago I noticed something at ALDI called "Mexican Style Lasagna."  It was a layered casserole, kind of like lasagna, but with corn tortillas instead of noodles, and various Mexican-inspired ingredients layered in.  I didn't buy it that day - unfortunate for me, because when I went back to get one a few days later I found that it had been put on markdown for clearance, and they were sold out. Serves me right for not buying it the first time I saw it; when something on sale at ALDI says it's a "special purchase" I should know by now that it's not going to be around forever.

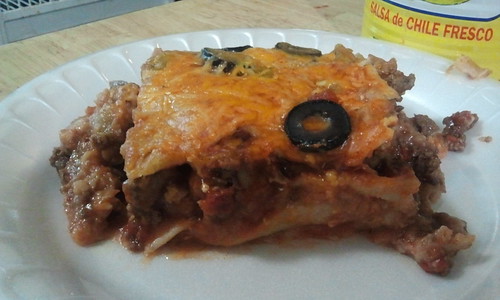
The worst thing about wanting to get something like that and not getting it is the unscratchably itchy jones which inevitably results. Lynnafred and I had both gotten it in our heads that we wanted MEXICAN STYLE LASAGNA for supper and nothing else would do. So we made our own.

Mexican Style Lasagna
Serves10 - 12, recipe may be halved for smaller groups.

2 pounds ground beef
2 envelopes of your favorite taco seasoning
2 cans (14.5 oz each) diced tomatoes with chili peppers
1 tsp cumin
2 cans (27 ounces each) enchilada sauce
2 packages (16 - 20 count) corn tortillas
3 cans (16 ounce each) refried beans
2 cans (4 ounces each) diced green chilis (Ortega's fire roasted are great,) drained
2 pounds shredded Mexican-style cheese (cheddar and Monterey Jack blend)
1 pound queso panela (Mexican basket cheese,) crumbled
½ cup sliced black olives
Preheat the oven to 350 F.

Brown beef in a skillet and pour off the fat. Stir in the taco seasoning, the cumin, and the two cans of drained tomatoes. Stir well over low heat until hot and well-blended.  Set aside.

Into the bottom of a lasagna pan, pour in enough enchilada sauce to just cover the bottom. Arrange a layer of corn tortillas on the sauce.  Spread the tortillas with the refried beans. Use all three cans and make it a good thick layer.  Dot the beans with a can of diced green chilis and pour on just enough enchilada sauce to moisten it up.  On top of this, arrange another layer of tortillas.  Spread the prepared beef in a layer over the tortillas, and sprinkle this layer lightly with shredded cheese.  Add some more enchilada sauce and then another layer of tortillas. 

Pour on more enchilada sauce; this time, be generous and allow the sauce to run down inside the layers you've built. There should be a layer of sauce atop the last tortilla layer.

Generously cover this top layer with crumbled queso panela, then add the second can of drained diced green chilis.  Put on a generous layer of shredded cheese and sprinkle the top with the sliced black olives.  Bake for about an hour at 350 F.  Cut like lasagna; serve with sour cream and, if desired, shredded lettuce.


29 May, 2011

Lynnafred's Cookie Base

It was too damn hot in the kitchen for me, but Lynnafred got a jones for cookies, and when that happens she becomes a baking demon, unstoppable until several batches of cookies spill from the oven and the dining room table becomes covered with racks of cooling cookies.

She's come up with a very good "cookie base" - an all-purpose mixture that is highly adaptable to the type of cookie she want to produce.

Lynnafred's Cookies
Makes about 6 dozen

 Basic Mix:

1 cup butter, softened
¾ cup brown sugar, packed
½ cup sugar
2 large eggs
1 teaspoon vanilla extract
2½ cups all-purpose flour
1 teaspoon baking soda
½ teaspoon salt
2 cups of "mix-ins" (chips, nuts, dried fruits, etc.)

Method:

Preheat oven to 350 F.
Cream butter and sugars together and beat eggs in one at a time.  Add vanilla extract and mix until smooth. Whisk dry ingredients together in a bowl until well-combined. Add the dry ingredients to the egg mixture and beat until a batter forms. Fold in the "mix ins." Drop by spoonfuls onto a parchment-covered cookie sheet and bake 8 to 10 minutes.  Remove with a spatula to racks to cool. Cookies will be soft when they come out of the oven and will firm up somewhat as they cool.

Variations:
  • For chocolate cookies, substitute 1 cup of cocoa powder and 1¾ cups of flour for the 2½ cups of flour.
  • Try "mix in" combos that work well together, using any proportion you like that adds up to the two cups required.  Some of Lynnafred's favorites are cinnamon chips + chocolate chips, white chocolate chips + dried blueberries, and dark chocolate chunks + butterscotch chips.
  • Use different kinds of brown sugar for variations in flavor. The darker the brown sugar, the more intense the molasses flavor will be in the sugar.
  • Try interesting "mix-ins" that you wouldn't normally associate with cookies.  Chocolate-covered dried cranberries are awesome in cookies.

Cinnamon cookies are one of Lynnafred's faves.  Unfortunately, we were running a little low on cinnamon chips tonight, so she made these combo chocolate chip-cinnamon chip cookies.

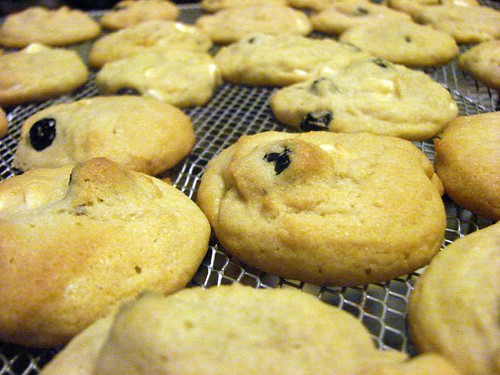
These cookies feature dried blueberries and white chocolate chips.  They're totally more-ish.

14 May, 2011

My Aunt Nellie's Pierogi

Back in the late 1980's, after I had been thoroughly adopted into my wife's family, her grandaunt Nellie handed me a small bundle of papers. "These are the family recipes," she told me. "I didn't want to give them to just anybody, but I know you'll make them so now they're yours."

I've made them many times since then, and I shared the recipe with my friends on the old Fidonet National Cooking Echo, an electronic message forum that predates the internet, in 1997.  Apparently, a lot of other people liked her recipe too, gathered into a large number of internet databases, freeware electronic cookbooks, and so on (often with my byline and attribution stripped out.)

Aunt Nellie's pierogis were always a family favorite.  She had learned how to make them from her mother, who had never written any recipes down on paper. Nellie, however, took notes so she wouldn't miss anything - especially with the dough.  She said that making the fillings was easy, but making the dough depended almost as much on "feel" as it did ingredients. The first time I made pierogies, she sat with me at the kitchen table and walked me through it. We made three batches of dough before it measured up to her standards.

It's hard to describe the proper texture of the dough. It should be almost silky to the fingertips, soft and yielding, yet firm and somewhat elastic - similar to egg noodle dough but not as dry. It's very much like the dough for scallion pancakes, which was once described to me this way: "It should feel like a young girl's arm."

Anyway, I'm going to get right to the recipes. This is going to be a long post.

Auntie Nellie's Pierogi Dough
Enough for 24-30 old-style small pierogi
2 cups sifted flour
1 large egg
1/2 cup warm water
1 teaspoon salt
2 tablespoons butter, melted

Mix all ingredients lightly and knead in the bowl.

Rest for an hour, covered. Then turn out onto a floured board and knead again until smooth.  The dough should be silky, firm and elastic.

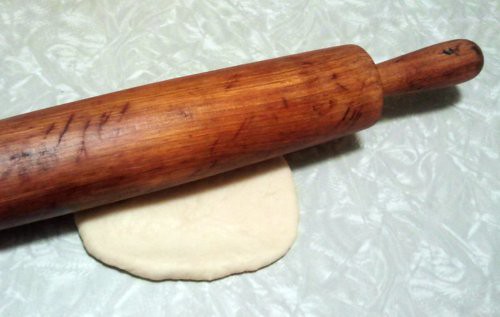
Roll out dough about 1/8-inch thick. I don't roll out the entire batch at once, but only enough for three or four pierogi. You can gather up scrpas, knead them briefly, and then roll them again - it won't make the dough tough.

Cut out circles with a coffee cup or medium biscuit cutter.  (Use a large biscuit cutter if you want pierogies the size of the ones you buy in the store these days. The coffee cup/medium biscuit cutter method produces the same kind of smaller pierogies that were common up through the 1950s.)

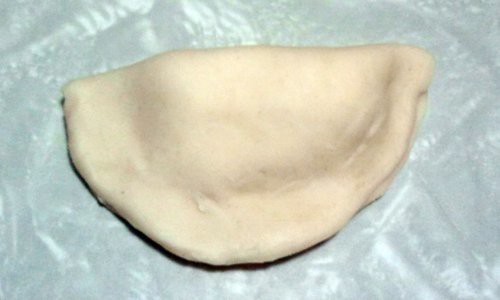
Put a small amount of your choice of filling in the center of each of the circles - about a teaspoon or so will be plenty - and then fold the circle in half with the filling in the center.  

Firmly pinch the outside edges together to seal the pierogi - they need to be well-sealed to keep them from opening up when you cook them.

To cook:  bring a pot of water up to a full rolling boil and drop the pierogi in. Turn the heat down a bit to a low boil to prevent them from opening back up.  Cook them for a few minutes after they rise to the top of the pot and float.  Serve with melted or browned butter, or you can saute them in a little butter with some sliced onions until they are slightly browned.

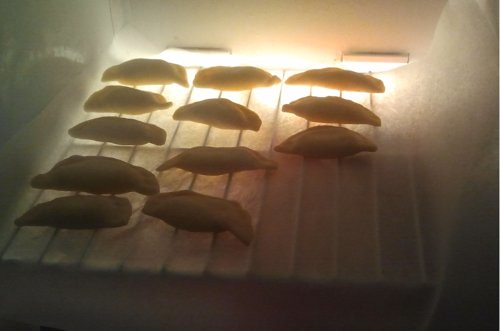
If you're making them way ahead of time - say, during Lent for eating at Easter breakfast - place them, separated, on a rack or a cookie sheet in your freezer.  They'll be frozen solid in about an hour, and then you can tip them into a plastic bag and pop them back into the freezer for longer-term storage.  Tip: Don't bag them before they are completely frozen, or they will stick together into an impossible-to-separate mass.

Okay, now you have a recipe for the dough and how to fill and cook them.  We'll follow up with a few recipes for fillings.  Over the years I've made a few adaptations; her original recipes were drastically underseasoned, and the quantity yield was strange - some filling recipes would make just the right amount for a single batch of dough and some would make insanely huge quantities that required three or four batches of dough to use up.  The recipes I'm giving here are still hers, they're just tweaked a little, and more accurately sized for a single batch of dough.

This mushroom filling is one of my family's favorites.  Auntie Nellie always made it with plain white mushrooms, but she told me that her grandparents used wild prawdziwek mushrooms from the forest (I found out later that prawdziwek is the Polish name for porcini shrooms, or cèpes. Unfortunately, cèpes are very rarely available fresh here in the US, so I try to use a mix of white, shiitake, and oyster mushrooms for a richer flavor.  Occasionally, I find cèpes canned in oil in the local Russian market. Not only are they awesome for stuff like this filling, but the oil is hugely flavorful for other culinary uses.

Auntie Nellie's Mushroom Pierogi Filling
Enough for one batch of Aunt Nellie's dough

Butter
1 medium onion, finely minced
1 cup mushrooms, finely minced
Celery salt and freshly ground black pepper to taste
2 large egg yolks

Melt butter (a couple of tablespoons to start) in a pan and saute onion until translucent and amber. Add the mushrooms and continue to cook until mushrooms are done. (Onions and mushrooms both take up the butter as they cook, so feel free to add more butter to the pan as you wish.)

Remove the pan from the fire and add seasonings to taste.  Add egg yolks and stir in well.

Allow to cool before filling pierogi.

This cheese filling is Lynnafred's favorite. Even though it's as much mashed potato as it is cheese, the filling becomes kind of "fluffy" and creamy when it cooks, kind of like the ricotta layer in a lasagna.  

Auntie Nellie's Cheese Pierogi Filling
Enough for one batch of Aunt Nellie's dough
1½ cups Farmer's Cheese
1 cup mashed potatoes (leftover is OK, instant is not.)
Celery salt and freshly ground black pepper to taste
½ teaspoon dried summer savory (optional)

In a bowl, whisk the farmer's cheese until light.  Add mashed potato and seasonings and stir thoroughly until combined.  Taste and adjust seasoning as needed before filling pierogi.

No matter how many varieties of pierogi I make for holidays, I have to make at least as much of the cabbage-filled ones as I do of all the others combined.  As much as everyone likes the mushroom and cheese pierogis, they seem to like the cabbage ones best of all. And it's a very flexible recipe as well.  It takes well to doubling or more, and it adapts well to other additions - Auntie Nellie would often make it with a couple of mashed potatoes added, or with a few finely-chopped mushrooms in the mix to liven up the flavor.  Originally, the recipe called for the sauerkraut to be simmered with the cabbage three times, changing the water between each parboiling. While that certainly made the cabbage tender, it also tended to draw off every bit of flavor from the sauerkraut.  I think the flavor is much better with a bit of the sauerkraut tang remaining, so I've eleminated two of the parboilings. Feel free to add them back if you desire.

Auntie Nellie's Cabbage Pierogi Filling
Approximately Enough for one batch of Aunt Nellie's dough
1½ cups sauerkraut
1½ cups finely shredded fresh cabbage
3 tablespoons butter
1 small onion, finely minced
Dash or two of Maggi Seasoning
Celery Salt to taste
Freshly ground black pepper to taste (see instructions)

Parboil the sauerkraut and cabbage in water to cover, simmering until the cabbage is tender. Pour off the water and finely chop the cabbage mixture.

Melt butter in a skillet and add the onion.  Cook until the onion is amber and translucent, then add a shake or two of Maggi along with the cabbage mixture and saute until the cabbage just starts to brown a bit. Season with celery salt and black pepper.  I usually use a heavy hand with the pepper because the cabbage mix takes well to the fruity aroma and spicy kick of robust black pepper seasoning. Allow to cool completely before filling pierogi.
Enjoy!

11 May, 2011

Making Panko

My breadbox was a mess - I must have had about eight different "bread ends" in there. What the hell is it about bread that no one wants to eat the last three pieces? Most of it hardly even seemed "day old," which I guess is typical of factory-baked white bread anyway, and even though I knew no one was going to eat it, I didn't want to just chuck it. So I did the next best thing: I made panko.

Panko crumbs are dead easy to make.  Trim the crusts from leftover white bread and push them through the grater on your food processor. Spread the resulting crumbs in a thin layer on a cookie sheet and bake in a 300 F oven for a few minutes until they're dried out but not toasted.

I store mine in a big jar until I need them - anywhere airtight is fine, and they keep a long time, so you can make more as you get more bread that needs used up rather than making it as needed. (It's better to have panko and not need it than to need panko and not have it.)

12 March, 2011

Ham Stock, Pea Soup, Lentil Soup - A Trio of Recipes

Photo by ALDI
As the calendar starts rolling toward Easter, hams start to appear on sale in the supermarkets.  The ALDI in my town had a great deal on their Appleton Farms spiral-cut hams a short time ago: $1.49 a pound for the ham, with $3.00 taken off the total at the register. I put a nice big one in my cart because if you're trying to stretch a tight budget (and we've been pretty tight lately) there are few things that give you as big a bang for your buck as a ham.  Besides the initial family dinner, a big ham will provide sandwiches for lunch, slices for breakfast, seasoning for peas and beans and such, and then there's stuff like chopped ham salad, ham-and-cheese omelets, croquettes, and hash.  Now, there's no need to eat ham for every meal until it's all gone, but seriously the $15 or so you'll lay out for a ham on sale really does go a long way.

And then, of course, there is SOUP.

Ham bones are laden with flavor and you can usually make enough stock for two pots of soup.  One night last week, that is exactly what I did.  From bone to bowl usually takes about eight hours, so you probably won't want to start at 4:00 in the afternoon after work like I did. But if it's, say, a rainy Sunday and you're not going anywhere anyway, you've got plenty of time on your hands to make a proper pot of slow-simmered soup.  (Yeah, for all the junk food and TV dinners I eat, the truth is I'm a big fan of Slow Food and I make most of our family meals from scratch.  Don't tell the Burger King, or he'll start creeping outside my windows again.)

Anyway.  Good soup starts with good stock, so let's start with ham stock.

Ham Stock
makes about 7 quarts

2 gallons of water
3 medium onions, chopped
3 or 4 large carrots, chopped
3 or 4 ribs of celery, including the leaves, chopped
1 ham bone with a little meat still on it.
Handful of parsley, whole
8 - 10 whole peppercorns
3 bay leaves

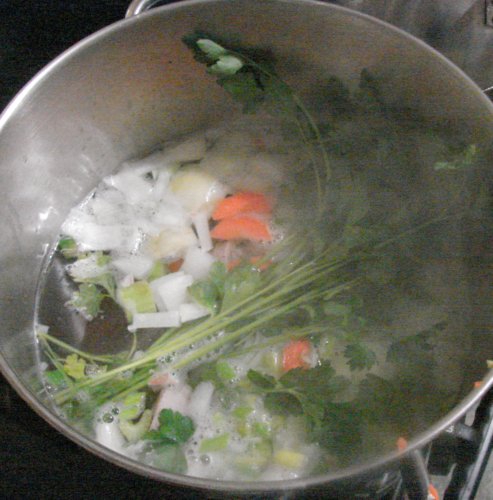
Put the water, onions, carrots, and celery into a large stockpot and bring to a boil. Add the ham bone, parsley, peppercorns and bay leaves.  Turn the heat down to simmer and allow the stock to simmer for 4 or 5 hours.  Add a bit of water now and then if too much boils off. Remove the bone from the pot at the end of the cooking time. Pick off the meat and reserve for inclusion in the soup, and toss the bone. (I usually save the cartilage, gristle, and other nasty little bits for the dogs.)

You may strain the veggies from the stock if you'd like. I take out the long stringy stalks of parsley, but generally leave the rest of it in.

You will now have somewhere between 6 and 8 quarts of ham stock - enough to make two pots of soup.  Or one huge pot if you're feeding a lot of people.


You can freeze stock for later use if you have the room in the freezer.  If you're the proud owner of a ham bone but lack the time to give it a proper soupination, you can freeze that for later too.  I had plenty of time on Soup Night, so I decided to just make two pots of soup side by side on the stove.

Green Split Pea Soup
Makes about 3 quarts
 
3 quarts of ham stock
2 carrots, chopped
2 onions, chopped
2 ribs celery, including leaves, chopped
1 bay leaf
1 pound green split peas
Salt, pepper, and seasonings to taste
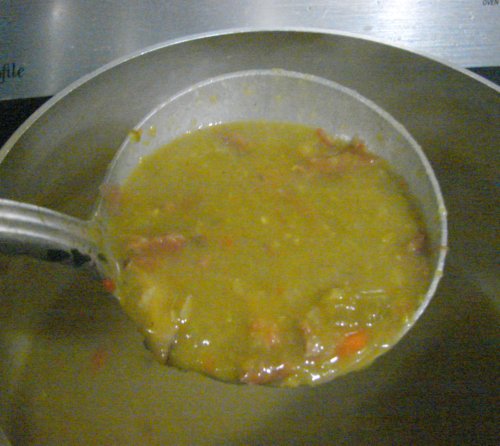
Bring ham stock, carrots, onions, and celery to a boil; reduce heat to a simmer.  Add bay leaf and split peas and simmer for 2 hours, covered, stirring occasionally.

By the end of the two hours, the peas should be soft and starting to break down.  Add reserved ham bits from making the stock, some chopped parsley, and some ground black pepper.  Simmer uncovered for an hour and a half, stirring occasionally, to help thicken up the soup.

Half an hour before serving, taste to adjust the seasoning. At the very least, you should add salt to taste, but there are certain ingredients I always add to my soups to make them outstanding.  One of these is Maggi seasoning.  Not the crappy soy-saucy stuff you find in American and Asian groceries, but imported Maggi Würze from Switzerland. This is the original formulation as Nestle first developed it over 100 years ago, and the main component is an extract of lovage. It is amazing in soups and stews.  It's available online.  Another seasoning I use consistently is Vegeta, an eastern-European blend of herbs, seasoning, and MSG OMG.  Lynnafred calls it "magic powder" because it has such an incredible ability to flavorize soup and gravy.

After adjusting the seasoning to your taste, simmer briefly, stirring to distribute the flavors, and serve hot.
You can use any kind of lentil you like in this lentil soup.  My favorite are the tiny green Puy lentils from France. They take a little longer to cook because unlike common brown lentils they need to be soaked before using. However, they hold their shape even after having been cooked for hours and hours.  This quality gives the soup a heartier character.  You can find Puy lentils in the "gourmet" section of your local supermarket, or you can get them in bulk at many"health food" stores.

Lentil Soup
Makes about 3 quarts

1½ pounds tiny Puy lentils
3 quarts ham stock
2 or 3 carrots
2 onions
2 ribs of celery
2 bay leaves
1 can (14½ ounces) diced tomatoes
1 bag (16 ounces) frozen cut leaf spinach
Salt, pepper, and seasonings to taste.

Several hours before you start to actually cook, put the lentils to soak in plenty of cold water. (I start soaking the lentils when I put the ham bone into the pot to make the stock.)

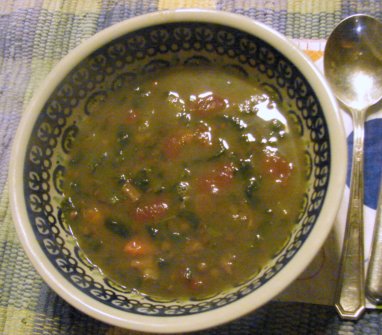
Bring the ham stock to a boil with the carrots, onions, celery, and bay leaves.  Turn the heat down to a simmer and add the soaked lentils, stirring as you pour the lentils in.  Add the diced tomatoes and cover the pot, simmering for three to four hours.

Add the frozen spinach to the pot, and continue to simmer as you season the soup.  I use salt, pepper, Vegeta seasoning, and Maggi - at the least, you should add salt and pepper to taste.  When the spinach is tender, the soup is ready to serve.

Bon Appetit!

01 March, 2011

On Ad Hoc Fried Chicken

Several days ago in a post on her blog Fun With Carbs, Leeanne Griffin described recreating the amazing buttermilk fried chicken served at chef Thomas Keller's Ad Hoc restaurant in Yountville, CA. Her joyfully over-the-top account was enthusiastic and bursting with fun, and she made it obvious that the recipe produced an awesome-tasting fried chicken that was second to none.  I found it quite inspiring, in fact, and made up my mind to try the recipe myself.

Because I have long experience with both whole fowl and big batches of brine (smoking, pickling, and homemade bacon all require gallons of the stuff) I didn't find the prep work as daunting as Leeanne perhaps did. But although it's indeed time-consuming and labor intensive for such a relatively simple meal, the results are truly worth it..  The brine is absolutely the key - it imparts a wonderful flavor and juiciness to the meat and makes it more than just another fried chicken recipe.  It was so good that I consider the recipe a keeper, and one that I will certainly make again.

There are, however, a couple of changes I'd make (may Mr. Keller and Leeanne forgive me.)  Wanting to test the seasoning balance in the coating, I fried up a couple of test pieces before going all out  and found the coating a little bland.  An extra tablespoon of salt and a tablespoon of Bell's Poultry Seasoning mixed into the coating mix provided what we were looking for.  Before making any tweaks to the recipe, though, I still recommend that you fry a piece of chicken in the coating as originally formulated just to be sure you really want to tinker with what many people feel is perfection.

The other change I plan is in the cooking method.  I no longer own a deep fryer - it's one of those "single use" appliances that I shed from my kitchen a few years ago when I decided that I'd collected too many one-trick culinary ponies in the pantry.  I deep fry the way my grandmother did, with a heavy pot of oil, a frying thermometer clipped to one side, and careful regulation of the fire.  The trouble with deep frying chicken is the chicken fat which contaminates the cooking oil and renders it, for me anyway, unacceptable for further use.  Next time I make Ad Hoc chicken, it will be coated the same way as in the cookbook, but fried in shallow oil in a covered "chicken fryer," turning frequently to ensure that all sides are browned and crispy.  It will take no more time than deep-frying in batches, and the end result will be virtually indistinguishable from deep fried, but it will use far less oil (and give me a pan of drippings for whipping up some country gravy.)

30 December, 2010

"French Leftover Beef"

I've got nothing but leftovers in the fridge, the family is hungry, and I'm just not feeling all that creative.  WAT DO??

Turn for help from the internet, of course.

It really is amazing what Google will turn up in a simple search for "leftover beef recipe."  Mostly it's amazing because it seems like there are an awful lot of people out there who think "hash" when they think of leftover beef, and I've done that to death.

And then I ran into "French Leftover Beef" - A blog post which was published in 2005 on a blog called Mantia's Musings. As blog author Alyce tells it, the recipe is derived from boeuf miroton, a French dish which is specifically about using up leftover beef, and was originally published in "a women's magazine years ago."  Alyce's description of the dish sounded delicious and I knew right away I had found what I was going to make for supper. 

Such a recipe is enormously flexible, and so I made a few tweaks of my own to the ingredients.  I think it turned out great, and so did the rest of the family.  Except the dogs.  They never got to try it.  The gravy is heavy on the onions, and onions are not at all healthy for dogs.

French Leftover Beef
Serves 4 to 6

2 tablespoons olive oil
3 smallish onions, thinly sliced
2 tablespoons flour
1/2 cup chardonnay
1/2 cup beef stock, plus more as needed
2 tablespoons tomato paste
1 teaspoon sweet paprika
1 tablespoon Gravy Master
Salt and pepper to taste
3 cups leftover cooked beef, cut into cubes

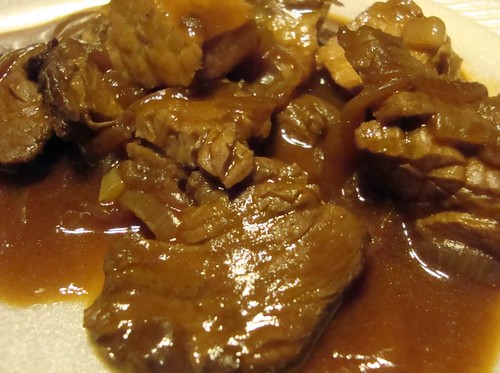
Heat the oil in a Dutch oven and add the sliced onions. Sautee until the onions are soft and beginning to caramelize. Stir in the flour and continue to cook until the flour is lightly browned, then stir in the chardonnay, beef stock, tomato paste and paprika.  Continue to stir over the heat until the mixture thickens, darkening the color of the mix as you wish with the Gravy Master.  

Cover the gravy and simmer it over very low heat for 10 minutes, adding more beef stock as necessary to prevent the gravy from getting too thick and scorching the dutch oven.

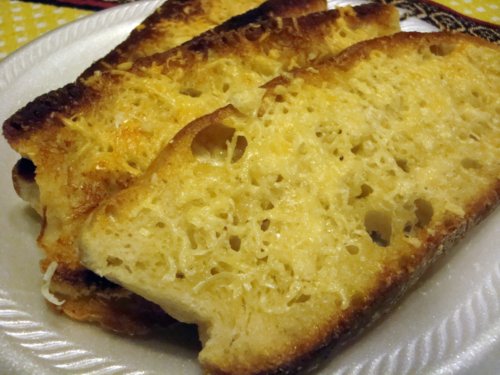
Stir in the meat and simmer, covered, for an additional 20 minutes (adding broth when needed as before.)  Serve with a tossed green salad and cheese toasts.

Alyce suggests serving Cheese Toast with French Leftover Beef, and I agree.  It's easy to make: just butter some slices of ciabatta or French bread, sprinkle it with grated Parmesan cheese, and run it under the broiler for a few minutes to toast the cheese and make the bread crispy.

28 September, 2010

Accidental Tomato Soup

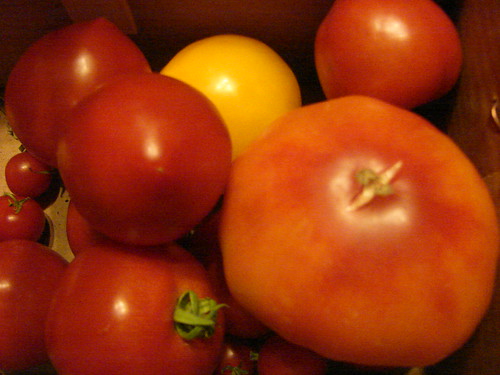
The unseasonably warm weather last week was great for my tomato plants - a whole lot of them ripened up in a hurry, and I ended up last night with a bunch of them getting soft and in urgent need of being used.  I intended to make a basic tomato sauce, but by the time I was done I had ended up with an awesome pot of tomato soup.

Accidental Tomato Soup

1/4 cup olive oil
4 bell peppers, chopped
1 large onion, chopped
6 celery stalks, with leaves, chopped
1/2 pound carrots, chopped
4 cloves garlic, crushed
3+ pounds of assorted ripe tomatoes, cut up
3 heads of fresh basil
1 teaspoon sea salt
1/2 teaspoon freshly ground pepper
1 cup rich beef stock
Light cream

Heat olive oil in the bottom of a pressure cooker.  Add bell peppers, onion, celery, carrots, and garlic and saute them in the oil while you chop up the tomatoes.

Add the tomatoes, basil, salt, and pepper to the pressure cooker.  Lock on the lid, turn the heat to medium-high and bring the pot up to pressure.  When the jiggler on the pot starts to dance, turn the fire down to medium and cook for 45 minutes.

Remove the pot from the heat and reduce the pressure under cold running water until the top can be removed.  Force the tomato sauce through a food mill or strainer to remove skins, seeds, celery strings, and so on.  

Bring the soup to a fast simmer and stir in the beef stock.  Taste and adjust seasonings.  For a richer Cream of Tomato soup, stir in light cream to taste just before serving.

You know what I love with tomato soup?  Grilled cheese sandwiches, made with cheap-ass orange American cheese.  Brings me right back to when I was ten years old.
.


17 September, 2010

Tasty Toasty Appetizers

My brother-in-law Walter Massa made these appetizers for a party at my sister's place a couple weeks ago.  They're completely delicious and will make your guests think you're a culinary badass even though they're pretty easy to make.  I don't know what he calls them...I'm going to call them "Margherita Toasts"  because that sounds better than "Those Toast Thingies Walter Made."

Margherita Toasts

1 crusty baguette, sliced into rounds (well, "ovals" really)
Extra virgin olive oil
Fresh basil leaves
Sun-dried tomatoes, cut in strips
Fresh mozzarella, sliced

Arrange the sliced bread on a cookie sheet and brush each slice with a bit of olive oil.  Top each slice with a fresh large basil leaf (the leaf should just about cover the entire slice of bread) then top that with a couple slices of sun-dried tomatoes.  Finally, add a slice of fresh mozzarella cheese to each.  Run the appetizers under a broiler just long enough to make the cheese bubbly with occasional spots of toasty brown.

Slide the toasts immediately to a serving platter and place in front of your guests, who will eat them ravenously.


By the way, I should mention that Walter is an accomplished and talented baker.  If I were ever sentenced to death, my last wish would be half an hour alone with a loaf of his rye bread and a quart of milk, I kid you not.
.

11 September, 2010

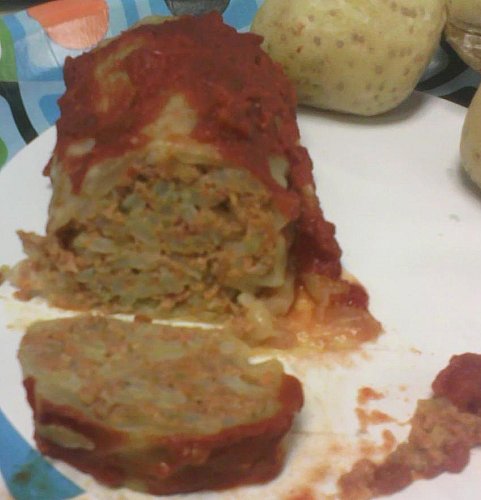
SPAM Golabki

I got this huge head of cabbage for a buck, which was really a mixed blessing.  On the one hand, it must have weighed something like twelve pounds, so paying just a buck for it was a pretty awesome deal.  On the other hand, it must have weighed something like twelve pounds and that's a lot of cabbage to deal with at one time.  I usually buy smaller heads so it doesn't go to waste.

I didn't have a lot to work with - it had been a few days since we'd been to the store -  but I did have some ground beef, a can of Low Sodium SPAM, and rice.  There's always rice in the house.

SPAM Golabki
Makes 12 to 16 golabki

1 head of cabbage
1 can Low Sodium SPAM
1 pound ground beef
2 cups cold cooked rice
1 green bell pepper, finely chopped
1 medium onion, finely chopped
1 tablespoon paprika (more or less to taste)
1 teaspoon ground black pepper
Tomato sauce

Bring a large pot of water to a boil and plunge in the head of cabbage long enough to wilt and loosen the outer leaves.  Remove the leaves and set aside; continue doing this until you have 12 to 16 cabbage leaves to roll into golabki; by the time you have that many, the remaining leaves in the head will be too small to use.

Remove the SPAM from the can and place in a large bowl.  With a fork, separate the SPAM into small bits.  Add the ground beef, rice, bell pepper, onion, paprika, and black pepper.  Also add a bit of salt to taste, but use your judgement - the SPAM is likely to have enough salt as it is.  Combine the mixture well.

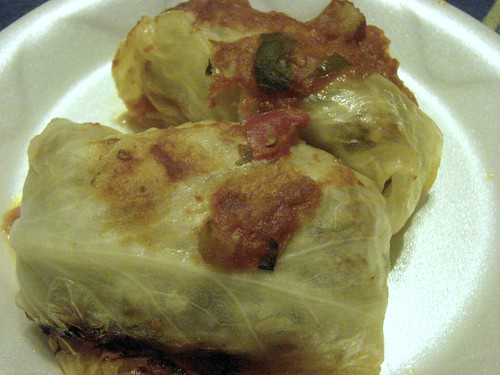
Roll up small portions of the meat mixture in the cabbage leaves, and arrange the cabbage rolls in a lasagna pan or other large baking pan.  Spoon tomato sauce over the golabki to lightly cover them, then cover the pan with aluminum foil and bake in a 350 F oven for an hour.  Remove the foil and continue to bake for another 10 to 15 minutes.

Serve hot.  Green peas and mashed potatoes are fitting and appropriate sides.

Don't laugh.  These golabki came out awesome.
.

01 September, 2010

Quesadilla Margherita

A late summer heat wave is keeping my kitchen too hot to do any real cooking, so I did a little culinary mashup and made "quesadillas margherita" for supper last night.  They were fast, easy, and satisfying, and I had everything I needed on hand:

Quesadilla Margherita
Makes 4

8 burrito-sized flour tortillas
Shredded mozzarella cheese
Freshly grated Romano cheese
4 fresh plum tomatoes
Fresh basil leaves
1 lb fresh mozzarella, cut into 12 slices
Dried Italian seasoning (optional)
Anchovy fillets (optional)

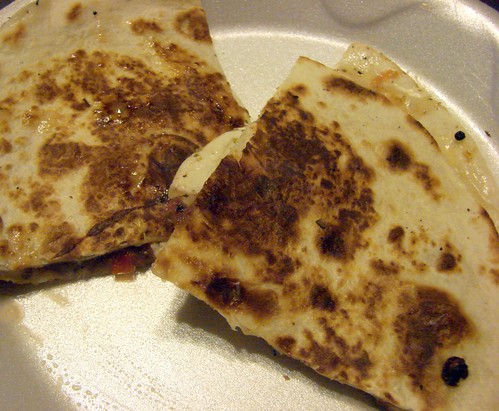
Preheat a 12- or 14-inch skillet over medium heat.  When the skillet is hot, add a tortilla and sprinkle it lightly with shredded mozzarella and grated Romano cheeses.  Slice a plum tomato, knock the seeds out of it, and arrange the slices on top of the cheeses.  Add fresh basil leaves to taste and add three slices of fresh mozzarella.  Sprinkle liberally with dried Italian seasoning if you wish, then top with a second tortilla.

Give the quesadilla a few minutes to toast on the bottom, pressing down occasionally on the top with your spatula, and then flip it over to toast on the other side.  When the tortillas are toasted and the cheeses are meltylicious, your quesadilla margherita is ready!

Repeat as necessary until you've made 4 quesadillas.

If you like, you can add anchovies right after the basil but before the fresh mozzarella.  I like mine with anchovies, but Maryanne and Lynnafred prefer theirs without.

The quesadillas were made even more awesome because the plum tomatoes were freshly picked out of our garden, and the fresh mozzarella was the amazing stuff that ShopRite makes in-store.
.

24 May, 2010

Alternative Golabki

Back in April, I reviewed Square brand canned golabki.  It wasn't as good as homemade (of course) but there were flavor elements to the filling that I found interesting and even enjoyable.  The most pronounced of these was a "cured meat" flavor akin to corned beef.  It got me thinking about how I could get that kind of taste in a homemade golabki.

It turned out to be easier than I thought; I just started out with our standard family recipe and did some tweaking to the ingredients.  To get the right texture and taste to the filling, I used a can of corned beef that I got at Big Lots! for two bucks - if you're going to try making golabki this way (and they're delicious, so I highly recommend doing it at least once!) don't buy the tin of corned beef at the supermarket if you can help it.  Go to Price/Rite, Big Lots! or some other deep-discount place and get the cheap stuff.  It works great.

Alternative Golabki

1 can (1 lb) tinned corned beef
1 lb ground pork
1 generous cup cooked rice
3/4 cup minced onion
1 tsp freshly ground black pepper
1 tsp good Hungarian paprika
1/2 tsp ground coriander, or more to taste
Dash of salt
1 average-sized head of cabbage
1 can (28 ounces) tomato puree 
Set a big kettle of water on to boil while making the filling for the golabki.

Use a fork to shred the tinned corn beef, then mix it thoroughly with the ground pork, rice, and onion. Season the meat mixture with black pepper, Hungarian paprika, coriander and salt, mixing well to distribute the seasonings.

(At this point, I pinched off a small lump of the mixture and cooked it in the microwave - about a minute is all it takes - and tasted it to check the seasonings.  I suggest you do this, too, and adjust them as you see fit.)

By now the kettle of water will be boiling.  After trimming off any "bad" outside leaves on the cabbage, plunge it into the water for a few minutes to wilt and parcook the outer leaves. This will make them easy to remove from the head and supple enough to wrap around the filling.  Continue plunging the cabbage into the boiling water and peeling off leaves until you have a sufficient number of leaves to use up the stuffing.

Stuff the cabbage leaves by taking up a lump of the filling enough to make a small burger, and form it into an oblong shape. Wrap the oblong in a cabbage leaf by folding the sides of the leaf up, then rolling the rest of the golabki up in the ends of the leaf, much the same way you'd wrap a burrito. As each is wrapped, place them in a lasagna pan or large baking pan.  Pour the tomato sauce evenly over all the cabbage rolls.  Cover tightly with aluminum foil and bake in a 350 F oven for 45 minutes, then remove the foil and bake for another 8 minutes to reduce and slightly brown the sauce.

Serve hot with mashed potatoes.

03 April, 2010

Fresh Horseradish

Every year, I make my own prepared horseradish and give bottles of it to family and friends to enjoy with their Easter and Passover meals.  It's a tradition my mother handed down to me.  In the mid-1990's, I wrote up my technique and posted it to the Fidonet COOKING echo (a sort of international messaging system for cooking enthusiasts that predates the internet.) Since then, these instructions, like many of the other recipes I've shared electronically over the years, have been scraped by bots and stolen and added into recipe archives all over the internet and beyond, usually with my name and location stripped from it.  In fact, only website other than my own has actual permission to archive and distribute my recipe, and that is Bert Christensen's Weird And Different Recipes, a website well worth browsing if you're looking to cook something...unusual.

Anyway, the genie is out of the bottle, and I doubt I will ever be able to get my bylines back onto the bootlegged copies of my horseradish recipe that are floating around in cyberspace.  But I can, however, print the recipe right here, so everyone can know that those instructions are mine, developed and written my me.  And if you ever see them anywhere but here or over to Bert's Place, you're seeing ganked content.

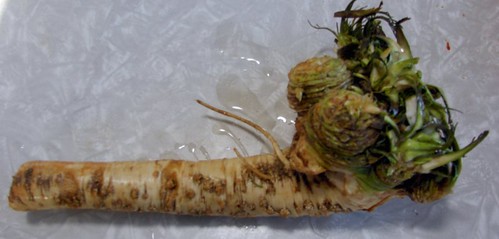
Fresh horseradish root.  Yes, I know what it looks like.  I have a 12-year-old's sense of humor.

Dave's Horseradish

Horseradish roots
Vinegar
Kosher salt

Every Spring, for the Easter/Passover season, I make gallons of prepared horseradish for my family and friends. My horseradish has a reputation for being the strongest kickass root available. Anyone, though, can make root that can stand up to mine...if you use my instructions.

Selecting the root: Bring a small knife with you to the supermarket. Pick up every root you're considering buying and give it a squeeze. If it's limp, feels fleshy or flaccid, or wrinkled, forget it. Select only fresh roots that feel rather heavy for their size and are as hard as wood. Use the knife to pare off a thin bit of the root and pop it in your mouth. Bite down on it. If it makes your lip and tongue go numb and tingly, it's good. Don't buy it if it's weak, or if it leaves a bitter quinine aftertaste (the bitterness will be magnified by grinding.)

Preparation: Set up a table in front of a window. Open up the window and set up a fan to blow air OUT the window. Horseradish fumes are crippling and you will NOT be able to do this without pulling the fumes out the window. By exhausting air out rather than blowing in, you can even do this on a chilly night when you might otherwise not want a window open.

On the window table put your food processor. If you can run your processor with both the shredding blade in the top and the puree knives in the bottom, great. Set it up that way. If not, you'll have two steps (grating and pureeing) instead of one. Next to the processor, still in front of the window, put a large bowl. That's where the ground root will go. Close at hand (maybe on the kitchen table) put the jars where the root will be packed, a large bottle of vinegar, and your salt.

Step 1: Wash and peel. Put all the roots into the sink and start running a thin stream of cold water. Get them all wet and let them sit a few minutes to soften the dirt on them. With a stiff bristle brush, give them a good scrubbing under the stream of water. When they're clean, use a veggie peeler to pare off the brown skin and green tops (if they have green tops. You can cut the top inch off the root, leaving the greens alone, if you like, and plant them in your backyard if you want to grow your own.) Do the peeling under the running water, also. Keeping the water drizzling over the root while you peel carries off some of the volatile chemical, saving your life while you work in the sink.

Step 2: Grate and Grind. Bring the peeled roots over to the window table and turn the fan and your food processor on. Feed them down the chute to the grating wheel. The top wheel will grate the root, and the bottom knives will do the fine chopping (if you can't run both knives in your machine at once, you will have to grate each bowl full of root, then put the chopping knife in to finish separately.) As the root gets finer and finer, it will begin sticking to the sides and bottom of the bowl. Slowly, and with the processor still running, pour in vinegar to get a thick but not sticky consistency. Continue to whirl in the bottom knives for several minutes, until the root bits are very very fine. Stop the processor and dump the processor bowl into the large bowl. Repeat these steps until all the roots are grated, ground, and in the large bowl. Remember to keep the fan on all this time! When all the roots have been processed, rinse the processor knives and bowl with cold running water. Wash them as necessary. Put the processor away or aside. You'll need the space on the table in front of the fan to pack the jars.

Step 3: Seasoning. You've still got that fan running, right? Leave the bowl in front of the fan. The grated root in the bowl should not be too dry. Stir in enough vinegar to give a smooth consistency. Taste a little bit of the puree (be careful! This is likely to be the strongest horseradish you've ever tasted.) If you think it needs salt, add some Kosher salt or canning salt. I usually add about half a teaspoon per quart.

Step 4: Packing. Use a ladle and a canning funnel to fill pint jars with the prepared horseradish. Fill the jars up, cap them off, and put them in the fridge. Do not process the jars. Keep them refrigerated. You may turn off the fan after all the jars are full and after all implements have been rinsed. The horseradish will maintain full potency for a couple of weeks (I make mine no more than a week or so before Easter) but will still be pretty damn strong for a month or two. Use it before it turns brown.

Cleaning up: Most of your tools (the bowls, ladle, etc) will require little more than a good rinse with cold water first (to neutralize and dilute any horseradish fumes) then hot water, since you aren't cutting any greasy fat.

That's it; that's how to make horseradish.

26 February, 2010

The Best Pie Crust Ever, and Cute Little Pies

Baking has long been the weakest of my culinary skills.  It took me quite a while to get the hang of making homemade bread, for example, and even now I'm not all that good at it.  I can make a decent white Italian bread dough, which I use for specialty loaves (pepperoni bread, Easter Pizza, spinach bread, and so on) but I admit I'm a lot better at curing a slab of bacon than baking a loaf of bread.

That goes for pies, too.  Not the fillings, mind you - my pie fillings are awesome - but my crusts have always been less than spectacular.  Some years ago, I finally just gave up trying and started buying Pillsbury refrigerated pie crust, which is pretty much just flour, lard, and a bit of salt, just like most homemade crusts. But lately money's been pretty tight and pre-cut pre-rolled circles of pie crust from the refrigerator case is more expensive and less versatile than homemade.  So the search was on for a pie crust recipe that even a baking doofus like me could knock together reliably.  

It took a while, but I finally found a pie crust recipe that comes out beautifully - flaky and tender and, um...easy as pie to make.  It was on a handwritten scrap of memo paper tucked in one of my old estate-sale cookbook discoveries, and versions of it are common all over the internet.  I present it to you here:

Never Fail Pie Crust
Makes pastry for two 2-crust pies

1 teaspoon salt
1 tablespoon sugar
4 cups all-purpose flour
1 3/4 cup lard
1 large egg
6 tablespoons icewater
1 teaspoon cider vinegar

Combine the salt, sugar and flour in a large bowl.  Cut in the lard with a pastry blender until the mixture is coarse and crumbly.  

Beat the egg with icewater and vinegar, then stir it into the flour mixture with a fork until moistened.  Knead it a little to make a smooth, silky dough.  Divide the dough into four equal portions, wrap each ball in plastic, and refrigerate it for at least 15 minutes before rolling it out.
You can use shortening instead of lard if you like, but I've found that lard really does make the best pie crust and because I don't make a steady diet of the stuff I'm not too worried about indulging occasionally.

You wouldn't believe how easy this dough is to work with.  I rolled it out directly on my lovely old formica tabletop without pastry cloth or wax paper, just a dusting of flour to keep it from sticking, and it was simple to roll and easy to pick up off the table top no matter how thin I rolled it.  Truly awesome.

Last night I made up a batch of the pie crust to help me use up some leftover chicken and gravy.  I lined a bunch of little Pyrex custard cups with the pastry, filled each of them with cubed chicken, some precooked diced potatoes and carrots, some frozen peas, a bit of minced onion, and a big dollop of chicken gravy.  Then I fitted them with top crusts and popped them into a 375F oven for a little less than an hour.

They turned out great.  Seriously great.  I am so glad I found that pie crust recipe.

.