19 January, 2009

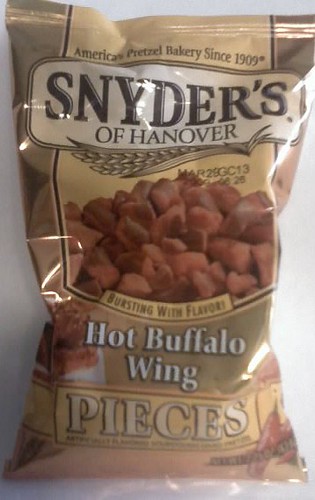
Snyder's Hot Buffalo Wing Pretzel Pieces

I've always been a little suspicious of "pretzel pieces" snacks. Unlike the little "pretzel bites" thingies, these are chunks and bits of broken pretzel. Like some loss-prevention guy at the factory took a look at all the busted pretzels spilling off the conveyors and said, "Hey, get someone to sweep that shit into bags and sell it, we're losing money there."

Needless to say, I don't buy them very often.

But then, who can resist a flavor like "Hot Buffalo Wing?" After all, what do you think of when you think of hot wings? Tasty, juicy fried chicken wings doused in sharp, fiery sauce - my mouth is watering just writing about it! So I gambled a buck in the vending machine at work on a package of Snyder's of Hanover Hot Buffalo Wing Pieces.

They're completely bizarre to look at: irregular shards of pretzels, with a thick coating of coppery orange powder on the broken ends and kind of an orange staining on the shiny pretzel surfaces. They turned my fingertips kind of salty red-orange, but not to the extent that Cheetos do.

The flavor is interesting. There's a strong, sharp vinegary tang and a rough-edged cayenne heat that never quite turns into the strong, irritating "back of the throat" heat I usually associate with cayenne. Snyder's has managed to capture the flavor of hot wing sauce fairly well (though it would have been better if there had been some buttery elements.) There's also a savory hint of umami, thanks to the autolyzed yeast extract in the seasoning ingredients. I found myself wishing they had put some powdered chicken bouillon into the mix, though, because the flavor could have been outstanding if the "wing flavor" had tasted more like wings and less like a bottle of the wing sauce.

I have to admit, they were pretty good, especially in the single-serving package that was offered in the vending machine. Towards the end, though, I started to find the vinegar taste a little too strong and annoying. And I still think the idea of selling busted fragments is kind of oogy.
.

18 January, 2009

Ramen Review 11: Nissin Chicken Ramen - Imported

Nearly all the ramen I've reviewed so far has been pretty simple fare - instant noodles, seasoning packet, boiling water. This one is different. It's possible, of course, to just add boiling water and enjoy the noodles, but to be at it's best, a little more effort is required.

The "serving suggestion" on the front of the label shows the ramen served with a sunny-side up egg on top. The package instructions show how to prepare the noodles both with and without an egg.

Ease of Preparation: 4/10
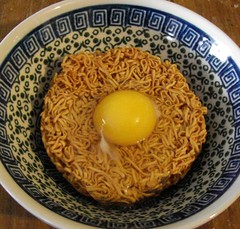
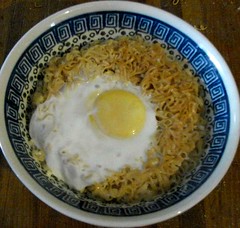
There's a bit more to this than just adding boiling water. The ramen is round to fit a bowl and has a round indentation on the top to hold a raw egg. The egg is cracked into the depression and boiling water is added to just come up to the top of the noodles. Then the bowl is covered with plastic wrap, supposedly to steam for three minutes and poach the egg. That doesn't actually work, though - there just isn't enough residual heat once the water is in the bowl to cook the egg. Using a sharp knife, we made a small hole in the membrane covering the egg yolk, replace the plastic film over the bowl, and microwaved the bowl for about a minute and a half. The result was a perfectly cooked egg atop perfectly cooked chicken-flavored ramen noodles.

Vegetable Packet: N/A - No vegetable packet is provided.

Seasoning: 10/10
Nissin ramen has always had one of the best chicken flavors anywhere. In this case, it's not in the form of a packet, but already incorporated into the ramen. For added flavor, the ramen is also toasted.

Taste: 10/10
To serve, we stirred the cooked egg into the ramen and enjoyed the noodles. They were excellent. The egg added an additional flavor layer to the bowl and added textural interest. The toasted noodles cooked up al dente and delicious, and provided a chickeny broth at the bottom of the bowl. Overall an excellent bowl of noodles for lunch.

Overall: 9/10 - Recommended

17 January, 2009

The Humongous Carrot

I have four "absolute staple" vegetables in my kitchen: garlic, onions, celery, and carrots. Those are the Big Four, the items I always have on hand. They're pretty much the same ones that my mom always had, as well, so I guess I know where one of my big culinary influences lies.

When I was a kid, my mom would always buy the slender carrots that come packaged in a plastic bag - the three-pound size. She would never buy bulk carrots, and she would never ever buy big carrots. She said they were "woody" and tasted bitter. Since I was a kid, I never questioned her judgement.

One day, though, I took a chance at my local produce store and bought a couple of really massive carrots because they were really, really cheap and I wanted some big carrots that would cook at about the same rate as some potatoes I was putting in a stew. See, that's the problem with slender little carrots - you put them in a stew or a pot roast with the potatoes, but they're smaller in diameter than the spuds, and they cook to disgusting mush long before the spuds are done.

Anyway, I bought these huge carrots and took them home and decided to try one to see just how woody and bitter they were. I peeled one, and cut a piece off the thickest and toughest-looking part, and tried it out.

My mom was wrong. This carrot was as sweet as could be, with a strong carrot flavor, and as tender as you could imagine a raw orange root could be. Delicious. Cut into potato-sized chunks, it worked out perfectly in the stew because it was done just right when the potatoes were cooked. It was a winner.

Since then, I've pretty much stopped buying the slender little carrots in the plastic bag. The produce store nearly always has these big carrots on hand (they call them "cutting carrots") and they're consistently excellent. Give them a try! They may not be what you've been led to expect.
.

16 January, 2009

Munchy's Fun Mix Cookie Assortment

Munchy's is Malasia's largest domestic cookie and snack manufacturer, and they have recently started a big international sales push. We found their "Fun Mix" assortment in our local Asian Supermarket, labeled as "Fun Mix - Hilarious Mix of Assorted Biscuits." Who can resist a slogan like that?

The cookies are of very good quality, perhaps a little dry for American tastes (they are much more "crackery" in texture than the typical flaky/tender "shortbread" style that most American associate with the word cookie. But they're flavorful and quite delicious, and even within the big reusable steel tin that they're sold, they're wrapped in small packets to ensure they stay fresh.

It turns out that there is a bit of hilarity in the cookies, after all. One of the sandwich cookies in the package is called "Lexus Calcium biscuits." They seem to be a fairly average sandwich cookie - two flecked cookies with a chocolate layer holding them together. Hilarity ensues when the ingredients are read; the list includes spinach and cheese. The spinach isn't noticeable (the taste getting lost behind the chocolate) but the cheese flavor is definitely distinct, lurking there below the chocolate with every bite!

There are also rectangular sandwich cookies imprinted with a face in the center and a name in the border below the face. There are "Nicholas," "Martin," and "Sophia," and I bet they're siblings because they all look pretty much alike. And they're random, as well, imprinted into both the chocolate and white sandwich cookies without distinction and not necessarily matched when put together either.

Link:
Munchy's website. Not much content, but the colors are bright and attractive.

15 January, 2009

Making Capicola Update - Visiting the Capicola

It's been four days since the pork loins were seasoned, cased, and hung in the attic to begin their journey toward becoming capicola. It's time to check on them and see how they're doing.

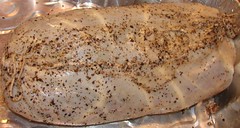
On the left is what the capicola looked like when we first hung them: the casing was opaque and very pale, and the salted pork loin was quite yielding to the touch. The outside of the casings always picks up some of the seasonings when you're stuffing them, so you can see little bits of the pepper clinging to the outside.

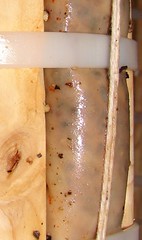
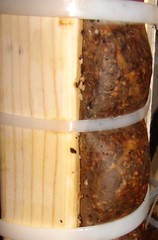
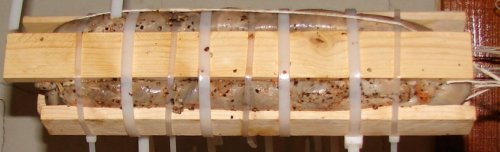
Although the capicola has only been hanging for a few days, the appearance has already changed. The difference is quite dramatic at this phase - from now on the changes will be much more subtle and hard to distinguish. Take a look at the picture on the left and you can see the difference: The casing has begun to dry and is now more transparent. Lean and fat areas of the pork inside can be clearly seen, and so can the pepper covering the surface of the meat. The meat is taking on a rich, chestnut brown color which will deepen and become more mellow over time. The casing is just slightly tacky to the touch, especially on the bottom bits from which meat juices had been dripping. The capicola feels more rigid when pressed - although it yields a bit, the meat has actually become quite firm, and this will also continue as time goes on.

By this time, the capicola is no longer actively dripping, but it is still losing moisture via evaporation. Many of the plastic cable ties are loose and it's time to tighten any that need it, using a pair of pliers. As I tightened the straps, I noticed that some of them pulled tighter by almost half an inch!

Once the tightening is done, I close the closet door, turn out the lights, and return to the warmth of the living room and the bright fire of the pellet stove. For at least this first month, I'll be stopping in to check on the capicola every few days. It will be time for another photo update in three or four weeks.

.

Making Capicola - A Short Q&A Post

On another online forum, Jim Weller of Yellowknife NWT had some questions related to the preparation and aging of my capicola. He's given me permission to reprint the questions and answers here.

Q:
. . .the excess salt has to be removed before they can be aged. . .
a cup or two of cheap white wine over them (the stuff they sell
for six or seven bucks a gallon is perfect.) Bathe the loins well
in the wine, wiping down the loins with the wine to be sure the
salt is removed. After each couple of loins are cleaned, dump the
salty wine down the drain and use fresh wine to clean the next pair.
As even cheap wine here is $12 per 750 ml bottle, can the used wine not be retained for cooking purposes? Would a mild (diluted) vinegar work?

A: Personally, I would not retain the wine. The salt is pretty concentrated, and it becomes fouled with pork blood that has been drawn out of the meat by the salt. When I was pouring the used stuff down the drain, it was a milky pink in color and pretty disgusting.

That being said, however, a full gallon of wine was sufficient for us to wash 10 whole pork loins. You'll need vastly less to do a single loin, or even two loins - just a couple of cups.

I don't see any reason why a diluted vinegar wouldn't work. To tell the truth, the wine doesn't add any flavor to the finished product. I have a feeling Mike learned to use wine in the old country because they used wine for everything - and produced their own, actually.


Q:
To age the capicola properly, you need a cold, dry place to hang them. A cold attic is ideal. . . It takes 2 to 3 months for the capicola to age completely. A good guideline is generally to hang it in mid-January and cut it down on Easter weekend . . .
How cold does it get in Connecticut in January? How warm in early April? How well is your attic insulated? Is it heated indirectly through the floor boards and does your capicola ever freeze? And does that harm it?

In other words what is the temperature range inside your attic?

A: According to climate data from the Connecticut State Climate Center, the mean temperatures at the official weather station closest to me are:

January - 25.4 F / -3.7 C
February - 28.7 F / -1.8 C
March - 37.7 F / 3.1 C
April - 49.0 F / 9.4 C

This doesn't take into account the frequent cold snaps we have in January and February - for example, the outdoor temperature here for the past few days (12 January - 15 January) has been about 15 F ( -9.5 C) with nighttime temps even lower (single digits.)

My attic is a "semi-finished" walk-up. There is no heat up there or electricity save a couple of pull-chain light fixtures, but there are two rooms with closets and lathe-and-plaster walls. Parts of the attic under the eaves are walled off as crawlspaces and have some insulation, but I have no reason to believe that there is any insulation between the ceilings in the attic rooms and the roof sheathing. It is heated only indirectly through the floorboards, and a bit up the stairway (but I keep the door closed.) It is generally cold enough up there to see your breath but not cold enough to freeze anything. Last night when I was up there tightening the straps on the cappie, I brought a thermometer up with me and it showed the temp to be about 36 F.

Even though the outside temperature will be on the rise over the coming months, my attic maintains a cool temperature until daytime temperatures start creeping over 60 F. Then, of course, in the summer it becomes unbearable up there, even with windows open. By that time, however, there aren't any more capicolas hanging. (And that's the reason why I've never tried making my own prosciutto - I don't have a spot that remains at the proper temperature for the 18 to 24 months that a proper prosciutto would take to age.)

.

14 January, 2009

Remember Real Dried Beef?

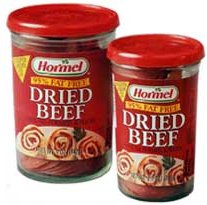
Dried beef is not what it used to be. Oh, the little jars are the same - small vacuum-packed tumblers with the snap-off lids - but the meat inside has changed. Once upon a time, dried beef used to be sliced from a real cut of meat; it looked like thin slices taken from a dried roast beef. Today, though, it's all "chopped and formed." Hormel and Armour make their dried beef out of some kind of dessicated hamburger.

A few years ago, when this changeover to cheapness was first happening, I found a bunch of jars of Beardsley brand dried beef in a local job lot store and bought every one of them I could grab. When my stash was all gone, though, I thought that was the end of good dried beef forever. I refuse to buy the chopped and formed stuff.

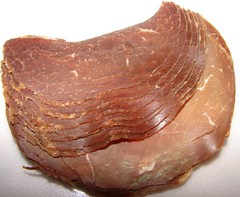
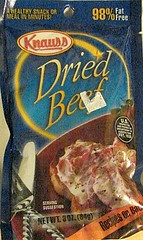
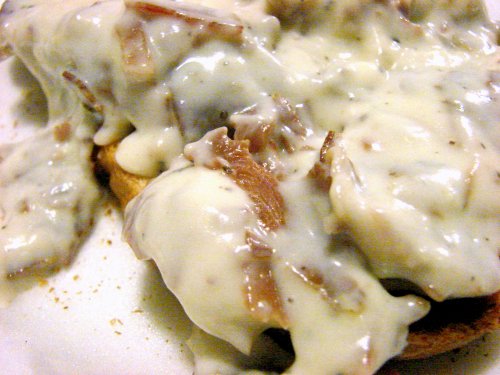
But joy has returned! Poking through the packaged-meat section of Food Zone International in Springfield, I found refrigerated envelopes of Knauss Dried Beef. I couldn't see through the packaging, but there was nothing on the label that indicated they were chopped and formed, so I took a chance and bought a couple. And to my joy and delight, I found that Knauss does indeed make the real thing (as shown on the left.)

Probably because it's not meant to be entirely shelf-stable, the Knauss brand is not as salty as the Hormel stuff in a jar, so it needed no rinsing or pre-soak to take some of the saltiness away. This morning, I enjoyed a delicious breakfast of that time-honored classic "Shit on a Shingle" - also known by the less-colorful name "creamed chipped beef on toast" and it was great.

I am entirely convinced that the bad reputation this wonderful breakfast has is due to ignorant people who have only heard it referred to as "Shit on a Shingle" or "SOS" and have decided that if it's called something so awful, it must not taste very good. So, here's my recipe.

Creamed Chipped Beef on Toast
Serves 2

1 generous tablespoon of butter
1 package (3 oz) of Knauss Dried Beef
2 tablespoons flour
1½ cups of milk (approximately)
Pepper, nutmeg, and Worcestershire sauce to taste
4 slices of toast, buttered lightly

Melt the butter in a skillet over medium heat until it is foamy. Add the dried beef, breaking it up into little bits as you do so. Stir the beef around in the butter to sizzle it deliciously, and when it is all nicely coated with butter and just starting to brown and curl at the edges, sprinkle it all over with the flour. Stir the flour into the beef thoroughly, then turn the heat down to low and cook for a few minutes until the flour begins to color a bit - just enough to get rid of the "raw flour" taste.

With the heat back up to medium-high, stir in the milk all at once and continue to stir until the mixture bubbles and starts to thicken into gravy. You won't need much salt (and if you do, use celery salt!) but season with a good shot of Worcestershire sauce, some nutmeg, and as much freshly ground black pepper as you like - I like lots of it in this! Keep stirring until the gravy is thickened and delicious - taste and adjust the seasoning if you like, and if the gravy is too thick stir in more milk, just a wee bit at a time, until it's got the consistency you like.

Serve on toast - but if you happen to have a few freshly-made flaky and mouth-watering homemade biscuits on hand, split them and ladle the SOS right on top for heavenly delight.

UPDATE - 30 March 2009:

E. W. Knauss & Sons, the world's largest producer of dried beef, was acquired by Alderfer Inc. in 2004. Click here to go to Alderfer's website; there you will find a search function to help you locate a retailer near you that carries Knauss dried beef. And if you can't find it locally, Alderfer offers an online purchasing option and full contact info so you can write to them if you like.
.

13 January, 2009

French Onion Soup

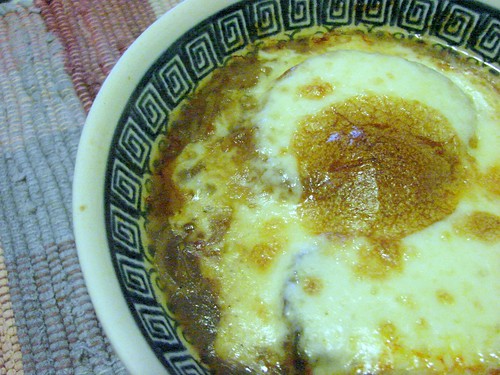
On a cold winter's night, is there anything so comforting and satisfying as a delicious bowl of French onion soup? Its rich, beefy broth and bubbly cheese, served right out from under the broiler, is a perfect way to snuggle in to dinner; sleet and snow don't seem so bleak outside when the woodstove is glowing and there's onion soup on the table.

It's easy to make, too.

French Onion Soup
Serves 4

Soup:
6 tbsp butter
2 pounds yellow onions, sliced thin
2 tbsp fresh thyme leaves, or 1 rounded tsp dried thyme
1/4 cup dry sherry or sake
8 cups of beef stock

Croutons:
1 baguette, sliced
1 clove of garlic, roughly broken
Extra virgin olive oil
Sliced or grated gruyere cheese or deli-sliced Havarti and Muenster cheeses

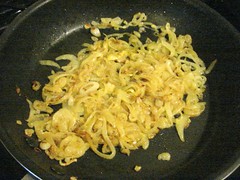
Melt the butter in a large, heavy skillet and cook the onion and thyme over medium heat until the onion is softened and amber in color (about 20 minutes.) Bring the heat to medium-high and continue to cook for 15 minutes, until the onion caramelizes and becomes dark amber, stirring now and again to prevent sticking. Add the sherry or sake and deglaze the pan at a simmer, then add the stock and bring to a boil. Season to taste, and simmer for 10 minutes.

Meanwhile, toast the baguette slices on both sides under a broiler. Rub the toasted slices with broken garlic and drizzle lightly with a bit of olive oil. Top each crouton with some cheese and run them back under the broiler just until the cheese has melted and is a bit bubbly. Set them aside.

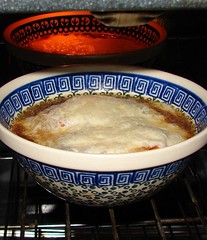
Ladle the soup into bowls. Top each serving of soup with one or two of the croutons, then top these with some additional cheese - I've found that a slice of Muenster and a slice of Havarti, slightly offset from one another atop each bowl, is favored by my wife and daughter. Run the bowls under the broiler until the cheese topping is bubbling and slightly browned, and carefully lift them to the table to enjoy.

Tips:

1. Take your time cooking and caramelizing the onions. A rich, dark amber coloring can take some time, but you're repaid with a wonderful, flavorful, fragrant final product.

2. You can use any kind of beef stock you like - reconstituted from bouillon or soup base, canned, or freshly prepared. I've made this soup using many different kinds of stock, and my favorite is still "from scratch."

.

12 January, 2009

How to Make Awesome Beef Stock

Good, flavorful stock is the foundation for so many wonderful things in the kitchen - gravies, soups, sauces - and can add rich, marvelous flavor to other things, like vegetables, as well. Although it can take some time to make, it's easy. If you're going to be home on a Sunday afternoon in January anyway, you might as well use the time to make a batch of beef stock. Then you'll not only be ready to make delicious French onion soup, but the kitchen will smell heavenly, too.

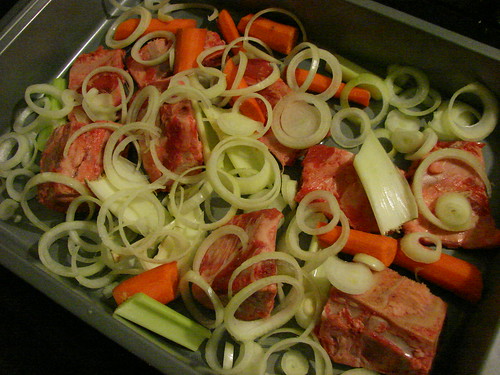
Start with a large, shallow roasting pan. Drizzle a small amount of olive oil onto the bottom of the pan. Add a couple of pounds of beef bones. Chop up some carrots, a few celery ribs, and a couple of onions and add them to the pan, too. Optionally, you can add a few quartered tomatoes and one or two sweet red peppers. Toss the ingredients around to coat them a bit in the oil, and then put them in the oven at 350 F to roast.

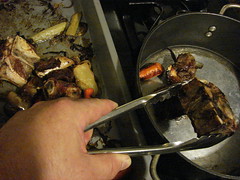
It'll take a couple of hours, but don't be in too much of a hurry. The secret to the flavor of a good stock is in the deep brown caramelization of the meat and veggies in the pan. Let heat and time work their magic, and don't try to rush things. Every half hour or so, pull the pan out and stir things around, turning them and flipping them so they brown evenly. Eventually, you'll see that everything is done.

Remove the nicely-browned bones and vegetables to a Dutch oven or stock pot. Add water to the pan and deglaze it thoroughly, then pour it off into the stock pot with enough additional water to cover the bones and veggies. Bring the pot to a simmer, and add a few peppercorns (whole or crushed as you desire,) a bay leaf or two, some parsley, and a bit of thyme. Cover the pot and let it cook.

In about an hour, you should start to smell the wonderful aroma of simmering stock. Check on the liquid level in the pot and add water now and again as needed.

In about four hours or so, any meat tidbits will be falling off the bone and the stock will be ready. Strain out the veggies, bones, and meat bits, and season to taste with salt, Vegeta, Maggi seasoning, or whatever secret ingredient your grandmother used to tell you about. You can skim the fat off the top of the stock now, but it will be easier if you chill it overnight - then you can just lift the solidified fat effortlessly from the top of the stock. (Leave a little bit of fat behind, though, for best flavor.)

There you have it - awesome homemade beef stock. An afternoon well-spent.
.

11 January, 2009

Making Capicola Update - Seasoning and Casing the Pork

Sorry about being so late with this update - this step takes some time, and we were at it for about four hours today.

Before the pork loins can be put into the casings for aging, the casings have to be prepared. I use natural beef casings which are about 30 inches long, about 3½ inches in diameter, and closed on one end. They come packed in salt, so they have to be cleaned and refreshed before using. First, rinse any clinging salt from the casings under cool running water; then, put them into a pot of cold water to soak about half an hour.

To thoroughly clean the casings, hold the open end of the casing over the faucet and fill it carefully with water - but not so much that it blows up like a water balloon and bursts! Turn the casing inside out and wash it well in running water. You'll notice a long line of fat running from the open end to the closed end of the casing. Take a sharp paring knife and carefully remove the fat - be especially careful to do it without putting any holes in the casing. Each casing will be enough to cover one whole pork loin (well, two halves, since we cut all the loins in half for ease of handling before we salted them.) Oh, I should probably mention that they're pretty smelly. It doesn't mean that they're spoiled. That's just the way they are.

With all the casings cleaned and the fat removed, put them in a bowl with just enough water to keep them supple and moist. When they're refreshed and wet like this, they're very soft, flexible, and stretchable. You'll have very little problem getting the loins into the casings as long as you keep them wet until ready to use. Set them aside and turn your attention back to the loins.

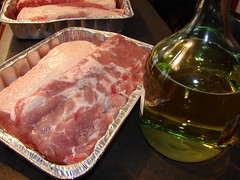
The pork loins have been sitting in salt and brine for two days, and the excess salt has to be removed before they can be aged. Put the loins into shallow aluminum pans and pour a cup or two of cheap white wine over them (the stuff they sell for six or seven bucks a gallon is perfect.) Bathe the loins well in the wine, wiping down the loins with the wine to be sure the salt is removed. After each couple of loins are cleaned, dump the salty wine down the drain and use fresh wine to clean the next pair.

With the casings prepped and the loins washed down, we're ready for the next step.

Sweet capicola is seasoned with coarsely-ground black pepper. Hot capicola is typically made with ground cayenne or hot red pepper. Other than the seasoning, the process is identical, so we'll go through the steps demonstrating sweet capicola.

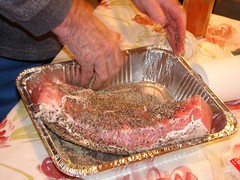
Put the pork loin in a shallow pan and pour in some black pepper. Rub the pepper all over the pork, adding as much as you need to thoroughly and evenly cover the meat. Make sure you coat the cut ends as well.

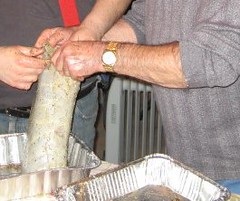
Putting the loins into the casings is easier with a helper. One of you can hold the end of the casing open while the other sort of squeezes the meat into a round shape and fits it into the opening. Carefully pull the casing over the meat (although the casing will stretch, it will tear if you're too rough with it, and the goal is not to have any large holes or rips - the pork should be completely enclosed. When the first loin half goes all the way to the bottom of the casing, use butcher's string or a hog ring to close off the casing just above the end of the meat inside. Then, an inch above that, tie it off again and use a pair of kitchen shears to cut between the ties. The empty part of the casing will now have a closed bottom, and you can put the next pork loin half into it. When that casing is stuffed as well, tie off the top and trim any excess casing (there may be as much as several inches excess.)

Once stuffed into the casing and tied at both ends, the capicola is ready for strapping and aging. It will look something like the one at right when you're done. It's kind of a messy process, and you shouldn't worry if you get some pepper on the outside of the capicola too.

At this point you're almost ready to start aging the capicola. Aging is a slow drying process during which the casing dries and stiffens and shrinks around the outside of the pork. Meanwhile, the pork loses much of its own moisture and transforms magically into dry aged ham. Compression helps the process along and greatly improves the texture of the finished product, which is very reminiscent of prosciutto. Traditionally, the compression is provided by tying the outside of the casing tightly with butcher's string. In Italy Michael Massa, the genteman who taught me how to make these, would put bamboo splints along the sides of the capicolas and tie them tightly with string. But string needs to be continually tightened and retied, and he always looked for an easier and more efficient way of doing it - and eventually he decided on using plastic cable ties, which could simply be pulled tighter every few days during the aging process.

Since I don't have ready access to bamboo, I use wooden splints instead. The loins average about 14 inches long each, so I start by cutting a common 2 x 4 into 14-inch lengths (use a plain 2 x 4, not a pressure-treated one.) Then I rip each 14-inch lengths into ¼-inch thick slats.

Enclose each capicola between four slats, and fasten the slats at each end with the long, wide 24-inch plastic cable ties. Once you have the end ones on, add a couple more between them, spacing them as evenly as possible. Pull them all as tightly as you possibly can to really squeeze the capicola - a pair of pliers is handy for that. You can then cut a few inches off the ends of the cable ties, but leave plenty of end sticking out - remember that as the weeks pass, you'll need to have enough "end" to grab onto with pliers and pull on to tighten the ties as the capicola shrinks. Once the large heavy ties are on and tight, I supplement them with the narrower, standard ties. Since the bulk of the compression is already done by the heavy ties, you can use shorter 14-inch ties between the big ones. When you're done strapping the capicola, it will look something like the picture above, and it is ready to hang to age.

To age the capicola properly, you need a cold, dry place to hang them. A cold attic is ideal. Tie butcher's string in a loop around the capicola from end to end, and leave plenty of loose string on the top. Use that loose string to hang the capicola from a bar or rod in your aging location (I have a closet in the center of my attic that is ideal.) Make sure you spread newspapers or put pans under the capicola when you hang it - under the compression, it will drip a little bit for at first.

And now, the waiting begins.

It takes 2 to 3 months for the capicola to age completely. A good guideline is generally to hang it in mid-January and cut it down on Easter weekend, but that's not always the right amount of time (it might be this year, though, because there's 90 days between now and Easter in 2009.)

We're done for now...periodically over the next three months we'll visit the capicola and tighten the cable ties and check the progress it's making. I'll post photos so you can follow along.

.