

Showing posts with label bread. Show all posts
Showing posts with label bread. Show all posts
27 August, 2014


25 August, 2014
Shortening In Bread
Most of the time when I make my own bread, I don't add any shortening - it's just flour, water, yeast, salt, and maybe some sugar or dairy whey to"feed" the yeast. That's not to say I don't understand why bakers put it in there - adding fats to the dough prevents the gluten from developing fully, so it gives the bread a more cake-like crumb and softer crust. It's very common for soft "sandwich" breads.
Commercial breads and those produced by supermarket bakeries often use shortening in their dough because that soft bread with a tender crust is really popular (just look at how many loaves of squishy white bread fly off supermarket shelves) and that's another reason why I always read the labels before I decide to buy something:

Finding "shortening" on the label doesn't bother me. I don't use it personally, but it's pretty much unavoidable unless you personally make every scrap of food you eat and that is impractical. But I will not buy anything using "partially hydrogenated" fats. Partial hydrogenation produces trans fat, period.
10 October, 2012
Review: Pepperidge Farm Strawberry Banana Swirl Bread
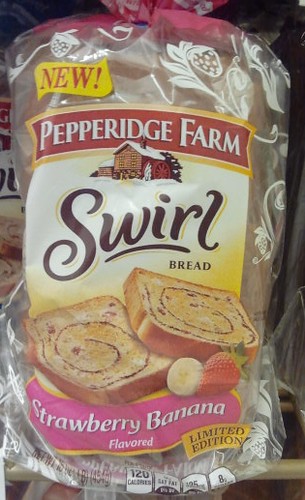
Maryanne starts every work day with a light breakfast of toast and coffee. Her favorites are flavored breads, like raisin or cinnamon swirl. She saw an ad for Pepperidge Farm's new Swirl Bread and immediately requested that I pick up a loaf on my next trip to the supermarket.
It took a little longer than the very next visit, though, because for at least a couple of weeks, it seemed that every time I got to the store they were sold out of Strawberry Banana bread. Finally, after what seemed like countless shopping trips, I found some in the local ShopRite and took it home to her.
The next morning she opened up the package and an awesomely delicious aroma of strawberries and bananas filled the kitchen. She dropped slices of bread into the toaster with great anticipation.
A few minutes later, she was at the table with her freshly buttered toast, hot and golden, and a cup of coffee. She took a bite of toast and looked...confused.
"What's wrong?" I asked.
"This is the Strawberry Banana bread, right?" she said.
"Yeah, why?"
"It doesn't taste like Strawberry Banana. It doesn't taste like anything but plain old cinnamon swirl bread."
I took a bite and she was right. There was so little fruit flavor in the bread that - as she noted - it might as well have been any ol' swirled flavored bread. Pretty disappointing for four bucks.
.
14 June, 2012
Out of the Can: B&M Brown Bread
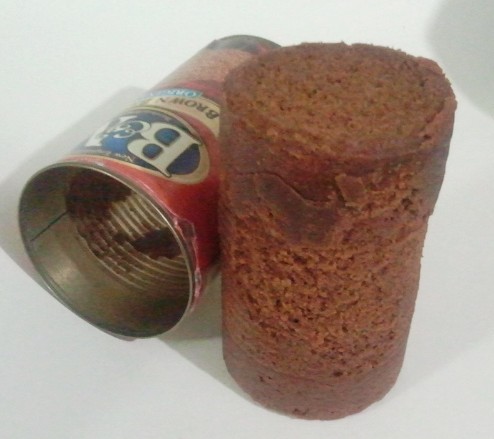
This is Boston Brown Bread. It's made commercially by B&M (the baked bean people) and in New England, you can often find it in the supermarket right alongside the baked beans. Although it looks vaguely turd-like, it's quite delicious, and makes an excellent accompaniment to baked beans. It's made with flour, cornmeal, and molasses and it has a fairly dense texture, more cake-like than bready.
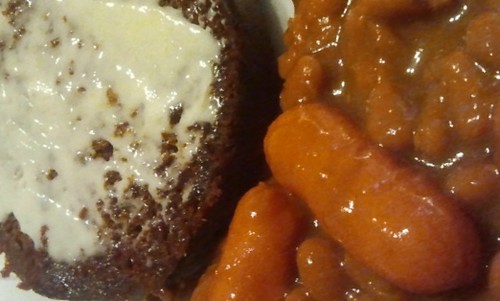
The best way to serve it is heated (either in the microwave or the oven), then sliced, spread with butter, and put on the plate right next to a big scoop of beans & weenies as shown at left. When I was a kid, my mother rarely served baked beans without B&M Brown Bread alongside. And I am happy to report that it is one of the very few food products from my childhood that still tastes exactly the same today as it did forty-some-odd years ago. (Yes. Holy shit. I really am that old.)

I've always taken for granted that B&M Brown Bread is available in the stores, though I know that it's probably one of those New England things that can be hard to find once you get out of the Northeast (kind of like Bell's Poultry Seasoning.) But if you're really interested in trying it, you could make your own with Alton Brown's recipe from Food Network.
01 January, 2012
Pillsbury Simply Rustic French Bread / Salami Bread
If you've ever had any of the various Pillsbury "bread" doughs, you've probably noticed that they all taste pretty much the same. Dinner rolls, crescent rolls, "Italian" bread, Rustic French bread, biscuits, you name it - Pillsbury does some pretty amazing things with textures (varying the flakiness of the rolls and making some of the breads denser than others, for example) but when you get right down to it and taste it, the basic flavor is identical right across the line.
So you can probably imagine that I didn't have very high expectations for Pillsbury Rustic French Bread. I don't care what the advertising says or how attractive the picture on the package is. It's still going to taste like something out of a bursting paper tube. And I was right. Totally unimpressive - you can get the same effect from not separating a bunch of dinner rolls and baking them in one long cylinder. Not "rustic" at all, and certainly not "French."
And therefore, for my second tube of Rustic French Bread, I thought I'd try something different. I make salami, pepperoni, and sausage breads all the time (using genuine yeast bread from a fairly standard yeast bread recipe) and somehow I got it into my head that maybe the rather "meh" Pillsbury Rustic French Bread could be made better by going beyond the usual.
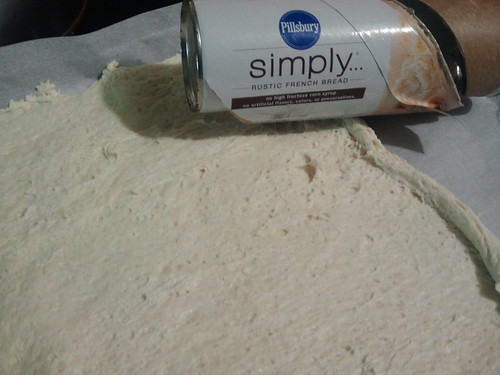
I started out by removing the Pillsbury dough from the tube and spreading it out on a work surface. I found that Simply dough is every bit as sticky as non-Simply Pillsbury stuff, so I spread it out on a sheet of baking parchment.
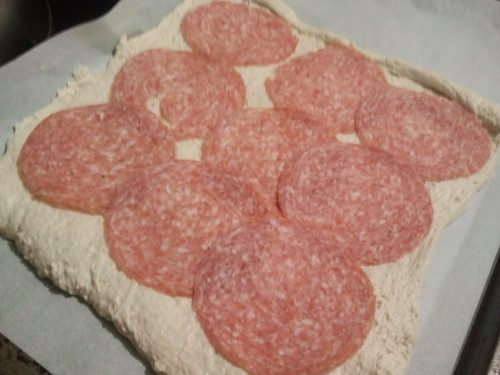
With the dough spread out, I added a single layer of Genoa salami. and then rolled the dough up into a loaf with the salami spiraled in the middle.
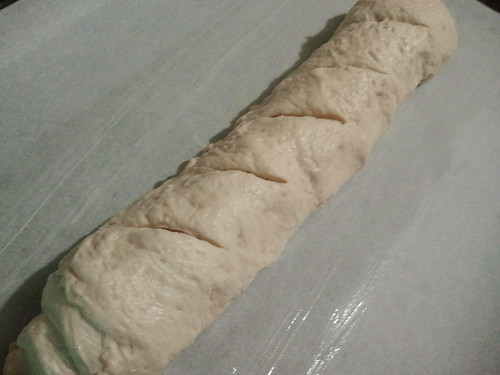
Here's the dough, all rolled up with a few slashes cut into it for venting. I transferred the loaf onto a baking sheet and put it into the oven.
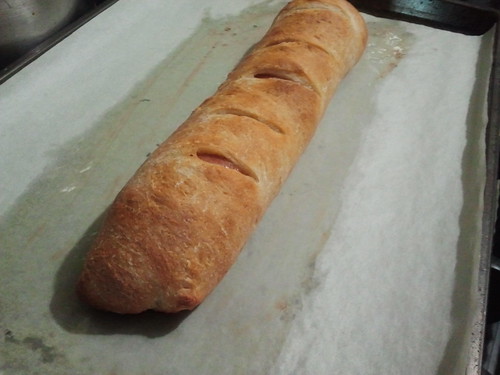
And here's the final product, out of the oven all nicely browned and looking totally nommable.
You know what it tasted like? Cheap and crappy Pillsbury dough with salami inside. It was really lousy.
I dunno. Pillsbury's quick breads certainly have their place - I enjoy the dinner rolls and "biscuits" occasionally. But I guess I'm just less than enthusiastic about using Pillsbury breads for stuff like "rustic French bread" or pizza dough.
25 September, 2011
Marie Callender's Baking Mixes: Honey Butter Corn Bread
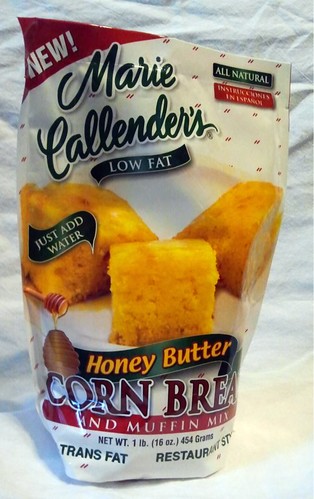
I bought an assortment of Marie Callender's baking mixes a little while ago - back when the weather cooled down and I thought that autumn was finally here and I'd be running the oven more. Here it is a week later, and it's been kind of warm and humid again, much more like summer, and I only had time to make one of the mixes before the weather turned. So I've decided to review the mixes one at a time, as we make them, rather than go on a baking bender and review all of them at once. This review - for Marie Callender's Honey Butter Corn Bread Mix - will be the first of four reviews over the coming weeks.
First, though, let me explain a little about the difference between Northern corn bread and Southern corn bread.
Northern-style (or New England style, if you prefer) corn bread is generally moist, rather dense, and somewhat on the sweet side. Some of my Southern friends have described it as being more like a cake. I never thought of it as particularly sweet - at least, it wasn't all that sweet the way my mother made hers, but it is certainly sweeter than most Southern recipes.
Southern-style cornbread calls for less sugar, has a drier and more delicate texture, and crumbles more easily.
Which variety you prefer seems to depend entirely upon where you grew up and what kind of cornbread your mother made. Serving a pan of each variety to a mixed crowd of Yankees and Southerners can be a real hoot: the Southerners mock the Northern corn bread for being a cakey dessert, while the Northerners choke and grab for glasses of milk to wash down "that dry-ass Southern stuff."
Now, the reason I've gone off on such a long tangent about types of corn bread is because Marie Callender's Corn Bread Mix produces a dense, sweet, and very moist corn bread - Northern style - and I want to forewarn Southern readers that they might want to skip it because it's not going to be anything like you've come to expect. On the other hand, it's wicked easy to whip up - just add water to the mix and stir, then pour the batter into an 8 x 8-inch brownie pan and bake - and it makes quite an excellent corn bread (to my New England palate.)
Speaking of tangents:
As far as I can tell, there are at least three entities out there in Corporate Food Land, operating more or less independently under the Marie Callender's name:
- The original California restaurant chain, Marie Callender's Restaurant and Bakery
- A line of frozen foods produced under license and made since 1993 by ConAgra, who purchased the frozen food company and retained the rights to the name, and
- Marie Callender's Gourmet Products, which make the baking mixes.
Other than the name, I don't think the companies have much in common. It's all very confusing.
09 December, 2010
Victory Toast!
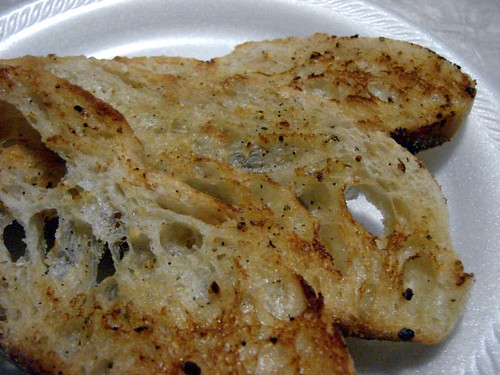
Victory Toast! A triumph of crispy, buttery, savory deliciousness the ingredients for which snatch value from the jaws of wastefulness! VICTORY TOAST!!
Okay, so I admit that's pretty lame, but I couldn't think of anything really catchy this morning, so we're stuck with it.
Anyway, remember back in May, when I reviewed Kraft Spaghetti Classics - that nasty quasi-Italian crap-in-a-box which has remained unchanged for 50 years? I still had a couple of boxes of it laying around the pantry and they needed to be used up. I boiled up the nasty grey non-semolina spaghetti for the dogs - both of them love pasta and sauce - but that still left me with strange Kraft "seasoning" and two pouches of Kraft Parmesan cheese.
So I made the best of it.
Victory Toast
Sliced ciabatta breadButterKraft Spaghetti Classics Seasoning PouchKraft Grated Parmesan Cheese
Lightly butter both sides of each slice of bread. In a skillet over medium heat, grill one side of the bread just until it begins to turn golden brown - don't let it toast completely. Turn the bread so the other side can grill, and sprinkle the lightly brown face-up side with Kraft Spaghetti Classics Seasoning to taste. Then sprinkle it with Kraft Grated Parmesan Cheese. When the skillet side of the bread is nicely browned, flip the toast over again and grill the cheese side briefly, just long enough to toast the cheese. Kraft's pouched Parmesan cheese is so low in moisture you won;t have to worry about it scorching and burning as long as you're reasonably careful. Serve hot and crispy!
Feel free to improve this recipe by substituting your favorite Italian seasoning blend and freshly grated Parmesan or Grana Padano cheese.
04 September, 2008
Tender Delicious Dumplings
 I love dumplings. Tender little pillowy clouds of dough floating on simmering gravy...what's not to like?
There seems to be two kinds of dumplings in American cooking - rolled dumplings, and drop dumplings. My mom always made the drop kind, so I do, too. Some people think that drop dumplings are heavier and denser than rolled dumplings, but if they can be light and fluffy if you don't mix the batter too much and if you give it time to rest before you drop the batter into the gravy. Here's the recipe I've been using for 30 years:
Fluffy Dumplings
1 cup all-purpose flour
1 tablespoon baking powder
1 teaspoon salt
½ cup milk
2 tablespoons light salad oil
Stir dry ingredients together well with a fork or a whisk. Combine milk and oil, and pour all at once into the flour mixture. Stir briskly with a fork until the mixture is evenly moistened, but don't overmix it. The batter should be sticky, slightly wet, and almost as thick as dough.
Set the dumpling mix aside for ten minutes. Then, scoop out spoon-sized lumps and drop them atop simmering stew. Cover the pot and allow to slowly simmer for 15 minutes. Don't lift the lid and peek at all or the dumplings won't rise! (I cover my pot with a glass lid so I won't be tempted to peek. Lifting the lid really does ruin the dumplings.) makes 8 to 10 dumplings, depending on the size of your scoops.
Some tips:
- If the batter is too thick, sprinkle in a little more milk or some water to make it very soft and sticky.
- Letting the dumpling mix sit for ten minutes is the secret to extra-fluffy dumplings. During that ten minutes, the baking powder starts to work and makes the dumpling mix start to rise. When you scoop out the batter to drop into the stew, you'll see all the air holes where the baking powder has been working. In the heat of the stew, the baking powder goes into overdrive and really makes the dumplings rise into fluffy, floury puffs.
- My recipe is based on the one given in the 1967 edition of the Better Homes and Gardens Cookbook (the Chicken and Dumplings recipe is where you'll find it.) The original is horribly bland. This version is still kind of bland, too. If you're not watching your sodium intake, you can add about half a teaspoon of your favorite seasoning salt in addition to the teaspoon of salt included to make them taste better. When I make these for chicken, I like to add half a teaspoon or so of Bell's Seasoning (my favorite brand of poultry seasoning.)
- Don't peek when they're cooking! It's the steam and the simmer from the stew that makes them turn out so wonderful. That's why I use a glass cover on the pot - so I don't even get tempted to look.
06 August, 2008
Local Food: Borealis Breads, Wells ME
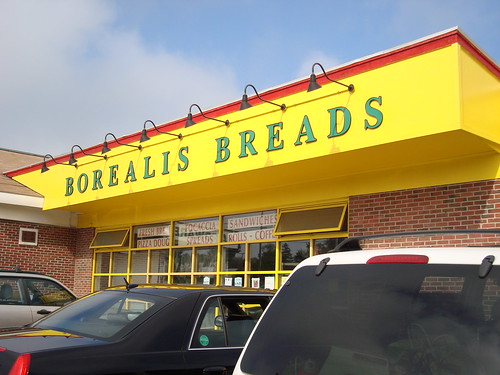 There is an amazing little bakery tucked away next to the Aubuchon Hardware store on US Route 1 in Wells, Maine. They make a wide variety of breads the old-fashioned way - no dough conditioners or preservatives, just "bread ingredients," time, and a stone hearth. Their bread is truly "staff of life" stuff in ways that plastic-wrapped grocery store white bread can never hope to attain. At a time when the term "artisan bread" is losing it's meaning because of the flood of gimmicky, expensive baked garbage in supermarkets, Borealis is baking true artisan breads, and doing it without the obnoxious, condescending attitude bigger players display.
Delicious breads and high standards aside, Borealis deserves special recognition in the Local Food category. They use over 80,000 pounds of whole wheat flour a year, and every bit of it is grown and milled in Maine - At Aurora Mills in Linneus. This is the type of committment to local agriculture that helps prevent sprawl and keeps small New England farms operating.
If you're traveling in Maine this summer - or anytime - hop off the Maine Turnpike in Wells and make a detour to Borealis Breads. It's well worth the extra half-hour or so you might incur on your way to where you're going, and you may find that the bakery is worthy of being a destination in its own right.
Click here to go to Borealis' website.
22 March, 2008
Easter Pizza
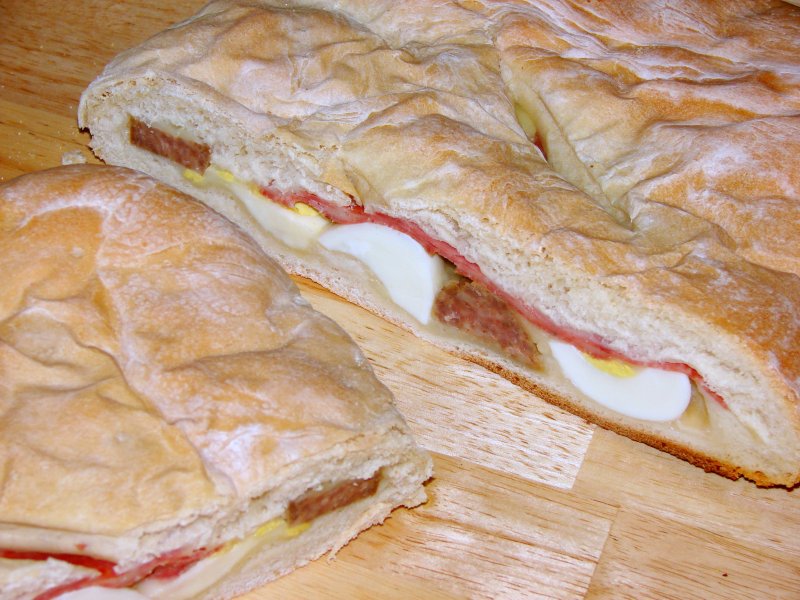 Every Easter when I was a kid, my Italian grandmother would make what the family called "Easter Pizza." She would stuff bread dough with layers of hard-boiled eggs, meats, and cheeses, and bake it in the oven until the bread was done. It was our favorite Easter treat.
What we always called "Easter Pizza" is known by many names and there are many different ways to make it. In Naples and Campania, Easter Pie is made with ricotta cheese, eggs, and whole grains of wheat. It's called pastiera, and the custard-like filling is often flavored with orange-blossom water. Sicilians make a different variety altogether: theirs has pasta, pork, cheese, and eggs. And in Calabria. pizza rustica is often made with ham, sausage, hard-boiled eggs, mozzarella, and ricotta.
Doing a quick Google search will show you that there are dozens of recipes for this traditional Easter favorite out there, and just about every one of them is different - after all, the ingredients not only vary from region to region within Italy, but even from family to family. My own recipe is as close to my grandmother's as I can recall, but she never wrote it down. Because she passed away so many years ago, when I started making it for my own family I had to reconstruct the recipe from memories of what it tasted like.
Easter Pizza
1 recipe bread dough - use your favorite recipe for medium-soft white bread, or you can buy a bag of "pizza dough" from your local supermarket.
1/2 pound sliced sharp Provolone cheese
1/2 pound thinly-sliced sopressata
1/2 pound thinly-sliced Genoa salami
1 pound Italian fennel sausage, cooked and sliced 1/4-inch thick
1 pound basket cheese (or fresh mozzarella)
5 hard-boiled eggs, halved
Punch down the dough after the first rising and divide in half. Line a baking sheet with parchment and sprinkle with cornmeal. Roll the first half of the dough out large enough to cover the baking sheet - the dough should be about a quarter of an inch thick.
Cover the dough with a layer of sliced Provolone cheese, going to within a quarter-inch of the edges. Next, lay down a layer of the fennel sausage. Crumble the basket cheese and sprinkle a little more than half of it on the sausage. Next, add the hard-boiled eggs. Cover this with slices of sopressata and finally with a generous layer of Genoa salami. Sprinkle this with the remaining basket cheese. If there is any Provolone cheese or salami left over, add them on top of all of this.
Roll out the second half of the dough large enough to cover the pizza and place it over the layers of filling; go around the edges of the pizza and seal it by turning the edges under and pressing with your fingers or a fork. Cut a few slashes in the top and allow the bread to rise for about 20 minutes.
Bake in a 350 F oven for about an hour, or until the crust is golden brown. The hardest part of this recipe is waiting for the pizza to cool slightly before cutting into it.
Notes:
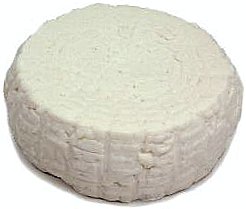 Basket cheese is a soft, fresh cheese that is formed by pressing curds gently in a basket. If you don't have an ethnic Italian population nearby, it can be hard to find. You can substitute soft, fresh mozzarella instead.
Feel free to add slices of prosciutto, capicola, or other Italian hams or sausages to your Easter Pizza. The recipe adapts well to modification.
Need a good, medium-soft white bread recipe to make your Easter Pizza? You can try the one I use:
3 tbsp sugar
1 tbsp yeast
2 1/4 cup warm water
1 tsp salt
2 tbsp shortening
6 1/2 cups flour
Dissolve the sugar and yeast in warm water and set aside to work and get foamy. Combine salt with 2 cups of the flour and cut in the shortening until the mixture is coarse and crumbly. Pour in the proofed yeast mixture and add another two cups of flour, mixing until you get a smooth and very sticky dough. Add another two cups of flour and knead well for 10 to 15 minutes, working in the remaining half cup of flour, until the dough is silky-smooth and elastic. Turn into an oiled bowl, cover with a damp cloth, and allow to rise for about an hour until doubled in bulk. Punch the dough down and divide in two; continue with the Easter Pizza recipe.
Links:
The basket cheese I buy - and many of the other Italian cheeses I use in my cooking - is made by a local company, Calabro Cheese Corporation. Their products are top-notch and all natural. Click here to visit their website and learn more about their extensive line of cheeses and where they are sold.
Temptation: Easter Pizza is What You Make of It, New York Times, 31 March 2004
.
10 March, 2008
Homemade English Muffins
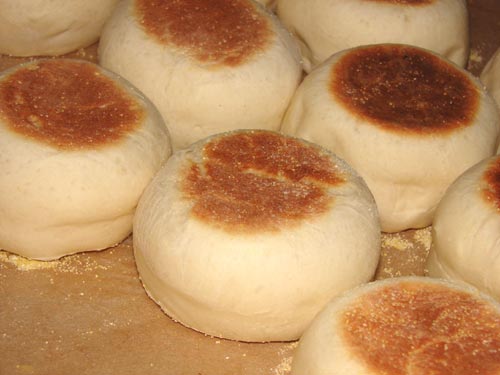 Homemade English muffins are so good, I may never buy another package of them at the grocery store again. And they're easy as well, especially if you have a heavy-duty stand mixer like a KitchenAid to do the kneading for you.
English Muffins
1 cup milk
3 tablespoons butter
1 tablespoon (or one envelope) active dry yeast
2 tablespoons of sugar
1 cup warm water
1 large egg
2 teaspoons salt
5 cups flour (approximately - you might need more)
Cornmeal
In a small bowl, heat the milk and the butter until the butter melts. Set aside and allow to cool.
Combine warm (about 105 F / 40 C) water with sugar. Stir in the yeast and let sit until foamy.
Whisk the egg and salt into the cooled milk mixture, then combine with the yeast mixture in a bowl. Add about half the flour and mix until well-combined and evenly moistened; continue mixing for about five minutes. Add remaining flour and mix well. Dough will be sticky. (This step is where a stand mixer comes in handy.) Turn the dough into a large oiled bowl. Cover with a damp towel and allow to rise for an hour or until doubled.
Line a couple of cookie sheets with waxed paper or baking parchment, and dust the paper with a generous sprinkling of cornmeal.
 Punch down the risen dough and pinch off a piece big enough to roll into a 2-inch ball. Flatten the ball to around half an inch thick, and use a 3-inch biscuit cutter to trim it into a uniform 3-inch round shape. Put the round onto the baking sheet. Repeat this process until all the dough has been formed into 3-inch rounds. Dust the tops of the muffins with cornmeal and cover once again with a damp towel. Allow to rise again until doubled (about half an hour.)
While the muffins are going through this second rising, put a heavy skillet on the fire and bring to moderate heat. An electric griddle is perfect for this - preheat it to about 325 - 350 F (160 - 175 C) and it will be just right. Do not grease the griddle - the cornmeal sticking to the muffin's top and bottom will prevent it fron sticking.
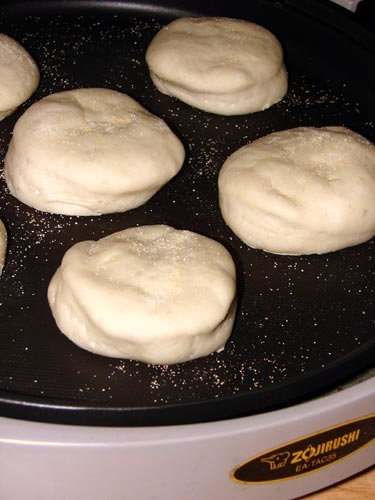 Using a spatula, carefully lift the muffins from the waxed paper to the hot griddle. Be gentle, because the dough is very soft. Grill the muffins for 5 or 6 minutes, or until golden brown. The picture on the right shows the muffins right after they were put on the griddle. In a few minutes, they will be puffed up and ready to turn.
When the bottoms are browned, slip the spatula under each muffin and turn them over to bake the other side. Once again, they will need about five or six minutes (you can pick them up after five minutes or so to see if they are ready to turn.)
When they're done on both sides, put them on the baking sheet or on a rack to cool completely. Enjoy them warm or cooled. I like to split them with a fork, toast them, and eat them warm with butter, Vegemite, or jam.

This picture shows a batch of muffins after the first side is baked, browning on the top side. They're round and puffy. Just left them rest on their top while they bake - don't press on them with the spatula.
 Your homemade muffins should be light and airy, yet with a slightly dense and chewy interior. They won't have the huge air holes like commercial English muffins do, but they will have plenty of bubbled texture to hold melted butter.
03 March, 2008
Naan
Here is a totally non-authentic recipe for naan. It may not be genuine, but it is incredibly delicious, and I cook them in a cast-iron frying pan rather than a tandoor.
Naan
1 packet of active dry yeast
1 cup warm water
1/4 cup sugar
3 tbsp milk
1 egg, beaten
2 tsp salt
4 1/2 cups flour (approximately)
1/4 cup butter, melted
Dissolve yeast and a teaspoon of the sugar in warm water in a bowl and allow to stand for 10 minutes until frothy. Stir in the remaining sugar, milk, egg, salt, and enough of the flour to make a soft dough (you might not use all 4 1/2 cups.) On a lightly floured surface, knead until smooth (5 or 6 minutes.)
Place dough in a well-oiled bowl and cover with a damp cloth. Allow to rise about an hour, or until doubled.
Punch dough down and pinch off small egg-sized chunks of dough (you'll turn out about sixteen pieces, give or take a few.) Roll each chunk into a ball and place on a tray. Again, cover the dough with a damp towel and allow to rise until doubled (about 30 minutes.)
Place dough in a well-oiled bowl and cover with a damp cloth. Allow to rise about an hour, or until doubled.
Punch dough down and pinch off small egg-sized chunks of dough (you'll turn out about sixteen pieces, give or take a few.) Roll each chunk into a ball and place on a tray. Again, cover the dough with a damp towel and allow to rise until doubled (about 30 minutes.)
 Heat a heavy skillet or cast-iron pan over medium heat. Melt the butter and have it standing by.
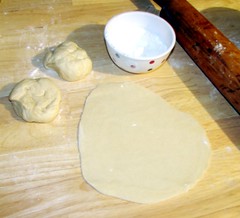
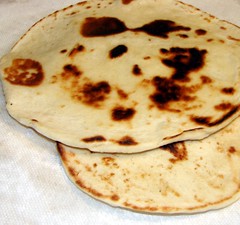
On a lightly floured surface, roll each ball of dough out into a thin circle. Place the flat circle of dough into the dry pan and pan-bake it for 2 or three minutes. As the bubbles form in the dough, brush the uncooked surface lightly with butter and then turn to cook the other side. Brush the cooked side with a little bit of butter as the other side finishes baking (another two or three minutes.) Use each naan's cooking time to roll out and prepare the next one. Repeat this process until all the naan are cooked. You may have to wipe the pan out now and again with a kitchen towel or apaper towel to prevent burning and to remove burnt flour dust.
 If you're making these to accompany a specific meal, remember that the whole process is going to take a little over two hours from start to service. To make it a little easier, I recommend kneading the dough with a dough hook in a heavy-duty stand mixer and melting the butter in the microwave.
20 January, 2008
How To Make Scallion Pancakes
Scallion pancakes are a delicious appetizer and dim sum treat found in many Chinese restaurants. A kind of fried bread, they are crispy and flaky on the outside, tender and a bit chewy on the inside, with shreds of finely diced scallions between the savory layers of pancake. And surprisingly enough, they aren't that hard to make.
You'll need:
3 1/2 cups of flour
1 heaping teaspoon of salt
2 tablespoons of vegetable oil
1 1/4 cups of boiling water
Sesame oil
1 bunch of scallions (3 to 5 scallions)
Oil for frying
This is easiest with a stand mixer. If you don't have one, you can do the initial mixing and kneading by hand.
 Put flour into the bowl of your mixer and add salt. Using the dough hook, turn the mixer on low speed and allow the salt to stir into the flour. Then drizzle in 2 tablespoons of vegetable oil. Allow the mixer to incorporate the oil into the flour while you bring 1 1/4 cups of water to a boil.
 Turn the mixer to medium speed and add the boiling water slowly. As the water is combined with the flour, turn the mixer speed up and let the dough hook do the work. You may have to scrape down the sides of the mixing bowl a couple of times to get the water worked into the flour evenly.
 When the dough holds together well, turn it out from the bowl and knead it a few times by hand on a lightly floured surface until you have a smooth, elastic dough. It will be very firm, appear silky, and not be sticky at all. Lightly oil a bowl with a little bit of sesame oil. Put the dough into the bowl and turn it a few times to coat the dough's surface and keep it from drying out. Cover with a damp towel and allow it to rest for at least twenty minutes. If you're going to do this step ahead, it's okay to let the dough rest longer - up to a couple of hours if you need to. Letting the dough rest allows the gluten in the flour to relax after the kneading, and there's no hurry.
 While the dough is resting, trim the roots and nasty bits off a bunch of scallions and then chop them very finely into rings as thinly as you can manage. You'll need anywhere from three to five scallions, depending on how big they are. When they're all chopped, set them aside in a bowl.
 After the dough has rested, roll it into a rough cylinder and divide that into eight equal segments. On a lightly floured surface, flatten each cylinder slightly with the palm of your hand and then roll it out to about an eighth of an inch thick. Sprinkle the pancake with flour lightly if you need to prevent sticking.
 Rub a light coating of sesame oil all over the top surface of the pancake using your fingers. You don't need much; just a light glaze - enough to make the pancake shiny with oil. Then sprinkle it lightly all over with the finely chopped scallions. Don't use too many - just a tablespoon or so will do. If you put too many on, the pancakes won't cook well and the scallions will break through the flour and make a mess.
 Carefully roll the pancake into a tight rope like a miniature jelly roll, making a scallion-filled dough stick. Then take that stick and form it into a coil, keeping the seams on the inside. Pinch the trailing end closed and tuck it under the coil to keep the scallions on the inside.
 Gently press the top of the coil with the palm of your hand to flatten it a bit. It will look something like the picture on the left.
 Dust the coil with a bit of flour on both sides to prevent sticking, and roll it out into a thin pancake. Try to get the thickness between 1/8 and 1/4 of an inch. You'll see the scallion bits through the thin layers of pancake, and some of the scallions on the edge might break through a bit. Don't worry about them, that's OK. You should end up with about a 7- or 8-inch pancake when you're all done. After each pancake is rolled out, rub the top and bottom surfaces with a bit of sesame oil and stack them up between sheets of waxed paper. You can store the stack in a plastic bag in the refrigerator until you're ready to cook them, and they can be made up to three days ahead of when you need them. If you wrap each pancake individually in waxed paper, you can even freeze them for later use.
 To cook: Put less than half an inch of cooking oil in a skillet and heat it to about 350 F. Using tongs, carefully place a pancake into the oil and fry it until it is browned. As it fries, you may notice the center of the pancake lifting above the oil on the steam it generates. Use your tongs to slightly lift the edges and let the steam escape so the center browns, too. Turn the pancake over and brown the other side, too. As the pancakes cook, you'll see the trapped air bubbles in the pancakes expand and brown. The pancakes will be flaky, crisp, and all in layers. Drain on absorbent paper and serve hot, with a dipping sauce if you like. I make a simple dipping sauce of 1/4 cup soy sauce, a teaspoon of oyster sauce, 2 tablespoons of rice vinegar, a teaspoon of honey, some of the chopped scallions left over from making the pancakes, and some crushed red pepper.
Subscribe to:
Posts (Atom)