It's possible, however, to make your own.
I have years of experience in canning, meat processing, and charcuterie. I make my own bacon, sausages, corned beef, patés, and more. But I had never put up any pickled meats, so I started by searching for some kind of recipe or written technique that I could study and use - or at least use as a starting point for my own recipe. I pored through my collection of vintage cookbooks and books on charcuterie and meat preservation, to no avail. And when I turned to the internet, the search was almost as frustrating - most Google hits for "pickled tongue" lead to message board postings by people trying to find the commercially prepared product.
Finally, a search on the Chowhound message board found
this thread, in which Chowhound user
Porker shares his recipe for pickled pork tongue. Lamb's tongue is smaller, more tender, and cooks more quickly than pork tongue, so I made a few tweaks to the recipe - including scaling it to handle the
ten-pound wholesaale box of lamb's tongues my neighborhood butcher obtained for me. But without Porker's help and the groundwork he did in developing
his recipe,
this recipe wouldn't have been such a success.

So, follow along with this step-by-step photo tutorial.
Step One: Curing
Because the tongues are going to be canned for storage, they need to be cured to help prevent botulism (the combination of curing, the acidic vinegar pickle, and refrigeration keeps the pickled tongue safe to eat.) Normally, curing with Instacure #1 (formerly known as Prague Powder #1 or "pink salt") requires about 1 ounce for every 30 pounds of meat, but because we'll be using a simple overnight liquid brine, we need a stronger concentration.
Make as much brine as needed to completely cover the tongues using this baseline:
12 cups of water
1 cup of pickling or kosher salt
6 tablespoons Instacure #1
For the ten-pound batch of tongues I prepared, I needed 3 batches of this brine (2½ gallons.)
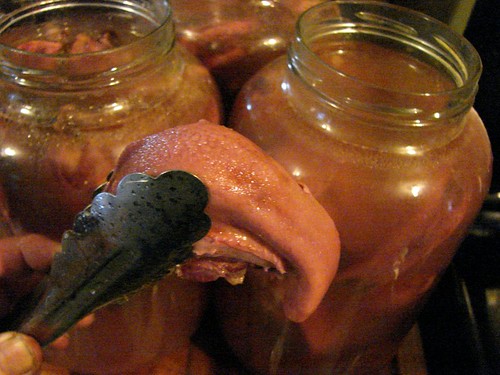
Mix the ingredients for the brine in a stainless steel (non-reactive) pot. Wash the tongues under cool running water. Place them in the pot, bring just to a boil on high heat, then remove from heat, allow to cool to room temperature, and store overnight
in the liquid.
Because I was processing ten pounds of meat I had to do this step in a 21-quart stockpot which would not fit in my fridge. So, when the tongues had cooled down enough to handle, I divided them between three one-gallon glass jars and filled the jars to the top with the still-warm curing brine. Then, off they went into the fridge for their overnight soak.
Step Two: Cooking
The next day, drain off the curing brine and discard it, and rinse the tongues.
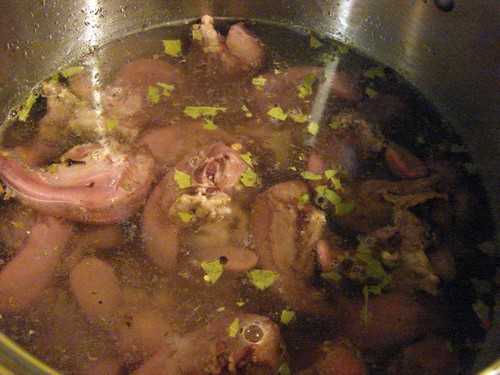
Make up a batch of cooking brine using this baseline:
3 cups of water
1 cup of vinegar
1 tablespoon of salt
1 tablespoon of pickling spice
As before, make up as many batches as you will need to cover the tongues in the pot. Bring up to a boil, then turn down the heat and simmer the tongues gently for two hours, until they are fork-tender. Drain the cooked tongues and shock them under cold running water. You'll notice that the tongues are covered in a loose yet tough membrane "shell" - this is the skin of the tongue and it has to be removed. Peel off the skins, and use a sharp knife to remove any roots, veins, and fatty tissues under the tongue.

The skinning process is very easy and although a little tedious will go quickly. When the skin cooks, it becomes hard and plastic-like, and most of the time will peel easily from the tongue. Once it's off, you can use the knife blade to scrape away any fatty bits under the tongue and especially under the thickest part, where you'll find fatty clumps and veins that you'll want to take out if only for appearances' sake.
With the tongues cooked tender, skinned, and ready for the final processing, you're ready to can them.
Step Three: Canning
NOTE: The USDA recommends that meats be canned using a pressure-canning process. I believe that the hot water bath process used here is safe because of the nitrite in the Instacure #1 and the acidity of both the cooking and the canning brines. However, I DO NOT KEEP THESE CANNED TONGUES ON THE SHELF AT ROOM TEMPERATURE, I KEEP THEM IN THE REFRIGERATOR AND I RECOMMEND THAT YOU DO THE SAME. I assume no responsibility for your actions in your kitchen; this is simply a chronicle of my own actions in my kitchen.
Wash your canning jars and prepare the canning brine: You won't need as much of the canning brine as you do cooking brine - only about eight cups or so. For this canning brine, you'll need:
4 cups of water
4 cups of vinegar
2 tbsp salt
2 tbsp of pickling spices if desired (I skipped this because I just wanted a nice clear brine.)
Pack the tongues in your canning jars, leaving at least 1½ inches headspace (two inches is even better - the tongues swell during processing and if you don't leave lots of headspace the brine won't completely cover the meat.) Add brine to cover the tongues completely and within ½-inch of the top of the jar. Cap the jars and process them in a boiling water bath for 15 to 20 minutes. Cool to room temperature and refrigerate 3 to 4 days before eating.
The ten pounds of tongues I process yielded eight 1½-pint widemouth jars of pickled snacks.

Special thanks for the info and encouragement from Porker at Chowhound, and to Anthony Caronna, my neighborhood butcher at Caronna's Market in Thompsonville CT, who was happy to get the lamb's tongues for me on special order. Caronna's, located on Pearl Street right next door to the yellow-brick art deco Thompsonville Fire Department, has been in operation since 1918.
PLEASE NOTE: I know that many of you reading this blog post have been brought here by Google and Bing as you search for the commercially-produced lamb's tongues you or your family members once purchased at grocery stores. Unfortunately, when the Rogers Company went out of business, pickled lamb's tongues became unavailable - they were the only company in the United States making them, and no one else has stepped forward to continue the tradition.
Because I enjoy pickled tongues and wanted to enjoy them again, I developed and published this recipe to help those who are interested in the product make their own, in their own home kitchen, the way I did. I am not a commercial supplier, just a hobbyist who likes to fiddle around in the kitchen.
If you decide to try making your own pickled tongues and have questions or want more information, please feel free to send me an email and I will do what I can for you to help make your job easier. Canning anything is a little intimidating - canning and preserving meat products can seem overwhelming to someone who's never done it before.
Please do not write asking to buy pickled lamb's tongues from me. I don't sell them and I won't send you any. I wrote this post to help you make your own, and the only way you're going to get any pickled lamb's tongue is if you get off your ass and get to work.
.
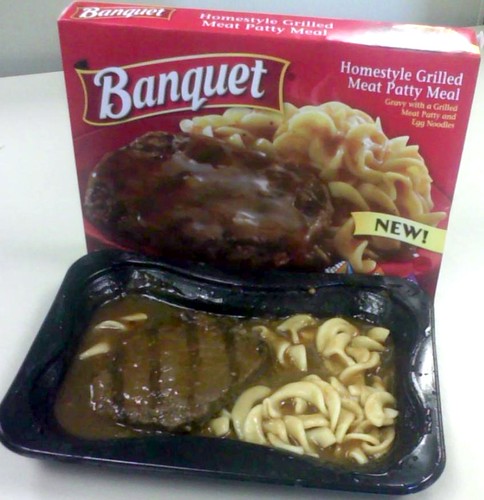
 Although a little strange to look at, the Banquet Boneless Pork Rib Meal is pretty inoffensive as Banquet meals go. In fact, if you've ever had a McDonald's McRib sandwhich, I'd say you already know exactly what to expect from that vaguely rib-shaped chunk of chopped, compressed, and formed pigmeat in the little black tray.
