 |
Shagbark Hickories are easily distinguishable
by their sheddy-looking bark. |
A couple of years ago, I started hearing about shagbark hickory syrup. Unlike maple syrup, which is made by boiling down the collected sap of the sugar maple tree, hickory syrup is made by extracting flavor compounds from the bark of the shagbark hickory tree and simmering it with sugar to create a syrup. I had an old recipe for it, sort of, written down from my great-grandmother from her childhood memories. It was one of those "family lore" things that I had folded aside in an old photo album and pretty much forgot about until the commercial syrup caught my eye.
There are two commercial producers of shagbark syrup that I know of. One is Hickoryworks in Indiana, and the other is Turkeywoods Farm in Mystic CT. Both of them talk about secret extractive and aging processes and make it sound like you need a degree in food science with a side in alchemy to make tree-flavored simple syrup. I guess if I were selling syrup for $30 a quart, I'd want to make it seem as difficult as possible too, just to keep people from trying to make their own. In truth, a little trial-and-error experimentation is all I really needed to develop an easy recipe for shagbark hickory syrup, which I'm going to share with you right here.
Special thanks go out to Gary Blake in Ohio. When I was having trouble finding a local source of bark, he sent me out a care package. We compared our old family recipes and swapped notes as we made sample batches of syrup - he in Ohio and I in Connecticut - until we got something we thought was acceptable.
Step 1: Start by collecting some strips of shagbark hickory bark. The shagbark hickory is easy to identify because of the "hairy" or shaggy appearance of the trunk. The bark is continually coming loose in long strips as the tree grows. Taking very loose pieces of bark from the trunk will not harm the tree, though you should be careful not to remove bark that is still tightly attached because doing so will leave the tree vulnerable to insect damage. If possible, gather newly fallen bark from the ground.
Step 2: Take about half a pound of bark strips and scrub them well under cool running water with a stiff brush. Don't use any soap or detergent, just the brush to remove dirt, sand, lichens, insects, and so on. When well-scrubbed, the outside surface of the bark is a light grey tending toward greenish, and the inside surface is reddish-brown.
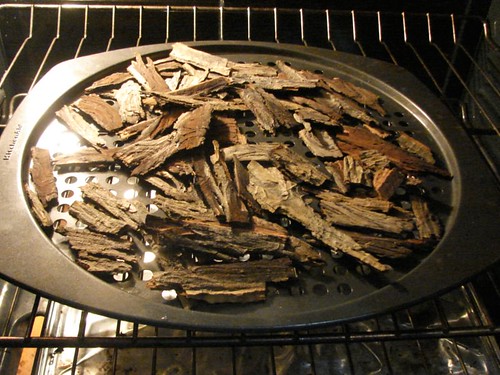
Step 3: Preheat the oven to 350 F. Break the scrubbed bark into manageable pieces, say 8 inches long or so, put them on a baking sheet, and slide them into the oven to toast. (I like to use a perforated baking pan that lets moisture out the bottom, but you can use a cookie sheet or roasting pan.) You should shake any excess water off the bark before putting it in the oven, but it doesn't have to be thoroughly dried. It takes about 10 or 15 minutes to toast the bark. After a few minutes, you'll start to smell the delicious odor of hickory seasoning - a little smoky, a little "spicy." Keep an eye on it and you'll notice that the bark will start taking on a gentle golden-brown tone. Watch it carefully and don't let the bark burn - charred bits will give the syrup an unpleasant burnt and ashy flavor.
Step 4: When the bark is toasted, take it out of the oven and allow them to cool enough to handle.
In the original recipes that Gary and I were working from, we were told to cover the bark with water and simmer for 20 to 25 minutes until we had a dark amber "tea" made from the bark. (Simmering rather than boiling is important because rough treatment like boiling extracts lots of bitter tannins from the bark as well as the flavor components that you're actually looking for.) We thought that the "aging" process spoken of by the commercial processors was a method of mellowing out the bitterness inherent in making the hickory extract. We also found that reducing the volume of liquid by 25% by continuing to simmer after removing the bark resulted in a richer, more pronounced flavor in the final product.
To continue using the method Gary and I hammered out, go to Step 5a.
To continue using an alternative method using a percolator, skip 5a and go to Step 5b.
Step 5a: Place the toasted bark pieces in a saucepan and cover with water. Bring the water to a boil and immediately turn it down to a simmer. Simmer the bark gently for about 25 minutes until the water is deep amber in color. Remove the bark from the liquid and discard (or save it for tossing on the barbecue coals.) Continue simmering the water until the volume is reduced by about 25%. Continue to Step 6.
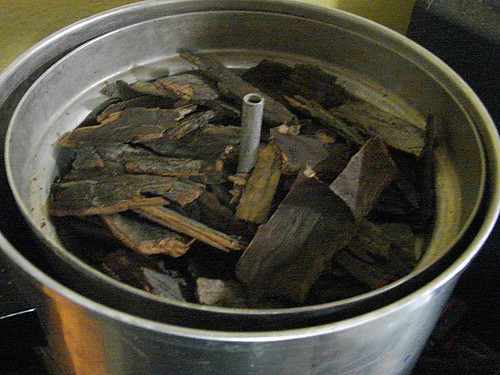
Step 5b: Break the toasted bark pieces into bits small enough to fit in the basket of a large percolator. (I use a big 36-cup coffee urn that I bought at a church rummage sale for five dollars.) Fill the percolator with water and run the coffee maker through a full perc cycle. Allow the percolated liquid to cool to room temperature, then plug the percolator in again and run through another full percolator cycle. Again, allow the percolator to cool completely. Do this at least twice more for a total of four full percolator cycles. This will not only give you a thorough extraction of the flavor compounds in the bark, but during the multiple perking cycles just about the right amount of water evaporates off. After the multiple percolations, remove the bark from the percolator basket and discard (or save it for tossing on the barbecue coals.) Continue to Step 6.
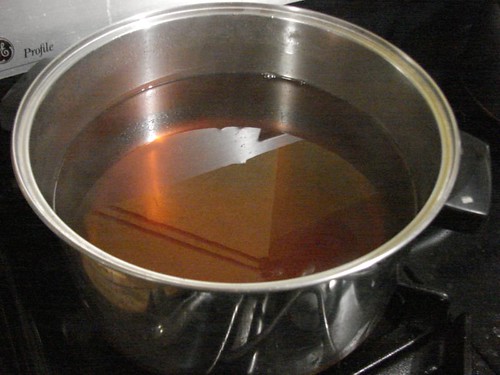
Step 6: Measure the extract water into a stockpot or saucepan large enough to accomodate it. Heat the water over a medium fire to bring it up to a simmer. Stir cane sugar into the water in a 2-parts-sugar to 1-part-water ratio, the same as for simple syrup. Simmer until the syrup thickens to the right consistency. Allow the syrup to cool until you can handle it comfortably.
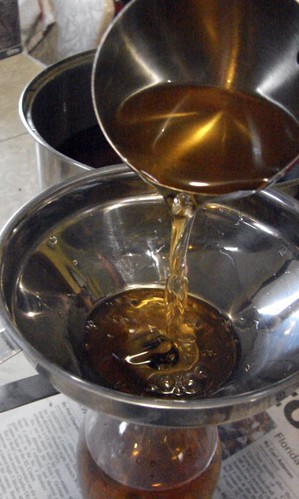
Step 7: When the syrup has cooled, ladle it off into bottles for storage. This year at Christmas I made a big batch and poured the syrup off into plastic Poland Springs Aquapod bottles, which have a very cool shape (I used the water inside the bottles to make the syrup itself. Tap water works just as well. I just wanted to use the bottles so I could give the bottled syrup as gifts.)
That is pretty much all there is to making shagbark syrup at home. It's delicious, and it's not all that complicated or secret to make. You can use your hickory syrup in any way that you would use maple syrup - on pancakes and waffles and so on, or even as a sweetener when you make a pot of baked beans.
Just remember that that this is one of those "recipes" that will require a little tweaking, experimentation, and intuition on your part. Be willing to play around with the basic information I've presented so you can bring out the best results for yourself and you'll be rewarded with an awesome taste experience.
UPDATE 9/18/14 - IS YOUR SYRUP CRYSTALLIZING?
I've gotten a lot of contact from readers about this recipe, and most of them are about crystallization - the syrup starts forming sugar crystals a day or a week after it's been made. I didn't cover the topic when I originally wrote this post, because I never had a problem with it when making syrup. Thing is, I probably have more experience making syrups and candies and such than others, so here is a quick guide of why syrup crystallizes and what you can do to prevent it.
- Keep an eye on the sides of your pan when you first blend the sugar and water together. Undissolved sugar crystals will "breed" other crystals. If you've got sugar crystals sticking to the sides of the pan, wet a pastry brush and stroke out the clingy sugar with some water, or use a ladle to pick up simmering syrup and "wash down" the inside walls of the pan to dissolve the sugar.
You can also keep your pot covered when you're simmering the pan. The steam trapped in the pot tends to dissolved clinging sugar crystals, too. (I never found this method to be as reliable.)
- You have to stir the sugar into the water to make it dissolve. But once the sugar is completely dissolved, try not to stir any more. Stirring promotes crystallization. If you need to mix ingredients over the heat, gently swirl the pan instead.|
- Acid helps block crystallization. Use a bit of cream of tartar or some citric acid in the mix to raise the acid level. (Cream of tartar can be found in the spice aisle of the supermarket. Citric acid is used in cheese making to quickly curdle milk, and in canning to keep fruit from turning color. You can get it in the bulk-products section of many markets, or look for "sour salt" in the spice aisle, or use Ball's Fruit-Fresh, found in the aisle with the canning supplies.) You can also use some lemon or lime if you like, but remember that using fruit as an acid source can change the flavor of your syrup.
- Use some corn syrup in the mix. The sugars in corn syrup discourage crystallization. Corn syrup isn't the same thing as high-fructose corn syrup - if you hate high-fructose corn syrup (like I do) read the label on the bottle before you buy it. Some corn syrups contain HFCS as an ingredient, others don't. Using corn syrup will also change the flavor of your syrup - corn syrup tastes different than sugar.
- Warm your utensils before using them in the cooking syrup. If you're using a candy thermometer, or getting ready to ladle syrup into bottles, warm your tools under hot running water first. Plunging a cold item into the syrup can "shock" it into crystallization.
What about if your syrup has already crystallized? Just pour it back into the pan, heat it up again and dissolve the crystals that are there, and add some acid to it before putting it back into containers.
One last note: ANY syrup will form big "rock candy"-like crystals if you leave it long enough. Sometimes I get these in the bottom of a jug of maple syrup. They're normal, but they take a long time. If your syrup is crystallizing rather quickly, try the steps above.
 The recipe as found is a simple list of ingredients:

