29 January, 2011

Handwritten Recipes: Pie Crust

Today's selection from the Handwritten Recipes blog is Pie Crust.  The recipe was found in a copy of An Old Sweetheart of Mine by James Whitcomb Riley (Bowen-Merrill, 1902), and it's a variation of the Never Fail Pie Crust recipe that I shared back in February 2010.  There are some differences in proportions and quantity, but the inclusion of vinegar and egg reveal their close relationship.

The recipe as found is a simple list of ingredients:
Pie Crust

3 C. flour
1 C. lard
Salt
5 tbl water
1 tbl vinegar
1 egg

It's possible that at least some people reading this may not have had experience making a pie crust from scratch.  So let's standardize the recipe by reformatting the ingredient list and adding some instructions:

Pie Crust
Makes pastry for 1 deep-dish pie

3 cups flour
1 rounded teaspoon salt
1 cup lard (½ of a 1-pound box)
5 tablespoons water
1 tablespoon vinegar
1 egg

In a large bowl, stir the flour and salt together.  Add the lard to the bowl.  Using a pastry blender or a stand mixer fitted with the whisk attachment, cut the lard into the flour until the mixtures resembles coarsely grated bread crumbs.

Beat the water, vinegar, and egg together in a small bowl until well-mixed.  Pour this into the flour mixture all at once and stir roughly with a fork until the pastry comes together into a ball of dough.  (In a stand mixer, switch from the whisk to the dough hook and pour the liquid in while the mixer is running.) The dough will be somewhat sticky.

Flour your hands and a breadboard or tabletop well, and remove the pastry from the bowl.  Knead it lightly two or three times - just long enough for the extra flour to take away most of the stickiness.  Form the dough into a ball, wrap it in plastic or toss it into a plastic food storage bag, and put it into the fridge for at least 15 minutes.

When ready to make a pie, divide the dough ball into 2 halves.  Roll each half out on a floured surface, using additional flour as needed to prevent the dough from sticking to the surface or to the rolling pin.

To try out the recipe, I made a simple, 9-inch apple pie.  The pastry held together nicely, but I found it to be a bit more susceptible to cracking than my usual Never Fail recipe.  Nevertheless, it handled and rolled out pretty easily.  It was totally delicious - perfectly flaky, as you can see from the photo here, and just melt-in-your mouth tender.  And pretty easy to make as pie crusts go.  Definitely easy enough for a beginner, so if you're in the habit of buying those refrigerated pie crust circles at the supermarket, you might want to try this recipe just for kicks.

The recipe, as I noted, would be enough for a 10-inch deep dish pie.  I had enough pastry left over from the trimmings to make two little apple pies for the kids.  Gathering up the trimmings, giving them a bit of a knead to make sure they held together, and then rolling them out did not make the pastry tough - those "second rollings" were just as awesome as the Master Pie.

Another keeper!

See the original recipe at Handwritten Recipes here.

28 January, 2011

Out of the Can: Campbell's Sun-Ripened Yellow Tomato Soup


Trust me - add some milk and stir it over the heat, and it'll taste a lot better than it looks here.

Fruit 2 O Essentials

Fruit 2O Essentials is a bottled soft drink that just pisses me off on so many levels.

Just the name, for example.  "Fruit 2 O."  It's annoying to have to use fancy HTML tags to make a subscript "2" all the time.  Every time I have to type "Fruit 2 O" it's like another little droplet of H2O plinking upon my forehead in some bizarre sort of water torture.

Then there's the flavors.  There's some weird stuff going on there.  The flavor is listed on the label in bright white letters - like "Cranberry Raspberry" for example - and then, under that in tiny little letters just a shade lighter than the background ribbon, it says, "Natural Flavor With Other Natural Flavor."  What the hell is that all about?  "Yo, dawg, we heard you like fruitiness so we put flavor in your flavor so you can taste while you taste."

Something else about the labels piss me off, too.  They have big luscious pictures of fruit on the labels, and under it - again in big white lettering "2 servings of fruit."  Only when you turn the bottle and look closer might you notice that the banner actually says, "5 nutrients equal to 2 servings of fruit."  Holy shit, the scientists at Fruit 2 O have determined the ESSENTIAL NUTRIENTS in fruit so they can declare their sucralose-water equivalent to eating the real thing.   And then they narrowed the list down to 5. That's some badass hardcore science there.  It should be in capital letters: SCIENCE.  Well, maybe not real science.  Fruit 2 O is, after all, made by the Sunny D guys - the same company that pays supermarkets to display Sunny D in the refrigerated orange juice section of the store so people will think it's good for you - so my guess is that the "science" involved mostly thinking about how to get people to part with a couple of bucks for a few ounces of sweetened, colorfully dressed water.

And last of all, there's something about the chemical stew they stir into the brew that just dries the back of my throat out whenever I drink it.  Never fails to make me want to cough and clear my throat, whether I'm drinking a couple of swallows or chugging  a whole bottle.

I'm kinda sorry I wasted money on this stuff.  Fail from top to bottom.

26 January, 2011

Retro Doritos!


Check it out - taco flavor Doritos are back.  And so is the vintage '70's graphic design.  This is, of course, quite awesome because taco Doritos were my favorite flavor back when I was a young punk in the late '70s.  

Hmm.  Snack food nostalgia. It's an odd feeling.

Handwritten Recipes: Blonde Brownies

A short time ago, I happened upon a truly awesome blog called Forgotten Bookmarks.  Run by independent bookseller Popeks Used And Rare Books, Forgotten Bookmarks is a sort of art project documenting bits of ephemera found between the pages of the used and rare books that come into the store looking for new owners. 

Among the many items found have been quite a few handwritten recipes - some on cards, some on slips of paper, some carefully written out, some in barely-legible spidery handwriting.  Enough of them turned up that shop owner Michael Popek started a side project, Handwritten Recipes, to document and share these forgotten treasures as well.

Mr. Popek thought it would be interesting to have someone actually prepare and photograph the recipes he features on Handwritten Recipes, and I agree.  It's a project that fits nicely with my interest in "heirloom recipes" and culinary ephemera.  Beginning today, I'm going to start working my way through the collected pieces there, preparing the recipes, photographing the results and perhaps the processes, and posting them here with links to the original discovery at Handwritten Recipes.  I hope that you enjoy this collaborative project as much as I will.

Our inaugural recipe was found in a copy of Motherless Brooklyn by Jonathan Lethem (Published by Vintage, 1999.)
 
Blonde Brownies
2 c. flour
1/4 teas. baking soda
1 teas baking powder
1 teas salt
2 c. packed brown sugar
2/3 c.. shortening, melted
2 eggs
2 teas vanilla
2 c. choc. chips
1/3 c. chopped nuts

Mix flour, soda, baking powder and salt
Add sugar to shortening - eggs - vanilla
Add flour mixture to sugar mixture
Spread in 13 x 9 pan. Sprinkle with chips and nuts
Bake 350° for 30 mins
Cool in pan; cut in bars
What a great choice for a first recipe.  I was a little skeptical at first as I spread the batter into the 13 x 9 pan - there didn't seem to be enough to make a good layer on the bottom of the pan - but they came out great.  The consistency was perfectly brownie-like, chewy and rich, and everyone loved them.  This is definitely a keeper.


22 January, 2011

Making Shagbark Hickory Syrup

Shagbark Hickories are easily distinguishable
by their sheddy-looking bark.
A couple of years ago, I started hearing about shagbark hickory syrup.  Unlike maple syrup, which is made by boiling down the collected sap of the sugar maple tree, hickory syrup is made by extracting flavor compounds from the bark of the shagbark hickory tree and simmering it with sugar to create a syrup.  I had an old recipe for it, sort of, written down from my great-grandmother from her childhood memories.  It was one of those "family lore" things that I had folded aside in an old photo album and pretty much forgot about until the commercial syrup caught my eye.

There are two commercial producers of shagbark syrup that I know of.  One is Hickoryworks in Indiana, and the other is Turkeywoods Farm in Mystic CT.  Both of them talk about secret extractive and aging processes and make it sound like you need a degree in food science with a side in alchemy to make tree-flavored simple syrup.  I guess if I were selling syrup for $30 a quart, I'd want to make it seem as difficult as possible too, just to keep people from trying to make their own. In truth, a little trial-and-error experimentation is all I really needed to develop an easy recipe for shagbark hickory syrup, which I'm going to share with you right here.

Special thanks go out to Gary Blake in Ohio.  When I was having trouble finding a local source of bark, he sent me out a care package.  We compared our old family recipes and swapped notes as we made sample batches of syrup - he in Ohio and I in Connecticut - until we got something we thought was acceptable. 

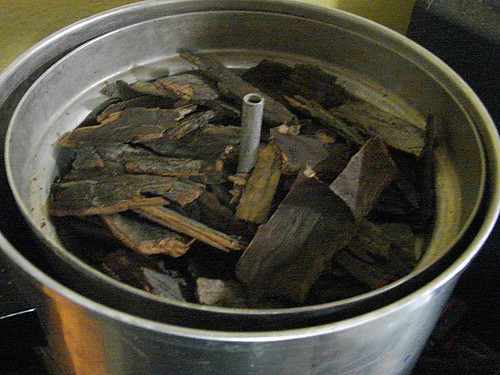
Step 1: Start by collecting some strips of shagbark hickory bark.  The shagbark hickory is easy to identify because of the "hairy" or shaggy appearance of the trunk.  The bark is continually coming loose in long strips as the tree grows.  Taking very loose pieces of bark from the trunk will not harm the tree, though you should be careful not to remove bark that is still tightly attached because doing so will leave the tree vulnerable to insect damage.  If possible, gather newly fallen bark from the ground.

Step 2: Take about half a pound of bark strips and scrub them well under cool running water with a stiff brush. Don't use any soap or detergent, just the brush to remove dirt, sand, lichens, insects, and so on.  When well-scrubbed, the outside surface of the bark is a light grey tending toward greenish, and the inside surface is reddish-brown.

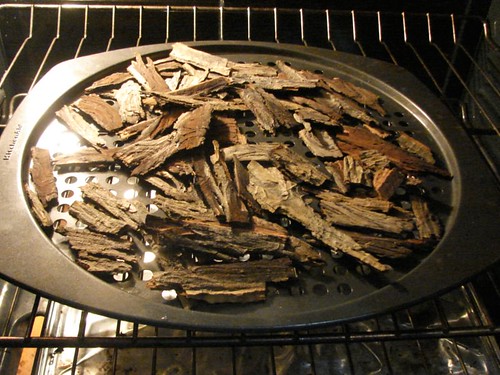
Step 3: Preheat the oven to 350 F.  Break the scrubbed bark into manageable pieces, say 8 inches long or so, put them on a baking sheet, and slide them into the oven to toast. (I like to use a perforated baking pan that lets moisture out the bottom, but you can use a cookie sheet or roasting pan.) You should shake any excess water off the bark before putting it in the oven, but it doesn't have to be thoroughly dried. It takes about 10 or 15 minutes to toast the bark. After a few minutes, you'll start to smell the delicious odor of hickory seasoning - a little smoky, a little "spicy."  Keep an eye on it and you'll notice that the bark will start taking on a gentle golden-brown tone.  Watch it carefully and don't let the bark burn - charred bits will give the syrup an unpleasant burnt and ashy flavor.

Step 4: When the bark is toasted, take it out of the oven and allow them to cool enough to handle.

In the original recipes that Gary and I were working from, we were told to cover the bark with water and simmer for 20 to 25 minutes until we had a dark amber "tea" made from the bark.  (Simmering rather than boiling is important because rough treatment like boiling extracts lots of bitter tannins from the bark as well as the flavor components that you're actually looking for.)  We thought that the "aging" process spoken of by the commercial processors was a method of mellowing out the bitterness inherent in making the hickory extract.  We also found that reducing the volume of liquid by 25% by continuing to simmer after removing the bark resulted in a richer, more pronounced flavor in the final product.  

To continue using the method Gary and I hammered out, go to Step 5a.
To continue using an alternative method using a percolator, skip 5a and go to Step 5b.

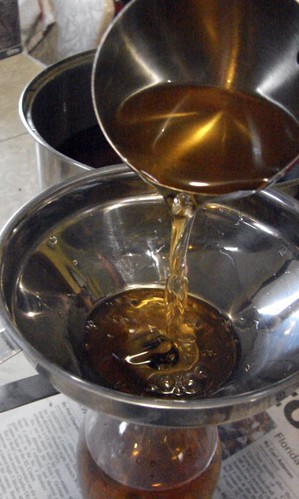
Step 5a:  Place the toasted bark pieces in a saucepan and cover with water.  Bring the water to a boil and immediately turn it down to a simmer.  Simmer the bark gently for about 25 minutes until the water is deep amber in color.  Remove the bark from the liquid and discard (or save it for tossing on the barbecue coals.)  Continue simmering the water until the volume is reduced by about 25%.  Continue to Step 6.

Step 5b:  Break the toasted bark pieces into bits small enough to fit in the basket of a large percolator.  (I use a big 36-cup coffee urn that I bought at a church rummage sale for five dollars.)  Fill the percolator with water and run the coffee maker through a full perc cycle.  Allow the percolated liquid to cool to room temperature, then plug the percolator in again and run through another full percolator cycle.  Again, allow the percolator to cool completely.  Do this at least twice more for a total of four full percolator cycles.  This will not only give you a thorough extraction of the flavor compounds in the bark, but during the multiple perking cycles just about the right amount of water evaporates off.  After the multiple percolations, remove the bark from the percolator basket and discard (or save it for tossing on the barbecue coals.) Continue to Step 6.

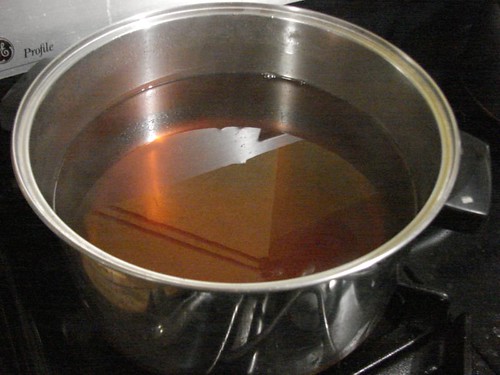
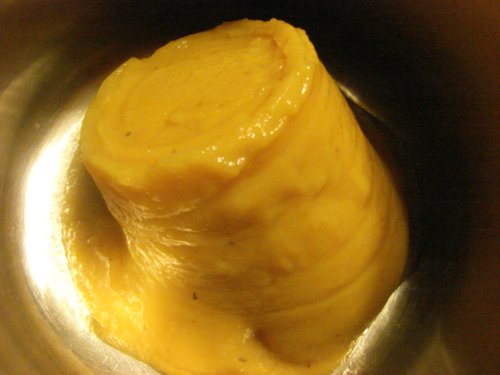
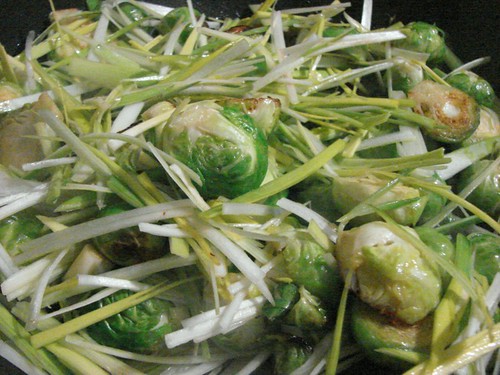
Step 6:  Measure the extract water into a stockpot or saucepan large enough to accomodate it.  Heat the water over a medium fire to bring it up to a simmer.  Stir cane sugar into the water in a 2-parts-sugar to 1-part-water ratio, the same as for simple syrup.  Simmer until the syrup thickens to the right consistency.  Allow the syrup to cool until you can handle it comfortably.

Step 7: When the syrup has cooled, ladle it off into bottles for storage.  This year at Christmas I made a big batch and poured the syrup off into plastic Poland Springs Aquapod bottles, which have a very cool shape (I used the water inside the bottles to make the syrup itself.  Tap water works just as well.  I just wanted to use the bottles so I could give the bottled syrup as gifts.)

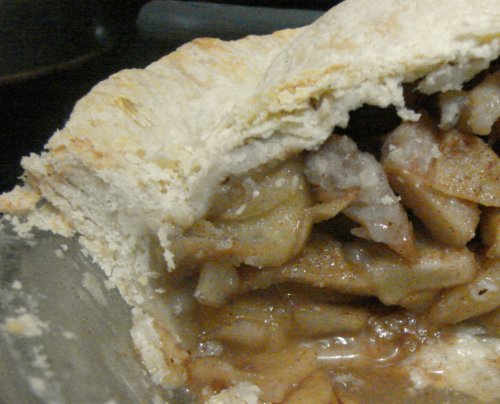
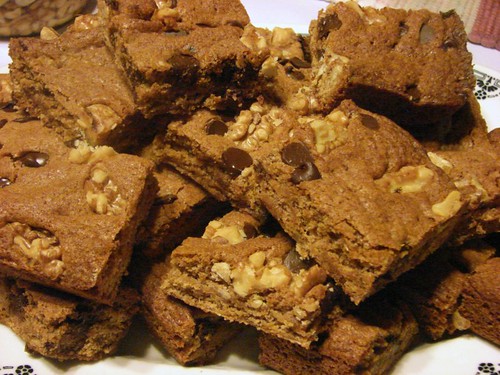
That is pretty much all there is to making shagbark syrup at home.  It's delicious, and it's not all that complicated or secret to make.  You can use your hickory syrup in any way that you would use maple syrup - on pancakes and waffles and so on, or even as a sweetener when you make a pot of baked beans.

Just remember that that this is one of those "recipes" that will require a little tweaking, experimentation, and intuition on your part. Be willing to play around with the basic information I've presented so you can bring out the best results for yourself and you'll be rewarded with an awesome taste experience.

UPDATE 9/18/14 - IS YOUR SYRUP CRYSTALLIZING? 

I've gotten a lot of contact from readers about this recipe, and most of them are about crystallization - the syrup starts forming sugar crystals a day or a week after it's been made. I didn't cover the topic when I originally wrote this post, because I never had a problem with it when making syrup. Thing is, I probably have more experience making syrups and candies and such than others, so here is a quick guide of why syrup crystallizes and what you can do to prevent it.

  1. Keep an eye on the sides of your pan when you first blend the sugar and water together. Undissolved sugar crystals will "breed" other crystals. If you've got sugar crystals sticking to the sides of the pan, wet a pastry brush and stroke out the clingy sugar with some water, or use a ladle to pick up simmering syrup and "wash down" the inside walls of the pan to dissolve the sugar.
    You can also keep your pot covered when you're simmering the pan. The steam trapped in the pot tends to dissolved clinging sugar crystals, too. (I never found this method to be as reliable.)
  2. You have to stir the sugar into the water to make it dissolve. But once the sugar is completely dissolved, try not to stir any more. Stirring promotes crystallization. If you need to mix ingredients over the heat, gently swirl the pan instead.|
  3. Acid helps block crystallization. Use a bit of cream of tartar or some citric acid in the mix to raise the acid level. (Cream of tartar can be found in the spice aisle of the supermarket. Citric acid is used in cheese making to quickly curdle milk, and in canning to keep fruit from turning color. You can get it in the bulk-products section of many markets, or look for "sour salt" in the spice aisle, or use Ball's Fruit-Fresh, found in the aisle with the canning supplies.) You can also use some lemon or lime if you like, but remember that using fruit as an acid source can change the flavor of your syrup.
  4. Use some corn syrup in the mix. The sugars in corn syrup discourage crystallization. Corn syrup isn't the same thing as high-fructose corn syrup - if you hate high-fructose corn syrup (like I do) read the label on the bottle before you buy it. Some corn syrups contain HFCS as an ingredient, others don't. Using corn syrup will also change the flavor of your syrup - corn syrup tastes different than sugar.
  5. Warm your utensils before using them in the cooking syrup. If you're using a candy thermometer, or getting ready to ladle syrup into bottles, warm your tools under hot running water first. Plunging a cold item into the syrup can "shock" it into crystallization. 
What about if your syrup has already crystallized?  Just pour it back into the pan, heat it up again and dissolve the crystals that are there, and add some acid to it before putting it back into containers.

One last note: ANY syrup will form big "rock candy"-like crystals if you leave it long enough. Sometimes I get these in the bottom of a jug of maple syrup. They're normal, but they take a long time. If your syrup is crystallizing rather quickly, try the steps above.


My Heinous Turducken

Not everything that I make is an unqualified success.  Last weekend, for example, I put together a turducken for a big family dinner.  A turducken, you may know, is a medieval-style feast of poultry - a chicken stuffed within a duck, stuffed within a turkey, each of the birds having been carefully boned and layered with bread dressings.  It was a lot of work, and required a lot of resources, and when it was all said and done, I was less than happy with the results.  Oh, the family and friends gathered around the table thought it was fine.  I just didn't think it measured up to my customary standards.

This turducken came about because of a marvelous alignment of events.  I had originally planned a simple turkey dinner featuring a bird I had purchased and frozen a few months ago.  A day or so into the thawing cycle, I was at Stop & Shop and found a plump duck on sale - a Manager's Special - for less than half the normal price.  I took that duck home with visions of Five Spice Crispy Duck dancing in my head.  Only after getting the duck home and placing it in the fridge next to the turkey did the thought of turducken cross my mind.

And so it was that on Saturday morning, I made up three large batches of stuffing: one of traditional sage-and-onion, one of cornbread, and a third with sausage.  On Saturday afternoon, I sat down at the kitchen table with a sharp boning knife and got to work on the poultry, removing all of the bones from the chicken and duck, and all but the wings and leg bones from the turkey.  I guess the idea is to have the finished turducken look like a regular stuffed turkey.  It doesn't quite work out like that, though - without a ribcage in there supporting the exterior, my turducken looked less like a stuffed turkey and more like a very pale obese midget had been beheaded, hogtied, and dropped into my roasting pan.  It weighed a bit more than 38 pounds.

The next morning, with all the stuffing and trussing done, I stabbed a couple of temperature probes into the frankenbird and slid it into a 300F oven, covering the roaster to prevent the meat from drying out during what I figured to be an eight-plus hour cooking time.


It did, indeed, take eight-plus hours.  Closer to nine.  And despite my best efforts - low heat, covering the roaster for most of the cooking time, frequent basting - the turkey still came out dry.  At a couple of places, the skin had burst and allowed stuffing to leak out and slowly harden in the heat of the oven.  The outside quarter-inch of turkey had been dessicated into turkey jerky, and the thin meat around the lower legs and cavity were mummified.

Luckily, my family was pretty understanding, especially my mother (the veteran of no few culinary disasters of her own) and still willing to give the final product a try. 

As I cut slices from the monster, it became clear that this turducken was really no worse than any of the others that people have photographed for the Web.  And, although the outermost bits of turkey were dry to the point of inedibility, it improved somewhat towards the duck layer.

While I thought of it as only a marginal success (if that) the other diners were pleased.  I attribute that not to the turducken, but to the deliciousness of the peripherals - the stuffings, helped along by fat and juices from the chicken and duck skins, were stellar and simmering the bones from the birds for so many hours yielded an awesome stock to make gravy.

I think if I ever make a turducken again, it will be a much less bothersome version.  I will use only the breasts of the various fowl and pound them out flat before layering them with the stuffings and rolling them up into the form of a normal rolled roast, tying it the same way.  The roasting time will be much shorter, the prep will be easier (much more like rolling and tying a pork belly for pancetta) and everyone will still get lovely slices of turkey, duck, chicken, and stuffings.

19 January, 2011

Insulated Lulz

This insulated pitcher is being offered for sale at A Dong's Asian supermarket in West Hartford:

Sorry for the crappy cell phone camera pic. 
That bottom line says "FAT ANTS."
LOL "BuBee."  I bet it's great for keeping milk warm.  HAR HAR *snort*

18 January, 2011

Balli Cerez

The produce store in my hometown carries a lot more than just fresh fruits and veggies.  The owner, a Turkish expatriate, carries a wide variety of imported groceries from his home country.  I've written about some of the cheeses and dairy products before, but today I'm writing about balli cerez, or "Honey Nut," an amazing and delicious spread widely enjoyed in Turkey as a snack.

Balli cerez first came to my attention just before Christmas when Enfield Produce stocked a shelf with large and small jars of it.  The outside layer of nuts in the jar, so carefully arranged into neat rows, caught our eye immediately, and we decided to add a jar to everyone's basket.

Our own jar, however, sat quitely in the pantry while we went about our holiday business, until last night when I discovered it anew.  Time for a snack!

I opened a jar and dug in a teaspoon, taking out a small amount for a taste. [Cue choir of angels.]  Damn, this stuff is amazing.  It's like eating baklava without the puff pastry, only better because there's a mix of nuts both common and rather exotic within. The flavors and textures combine almost magically.  I took out a full spoonful and spread it on some bread and was suddenly confronted with the best toast spread EVAR.  Once the jar was opened and left visible on the kitchen table, the rest of the family decided to have tastes as well, and before long the little 200g bottle was nearly empty.  Looks like I need to go back to Enfield Produce and buy one of the BIG jars.

How can you not want a
jar of this based just on
presentation alone?
Ingredients include honey, beemilk (that's royal jelly), pistachios, almonds, hazlenuts, caraway, pine nuts, walnuts, peanuts, coconut, radishseed, black cumin, apricot seed, and pollen.  I guess many of these ingredients have health benefits - the label also reads:

For everyone who wants to be young with a strong mind and nerves, for every old man who dreams to have his youth back.

Amazing stuff indeed.


17 January, 2011

Cape Cod Potato Chips & The Big Game Chip Switch

For several years, Maryanne and I have been buying Cape Cod's 40% Reduced Fat potato chips.  We had first tried them at a friend's house and were quite impressed that they could be so delicious - and so indistinguishable from standard kettle cooked chips.

Recently, Cape Cod has introduced two new flavors of chip to their 40% Reduced Fat lineup - Sea Salt and Vinegar and Sweet Mesquite Barbecue - and they're kicking off publicity for them with an event they call the Big Game Chip Switch. 

The idea is to offer up to your guests unmarked bowls of both regular and 40% Reduced Fat versions of Cape Cod chips and see if anyone can really tell the difference.  They've even set up a website - www.BigGameChipSwitch.com - where you can share lulzworthy stories of fooling your friends and, most importantly, enter to win a year's supply of Cape Cod Potato Chips.  Timing this activity for that "Big Football Game" is a great idea - it's estimated that grazing Americans will nom 11 million pounds of potato chips during that single broadcast.

Late last week, FedEx showed up at my door with a big box.  Inside there were six bags of Cape Cod Potato Chips (one bag each of their 40% Reduced Fat chip flavors, and one bag each of the corresponding Classic chips) along with a letter explaining the whole Chip Switch thing and asking if we'd mind doing a Chip Switch and writing about it.  Since we were having a bunch of people over for dinner on Sunday, we thought it would be a hoot.   So as our guests arrived, we put out the various Cape Cod chips in a blind tasting and asked everyone if they could tell which ones were the reduced fat versions.  Our tasters ranged in age from my 8-year-old granddaughter to my you'd-never-know-she-was-in-her-70's mom, so we had a good spectrum of palates here.

All tastings were done double-blind:  Identical serving pieces were marked on the bottom where the marks couldn't be seen.  The chips were poured out in the kitchen and handed off to someone else who didn't know which was which and who randomly placed them on the dining room table so that the person in the kitchen would also not know which bowl had been filled with which chip.

Photo by Cape Cod Potato Chips
The Sea Salt and Vinegar chips were the first ones we served.  I love vinegar chips - they're my second-favorite flavor behind cracked pepper - and apparently, everyone but the kids (who gamely tried them before announcing that the vinegar wasn't exactly to their liking) enjoyed them, too.  And every single person correctly identified the classic chips over the Reduced Fat version!  No one could really put their finger on exactly how they could tell them apart, but we decided it was probably because vinegar has a way of cutting through fat anyway, and the subtle flavor and mouthfeel differences between the two were enough to tip everyone off.  One thing I should mention, however:  Even though everyone could tell the difference between the classic Sea Salt & Vinegar chips and the 40% Reduced Fat Seas Salt & Vinegar chips, there were no preferences for one over the other - they liked the flavor equally.

This first tasting set the stage for lulz, since now everyone figured that they'd be able to identify the Reduced Fat chips easily after their initial triumph.  Since Maryanne and I have been buying the Reduced Fat original chips for years and have never been able to tell the difference, we were grinning when we set them out as the next tasting.  Everyone had some chips and voiced their opinions of which one was which before the Big Reveal...and no one got it right!  The room erupted into laughter when my brother-in-law Jim yelled out in surprise, "No way!  Those can't be the low fat chips, they're too good!"

By the time the Sweet Mesquite Barbecue chips came out, everyone was laughing and joking about whether they'd be able to tell them apart and were talking about chips and snacks in general.  Barbecue chips are an especial favorite of 8-year-old Emily, who made no secret about her preference and her delight in having two bowls of her faves placed on the table.  "These are awesome," she said, "I don't think they're different at all.  I bet these are the same chips."  By this time, the adults were carefully noshing, trying their best to figure out which chip was which, but again the tasters were met with total failure.  A few people followed Emily's cue and admitted they couldn't tell which was which, but those who said they could identify the Reduced Fat chips were again universally wrong.

Cape Cod is proud of coming up with a reduced fat chip that they say is pretty much indistinguishable from classically-made chips, and justifiably so.  We had a great time doing the Chip Switch on our family and friends.  It got our dinner party off to a roaring fun start, and it got our guests buzzing about Cape Cod chips (which is what the Cape Cod folks intended, I'm sure) even if they were able to tell which of the vinegar chips were the new version.  

Links:

Cape Cod Potato Chip's website - check out the many varieties and flavors of Cape Cod chips and popcorn.

Cape Cod's Big Game Chip Switch website - Read about the Chip Switch promo, share your own Chip Switch stories, and enter for a chance to win a year's supply of Cape Cod Potato Chips.

16 January, 2011

Burger King's New BK Stuffed Steakhouse

Burger King has a spicy new sandwich on the menu:  The BK Stuffed Steakhouse.  It's a large patty "stuffed" with chunks of jalapeno pepper and orange American cheese, topped with lettuce and tomato, and finished off with a creamy poblano chile sauce on a "corn dusted" bun.  We stopped at the local BK yesterday to give them a try.

When I stepped up to the counter and placed my order, the young man behind the counter looked down and sighed deeply, "The Stuffed Steakhouse."

"Please don't tell me you're out of them," I said.  "I've been looking forward to trying one since I first heard about them."

"No, we're not out of them.  I had one for lunch today and..." his voice dropped to almost a whisper, "they're so awesome."

Wow.  Seriously, how many times do you find that level of enthusiasm in a kid who has to stand behind a counter all day selling burgers and fries?  (Actually, I run into it pretty often at this particular Burger King, because the kids working there are always pretty fast and efficient while still managing to be friendly and kind of goofily cheerful on the job.  It's one of the reasons I really like going to my local Burger King.  But I digress.)

The strangest part of this sandwich is definitely the patty.  It's not so much "stuffed" with cheese and jalapeno bits as it is "studded" - the meat has been formed with the pepper and cheese tumbled in.  Even with the additions, though, the burger retains it's typical BK flavor profile.  And incorporating the peppers and the cheese into the meat hasn't hurt the burger's texture, either - it doesn't crumble or fall apart, and it isn't tough or overworked either, the way ground beef can be when it's been handled too much.  And I have to take a minute to mention the creamy poblano sauce.  That shit's amazing.  Really.  If Burger King were to put it in a bottle and sell it over the counter, they would have a huge hit.  It would be awesome for so many other dishes, you can hardly imagine - Lynnafred, for example, mentioned that it would be a perfect replacement for the sour cream that Taco Bell puts on stuff like the Crunchwrap Supreme, or on nachos, or on just about anything else.

So, you ask, what is the actual sandwich experience like?  In a word: bitchin'.  The heat level is just right for a non-burn-your-ass-off lunch.  I thought it was comfortably spicy with a good kick.  Lynnafred, whose heat tolerance has been steadily building over the past couple of years, thought it was even a bit on the mild side.  We all really liked the burger and would absolutely get it again.

Cross-section of the stuffed burger, enlarged to
show the texture in disturbing detail.
There were a couple of things less than optimal about the BK Stuffed Steakhouse, though.  Our January-purchased burgers suffered because of the crappy winter tomatoes that were sliced onto the top of the burger.  It would be so much better in the late summer, when delicious red ripe tomatoes are available.  And I wish that the jalapeno distribution was a little more even within the patty.  The random distribution of the peppers and cheese through the meat led to bites with no jalapenoey goodness within (though I freely admit that they were much more even than trusting the BurgerLord behind the counter with sprinkling on jalapeno slices by hand.)

Other than those little nitpicks, I'd say The King has a winner here.  I hope this sandwich finds a permanent place on the menu.

15 January, 2011

Campbell's Harvest Orange & Sun Ripened Yellow Tomato Soups

Recently, I had some pretty harsh words for Campbell's Chicken Wonton Soup - and Campbell's chicken soups in general, which are pretty lousy.

But I believe in giving credit where credit is due, and so here I am, praising two "Limited Edition" Campbell's Tomato Soups:  Harvest Orange and Sun-Ripened Yellow.

Lynnafred and I found a bunch of these condensed soups on a clearance table at the local Price Chopper.  Neither of us had seen them on the shelves before, so we were both surprised to find them being marked down - we had never had the opportunity to buy them at full price to begin with, and here they were, getting rid of them!

Last summer, about a third of the tomato plants we set were heirloom varieties which produced orange or yellow fruit.  Lynnafred especially is fond of yellow tomatoes, which are slightly sweeter and significantly less acidic than their traditional red relatives. She scooped up four cans of each of the unique Campbell's concoctions in the hope that they would prove as delicious as the actual fruit.

Her gamble paid off: both the Harvest Orange and the Sun-Ripened Yellow Tomato Soups are pretty damn good.

They are both condensed soups and call for one can of soup to be mixed with one can's measure of water before heating.  We've always preferred the creaminess of Campbell's tomato soup made with milk, however, so that's the way Lynnafred prepared these "alt tomato" soups.

The Harvest Orange Tomato Soup is made with roasted garlic, rosemary, sage, black pepper, and Dijon mustard.  The flavor is delicious - the seasoning balance is just right with a unique flavor that is tasteable even through the familiar, semi-sweet Campbell's Tomato Soup flavor profile.

The Sun-Ripened Yellow Tomato Soup is surprisingly more standard-tasting.  The ingredients - including cilantro, jalapeno pepper, lime juice, and thyme - indicate that perhaps Campbell's might have been going for some kind of "southwest" flavor, but none of the seasonings were assertive enough to be recognizably unique.  Lynnafred described it as very close in flavor to standard tomato soup, "only totally better."  If only we'd found them on the supermarket shelves during their first run.

14 January, 2011

McCormick's Recipe Inspirations

Here's an interesting item I found at one of the local supermarkets not too long ago:  McCormick Recipe Inspirations.  Aimed at novice cooks, each Recipe Inspiration blisterpack has six small portions of McCormick herbs or spices and a recipe card.  Buy the spice pack, buy the other ingredients listed on the recipe card, and you're on your way to a meal.

This seems like such a great idea, and such an obvious way to market to beginners, that I'm surprised that no one has ever thought of this before.  After all, spices and seasonings are kind of expensive, and they can be pretty daunting to someone who hasn't learned how to cook by apprenticing in the kitchen at mom's elbow.  At about $1.99 per package, Recipe Inspirations seems like it could be an ideal introduction to exciting flavors.

Yet still I wonder.  

Reviews around the web don't seem to be all that favorable - many of them note that the McCormick recipe cards call for using all the herbs and spices provided in the kit, but that the flavors are unbalanced or even too strong for the number of servings noted on the card.  There is an enormous amount of packaging involved with the seemingly-simple blisterpacks and none of it is reusable.  And then there is the seemingly paltry price of $1.99.  That two bucks only buys you 8g of spices, and they're all gone in one use - hardly as economical as it appears at first glance.  It seems to me that a beginner would be better off making a careful selection of bottled herbs and spices, spending some time smelling and tasting them, and then trying them out in a few unfamiliar recipes from a trusted favorite cookbook.  As the novice gains experience, they also gain a decent stock of herbs and spices instead of just a wastebasket full of empty plastic-and-cardboard bubbles.

That's a more costly approach, but herbs and spices don't need to be expensive (some will always be more pricey than others due to climatic conditions, the political situation in the countries of origin, difficulty of harvest, and so on.)  Many herbs and more common spices are available at dollar stores and job lots, and I can tellyou from personal experience that the quality is pretty good.  In addition, good-quality herbs and spices are often available inexpensively at ethnic markets.  And then, of course, there are money-saving online stores where you can order what you need if you don't mind waiting a short time for delivery.

13 January, 2011

Libby's Vienna Sausage

At first glance, there is not a lot of difference between Vienna Sausage brands.  They're all small, casingless cylinders of meat puree canned in broth, and there shouldn't be a great deal of difference between brands.

Notice that I said "shouldn't."  Libby's has a coarser texture than some of the others, and a flavor that seems to be influenced by the metal it's packaged in. One of the local stores had them on sale for 20 cents a can - a helluva deal - so i bought a bunch of them.  Eating some reminded me that if there is one single reason why Armour is "America's Favorite Vienna Sausage," it's Libby's. 

12 January, 2011

Campbell's Chicken Wonton Soup

This is not a wonton.
I got a call from Lynnafred yesterday.  She had just opened up a can of Campbell's Chicken Wonton Soup that she'd bought on impulse the other day.

"Dad, this soup is horrible.  Why did you let me buy it?"

I only accept part of the blame for this, however.  Although there are several Campbell's soups that we buy regularly, none of the chicken varieties are on our list because they're so nasty.  Campbell's chicken broth is just horrible - it's heavy and artificial-tasting and the doughy noodles they throw in only makes it worse.  It stands to reason that Chicken Wonton would be no better.

There were five small "wontons" in the can, each of them a thick pentagonal chunk of noodle with a tiny dab of meatlike stuff near the center.  She ended up dividing the soup between the dogs who, predictably, enjoyed the hell out of it.

10 January, 2011

Brussels Sprouts

Poor Brussels sprouts - they've had such a bad reputation for so long - fueled, no doubt, by the tendency of inexperienced cooks to boil the hell out of them before serving - that many people refuse to touch them almost no matter what the preparation.  I've been eating them since I was a kid.  My mother, bless her, never believed in cooking the living hell out of veggies, so even though she cooked sprouts the only way she knew how - in boiling water or  over steam - we never had mushy overcooked sprouts.  They were always bright-green from the steam and tender but not squishy.  That's likely the reason I've never had to approach Brussels sprouts as a problem, aka "How do I make these nasty shrunken monkey heads edible??"  (Protip:  Calling them "shrunken monkey heads" can actually help you get your kids to at least try them.  For some reason, kids are far more likely to bite into what they think is a shrunken head than they are to sample some never-before-experienced vegetable.)

Anyway, boiling Brussels sprouts - or even steaming them - is a pretty harsh way to treat what is a deceptively delicate veggie.  That kind of cooking brings out the sulphurous cabbagey elements of the sprout's flavor and turns the tender little leaves mushy and kind of fibrous.  Not even a big chunk of butter can save Brussels sprouts so cruelly tortured.

A far better way to bring out the best in Brussels sprouts is to try a preparation that caramelizes the outside of the little buds while letting their own moisture steam them in the pan.  Tossing them in a flavorsome oil and oven-roasting is a popular method, but I usually just heat some butter and olive oil in a skillet and sautee the sprouts until they take on a golden-brown hue and soften just to an al dente tenderness.  That's the basic technique I used when I came up with this Brussels sprouts recipe recently:

Brussels Sprouts with Shredded Leek
Servings dependent on quantity of ingredients

Brussels sprouts
Butter
Olive oil
1 or 2 leeks
2 or 3 garlic cloves, roughly broken and sliced
Salt & Freshly ground pepper to taste

Choose sprouts that are fairly uniform in size.  Sometimes this isn't possible because of the way the sprouts are packaged by the grocery store - in this case, when you're trimming and paring the sprouts, cut the largest ones in half (through the base so the halves don't fall apart to loose leaves) so they all cook evenly.

Clean the sand from the leeks and trim away the really tough green leaves.  Cut the barrels of the leeks into 2- or 3-inch lengths, then julienne the cylindrical cuts into narrow strips about 1/8-inch wide.  Set them aside.

Melt a couple of tablespoons of butter in a heavy skillet and add about an equal measure of olive oil.  Heat until the butter is foamy over a medium fire, then tip in the sprouts.  Cook and stir the sprouts, coating them with the butter and oil as you sautee them, until they begin to caramelize.  Before they get too brown, add the shredded leeks and the garlic.  Continue to sautee as the sprouts brown and the shredded leek wilts and softens.  When the leeks are soft and tender and the sprouts are caramelized and can be pierced with a fork, they're done - serve 'em up.

The earthy leafiness of the sprouts are complimented nicely by the shredded leek, which gives a subtle oniony sweetness to the dish.  To keep the leeks and garlic from burning during the time it takes the sprouts to cook, be sure to add them at least halfway through the cooking process.

Sorry for the lack of quantities in this recipe, but it's one of those recipes that is very flexible, and the quantities you use are governed more by the number of people you're feeding than any strict recipenarian guidelines.

For another favorable take on Brussels sprouts, check out this post at Leeanne Griffin's Fun With Carbs.  Coincidentally, Leeanne wrote about sprouts this weekend too.

04 January, 2011

The Chef Basket As Seen On TV!

In October 2009, I wrote a nostalgic post about expandable steel-wire baskets after finding a vintage one by Mouli in its original box at a rummage sale.

These baskets were the original "salad spinner," designed so you could fill them up with leafy greens, rinse under running water, and then shake the entire basket to dry the veggies off.  My wife's family used them to gather eggs from the henhouse back in the 40's and 50's (the same use we put them to decades later when we had a backyard flock.)  And we also use them for picking baskets out in the garden.

They're still available out there, at church rummage sales, tag sales, and so on.  Usually, when I find them I pay about 50 cents or so for them.  Eventually, sometime over the summer tag sale season, I'll come across at least one of them for sale.  But if you're impatient, you can now get one from the ridiculous "As Seen On TV" people.

Now, of course, they're called the "Chef Basket 12 in 1 Kitchen Tool" and they're selling them for $14.95 at the local Walgreens.

I saw an ad for these on television last night, and it was an awesome display of bad actors trying not to embarrass themselves while acting clumsy doing things without the help of a Chef Basket.  Whatever.  The very fact that this kind of advertising sells stuff makes me ashamed of American consumerism.

Anyway, whether you find one at a rummage sale or pay the outrageously inflated $14.95 for one, I have some advice for you:  Don't use it as a frying basket.  Seriously.  Regular wire baskets are hard enough to get clean - repeated use as a fry basket will leave this one with cooked-on oil resins because you'll never get it cleaned well enough.  Stick to using it for non-grease-related culinary duty - you'll still find plenty of uses for it.

03 January, 2011

Hooray for Cup-a-Soup!

Soup is soothing comfort food, especially if you're not feeling well.  When someone has a miserable cold or a touch of the flu, perhaps the best thing you can do for them is to bring them a delicious pot of homemade soup to help them feel better.  Sometimes, soup is the only thing that's appetizing.

But what to do when you're the one who's sick?  I've been waylaid by some kind of nasty virus since New Year's weekend, and when I feel crappy like this I don't feel like doing anything, let alone build a soup.  When that happens, I turn to...LIPTON CUP-A-SOUP!

Yes, Cup-a-Soup, that pouch-enclosed, misunderstood, maligned ambrosial broth.  It's just the thing to stop the fever-induced shivers and acknowledge my body's need for food even while I really don't feel like eating anything.  I acknowledge that Cup-a-Soup isn't going to appeal to everyone, but it's one of those cheap, quasi-food things that I've enjoyed since I was a kid and I'm not going to stop liking it now just because it isn't hip enough.

Seriously, though:  right now, at this moment, I haven't been able to even think about solid food for three days.  But I'm sipping a steamy hot cup of Tomato Cup-a-Soup and everything's good.  It has a flavor profile remarkably similar to Campbell's Tomato Soup, another childhood fave, and I'm sure that has something to do with it's awesomeness.

Cup-a-Soup is made in Canada these days.  Thank you for sending us your Cup-a-Soup, Canada.  It kinda makes up for also sending us Celine Dion.

Dunkin' Donuts Sausage Pancake Bites

Dunkin' Donuts Sausage Pancake Bites are a perfect example of what happens when you start with an awesome idea and then follow through with a mediocre execution.

Because really:  Sausage!  Wrapped in a pancake!  That's a recipe for Win wrapped in Awsome.  After all, haven't you ever done that at home at breakfast?  Wrapped a sausage link in a pancake and enjoyed epic NOMs?  I have.  Everyone in my family has; I refuse to believe it never occurred to anyone else, ever.

Here is a fact:  The higher the quality of your ingredients, the higher the quality of the finished product.  Dunkies uses some really cheap sausage in these things - they remind me of those ratty  generic brown-and-serve sausages my mother used to buy.  The "pancake" part has much more in common with a corndog coating than with a pancake - it's dense and tough, and while it does have a pancake-like flavor, it still comes across less like a pancake and more like a cornbready doughball.  

Too bad, really.  DD could have had something really awesome here, but it just seems like they cut a bunch of corners and wound up with something really "meh."