My house was built by Maryanne's grandfather in 1926. We have pictures of it, standing new and proud, surrounded by...nothing, for even though we live in the middle of a densely populated area today, in the 1920's this was farmland, only two blocks away from downtown Thompsonville.
Today, on the south side of the house, just the other side of the driveway, stands a magnificent old black walnut tree. It's somewhere around fifty years old or so, wide enough around that I can't embrace it, and taller than the peak of the house. In our family, no one alive today knows how it got there - whether it was planted, or grew from a seedling, unnoticed and unmolested until it was too large to bother with. There are several disadvantages to having a black walnut so close. They're filthy bastard trees that make a mess around them - twigs are always falling, and they have enormous compound leaves radiate from a stem that is heavy enough to be a twig in its own right. Anything the leaves or fruit touch gets stained black and that includes the paint on my truck. And the tree itself emits a chemical compound called juglone, which poisons the ground around the tree and prevents many other plant species from growing well. Juglone is present in every bit of the tree and, while harmless to humans, can be deadly to horses and dogs - even to the point that black walnut shavings shouldn't be used in animal bedding. And it ensures that I have to bag up the rakings from under the tree and put them out at the curb for the town to pick up (all my other yard waste is composted out back.)
For all that though, I enjoy my black walnut tree. It's large, spreading, and handsome and provides a lot of shade in the summer which keeps the house cooler (south side, remember?) And then there are the walnuts.
Once upon a time, black walnuts were more common than English walnuts in New England. They have a richer and deeper flavor than English walnuts and today they are very pricey when you can find them for sale commercially. Because the heavy, dense wood is prized for things like furniture and gunstocks, black walnut trees are a lot less common now than they once were (though small stands of them are still found here and there.) I have a feeling that these days, more black walnuts are harvested by foragers like me (and squirrels) than by the commercial segment.
Right now - late fall - is the time to be gathering and processing the nuts. By now, most of the nuts have fallen to the ground, and the ones still on the trees can be easily shaken loose. And so, I present to you this primer about how to gather and process black walnuts. Beware: it's a lot of work.
First of all, before I say anything else: If you intend to go through with this, be aware that it is MESSY. Before you go forward, get a good pair of heavy rubber gloves to protect your hands from the juices produced by hulling and handling the nuts. Black walnut juice is initially kind of a yellowy-green, but it quickly oxides to a dark brown, and it PERMANENTLY STAINS clothing, processing materials, and - especially - skin. Seriously. The first time I did this stuff, I used some shitty disposable nitrile gloves while hulling the nuts. The gloves leaked and I ended up with deeply stained brown hands that stayed that way for weeks.
OK, here we go:
1. Harvesting the nuts
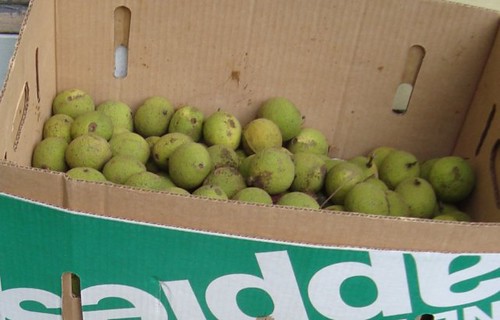
Black walnuts, ripening on the tree, look like slightly small green tennis balls. While they are green, they are immature and the nuts within will be of inferior quality. About in the middle of September, the tree's leaves will start falling and the nuts will finally be ripe enough to harvest. The hulls turn a lighter color - sort of yellowish green, and will develop brown spots. And you will easily be able to dent the hull by pressing it with your thumb. Gather the newly-fallen nuts from the ground or pick them from the tree at this point. Gather as many as you care to process, and as long as you don't mind the work, you will never have too many. It takes about a pound of unshelled nuts to make a cup of nutmeats.
2. Removing the Hulls
Here's where those gloves are essential.
The hull is a little tough, but it cracks open easily. An easy way to do it is to simply put the nuts on a hard surface like a sidewalk and step on them. The hull will split open and you can remove the nut. Put the nuts in a bucket and put the hulls in a trash bag for disposal. Don't leave them out where your dog will find them and chew them, and don't compost them, remember?
Other ways you can remove the hulls:
- My favorite way it to put the nuts on the dropped tailgate of my truck and press them with the heel of my (gloved) hand. It works just as well as stepping on them and seems faster.
- Fill your driveway with nuts and drive back and forth over them until all the hulls are split. Your car tires will do nothing to harm the actual nut, but will split and remove the hulls. Don't laugh. There are several agricultural extension offices that actually recommend this.
3. Washing the Hulled Nuts
Keep your gloves on. Put the hulled nuts into a pail or bucket and spray them well with the garden hose. When the bucket fills up with water, agitate it so the nuts knock and rub up against each other - this will help remove the remaining hull fibers. A few nuts might float to the top of the water - those are no good; pick them out and throw them out. Pour off the water (which will be stained dark brown) and refill the bucket and repeat the process. After three or four times, the water will start running clear and the nuts are clean enough to cure.
4. Curing
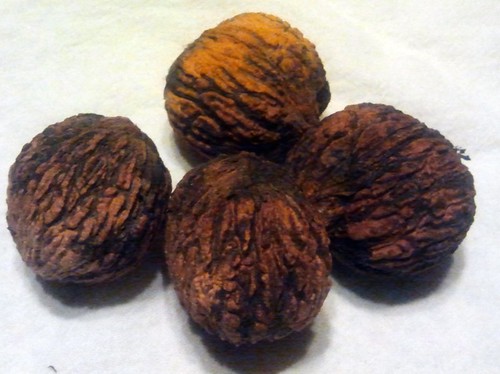
The nuts need to thoroughly dry and cure for two weeks or so before they can be shelled and stored. They should be spread out with plenty of air circulation in a cool, dry place out of direct sunlight. Traditionally, black walnuts were put into loosely-woven burlap sacks and hung from the rafters of the attic. However, I prefer to set up an old screen door on a couple of sawhorses in my cellar and spread the nuts out on them to dry, but there are other methods you can use if you don't happen to have an old screen door or some burlap sacks handy. You can spread them no more than a couple layers deep on racks, or put them in wicker baskets according to some sources. In a few weeks, they'll look like the picture to the left, and they'll be ready to shell and store.
5. Shelling and Storage
Black walnuts are damn hard to crack. They have a thick shell, and they are nearly impossible to break with handheld nutcrackers - and even most lever-action crackers will quickly become destroyed trying to break them open. You can hit them with a hammer (which has to be done carefully to avoid smashing the nutmeats to tiny bits) or you can slowly squeeze them in a bench vise until they split. Best of all, though, is a device called the Master Nut Cracker, invented by a gentleman named Gerald Gardner in Sarcoxie, MO and made in the USA from very high-quality parts. This cracker, which Mr. Gardner sells on eBay and from his website, has the muscle required to split all sorts of very tough-shelled nuts like black walnuts, butternuts, hickories, and macadamias.
 |
| The Master Nut Cracker. Photo by Gerald Gardner. |
After the nuts have been shelled, pick the nutmeats from them and store them in the refrigerator. They'll keep in the fridge for three months or so, but remember that nutmeats are filled with oil that easily goes rancid, so they won't keep forever. For long term storage, nutmeats should be frozen.
I told you it was a lot of work. But I think it's worth it.


