31 January, 2010

Quick Bresaola Update

I took the round roast out of the first cure stage today. The cryovac it was in was filled with meat juices and brine and the meat was starting to get firm, so the cure is doing its job. The meat was a vivid pink and smelled gorgeous with the thyme, rosemary, and juniper in the mix.

I rinsed it off with wine, patted it dry, and reapplied a fresh coating of cure, then resealed it in cryovac. It needs to stay for another five days or so, then I'll put it in a beef bung cap casing and hang it in the curing room in the attic with the capicola.

Pictures next week, when it comes out of the cure for the last time.

.

Vintage Sunday: Old Liquor

I have a fairly well-stocked liquor cabinet. It's a consequence of having a curiosity about new flavors combined with a taste for alcohol and generous friends who bring occasional unusual gift bottles.

Yet another reason, however, is my taste for estate sales.

Most of the time, when the contents of an estate are offered for sale to the public, the liquor is excluded. It gets disposed of before the sale (many hired estate sale organizers just pour it down the sink and put the bottles in the recycling bin.) But sometimes, I'll find bottles stashed in a pantry or off in a corner of the cellar, and make an offer on them. I've gotten some good deals on some great booze that way - and it sometimes surprises me just how old some of it has been.

Take this bottle of Creme de Menthe, for example. I have no idea how old it actually is, but the ornate label is lithographed in an early 20th-century style. The only thing I know for sure is that it is from Cuba, pre-RevoluciĆ³n - the label says "The New York Store, Prado 406, Havana Cuba."

When I bought it, the original cork had broken off, leaving a small cork plug in the neck. I removed it and replaced it with that tighter, but wonky-looking, cork you see in the photo.

Despite its age and the poor condition of the cork, the creme de menthe inside aged well - rich-tasting and silky smooth, and such a dark shade of green that it almost looks black. I'm not a big fan of creme de menthe, but we've used it for making candy, and it always turns out great. It's an obviously high-quality product and I'm glad I found it.


Another great old find was this bottle of Frigolet Liqueur. Bottled in France at the Abbey of St. Michel de Frigolet, where it is distilled by the monks, it was imported once upon a time in the early 1960's by The Great Lakes Wine Company of Chicago. This is perhaps one of the most delicious liqueurs I have ever tasted. It was first made at the abbey in 1865 by Father Gaucher and is still made using the same recipe today: an infusion of thirty herbs, aged in oak and then flavored with sugar and honey. The result is a subtly sweet pale green liqueur with an herbal bouquet favoring thyme.

Unfortunately, Frigolet Liqueur doesn't appear in Great Lakes Wine Company's current online catalog, and an internet search brings up several French links (including a few pages in English for tourists planning to visit the abbey) but nothing about North American sales. Too bad - I'm really going to miss this one when it's gone.


Here's one I haven't even gotten around to opening yet: An extremely old bottle of Irish Mist, still sealed, with it's revenue tax band still intact across the cork, and a District Of Columbia 1/5 Gallon tax stamp on the body of the bottle (visible in the picture to the right of the label, just below the shoulder of the bottle.) I wish that there was some kind of guide to dating bottles by the tax stamps on the neck, because I have a number of other bottles for which I'd love to discover an approximate date.

I'm not in any hurry to crack this one yet so I can't tell you whether time has been kind to the contents. As you probably know, liquorous spirits don't continue to age once they have been bottled (unlike wine.) They can only remain stable or oxidize and go to hell. One time, I bought a box lot of various old whiskeys and found to my delight a bottle of Chivas Regal 21-year-old Royal Salute Scotch in the sapphire Wade decanter - a $200 Scotch Whisky. Awesome, right? Unfortunately, no. The bottle had been improperly stored for more than a decade, and it had gone thoroughly to rot; the precious old Scotch tasted like tobacco, mildew, and formaldehyde. It was quite a disappointment.

But there have been delightful surprises as well: A bottle of pre-war Gilbey's Gin that was so mellow and drinkable that friends and I killed the bottle by drinking it straight, like a sipping whiskey; or the bottle of Scotch which I was able to document as having been bottled in 1934 and still sealed, which I later sold to a collector because he made me an offer too rich for me to refuse. The good experiences have far outweighed the bad, and I still keep a sharp eye out for old liquor when I go to estate sales.
.

30 January, 2010

Fishy Delights 28: Bar Harbor Whole Maine Cherrystone Clams

Good canned clams are an essential in my kitchen. As long as I have them handy, I can make up a quick batch of clam chowder, or some mouthwatering buttery seafood stuffing, or some tasty clam dip. I particularly like Bar Harbor Whole Maine Cherrystone Clams - the quality is superb, and as a special bonus they're a New England product (buying locally-produced foods is important to me.)

Unlike some other brands' canned "baby clams," which are as small as a dime and come from who-knows-where, Bar Harbor whole cherrystones are decent-sized, all-natural bivalve meats, plump and briney and taken from the cold waters of the North Atlantic off the Maine coast.

Have you ever made your own clam dip? Homemade dip is way better than the premade stuff you find in the refrigerated section of the supermarket, and with a can of these clams you're halfway there.

Dave's Clam Dip

1 can (6½ ounces) Bar Harbor Whole Maine Cherrystone Clams, drained, reserve the broth.
4 ounces cream cheese
1/2 cup sour cream
2 tablespoons Hidden Valley Ranch Dip Mix
1 teaspoon McCormick Worcesterchire Ground Black Pepper Blend
1/2 teaspoon good Hungarian paprika

Blend the cream cheese with 2 tablespoons of the reserved clam broth until the cheese is the correct consistency for dip. If the mixture is too thick, add more clam broth a tiny bit at a time until the proper consistency is reached. Stir in the sour cream, Ranch Dip mix, Worcestershire pepper blend, and paprika and stir until well-combined. Chop the clams roughly and stir them into the dip. Cover and refrigerate overnight to allow the flavors to blend and bring out the delicious clam flavor.

Now, this recipe will result in some leftover clam juice. Lucky for you that the very best Bloody Marys are made with clam juice. Tomato juice with clam juice added to taste (I like about a 70/30 blend) with a shot of Tabasco sauce, a spoonful of fresh horseradish stirred in, and spiked with a good dose of vodka. Awesome.
.

29 January, 2010

Cumberland Gap Hickory Smoked Sliced Pork Jowl Bacon

On January 19th, over at The Ridiculous Food Society of Upstate New York, Mr. Dave (no relation) reviewed Cumberland Gap Jowl Bacon. Click here for a link to that post.

It's been a while since I had jowl bacon, so I immediately headed over to my local Price Chopper to see if it was available, and it was! So I bought a package, and last weekend the family and I tucked into some for breakfast.

Now if you've ever seen a smoked jowl before, you'll know that it is very much crescent-shaped: the ends are narrow - pointy, even - and the central part is broad. From a commercial packers' point of view, it must be a nightmare, because it would be really hard to get a product like that into neat, uniform slices that are easy to package.

Cumberland Gap seems to have come up with sort of a solution to that problem, though. They apparently take the jowls and compress them into a cylindrical shape, then split them down the center and cut them into neatly uniform semicircular slices. The irregular shape of a natural jowl doesn't lend itself easily to this kind of shaping, though, and there are little pockets of gelatine filling in the gaps in the slices.

What this all adds up to is a variety of bacon with more of a moisture content than usual, and which tends to get a little tatty-looking as it cooks. Thick slices and wet cures mean that cooking over a lower heat is the best method here, but the irregular way the jowl is jumbled together in the slices cause them to take on a wicked curl as they start to fry. Accordingly, I kept the fire down to low and used my cast-iron bacon press to hold the slices down in the pan. They cooked up every bit as ugly as I expected - unevenly shaped, with bits falling off here and there. But all was not lost! The slices also cooked up evenly and, with the help of the bacon press, nicely within that range of bacon perfection where the slices are crispy but not brittle and uniformly golden brown.

At right, you can see what I mean by "tatty-looking" bits of pork. The compressed bits just simply "let go" of each other and sizzled up into more-or-less random shapes that had nothing to do with either the natural shape of the jowl or the semicircular shape that was imposed upon them.

But with bacon, it doesn't matter so much what the stuff looks like; the important part is how it tastes. And Cumberland Gap jowl bacon has a very good flavor, indeed.

It's not too salty, yet not bland. The smoke flavor is noticeable and delicious, and as Mr. Dave mentioned, it has a richer and more "porky" flavor than standard bacon. Parts of the jowl are a bit cartilaginous, so you also get bits of chewy, tooth-resistant bacony goodness that adds to the textural interest.

Overall, I wouldn't hesitate to recommend Cumberland Gap's jowl bacon to anyone. It really does make a nice change from the standard rashers of bacon we find everywhere. I just can't help but wish that they'd leave the stuff in its natural shape instead of trying to impose a fragile uniformity upon it that just falls apart upon cooking.

Link:

Cumberland Gap Provision Company - Learn about the company and about their many other pork products.

.

28 January, 2010

Poutine

French fried potatoes. Cheese curds. Brown gravy. Three simple ingredients, none of which are all that remarkable on their own. And yet, when hot fries are scattered with cheese curds and lovingly blanketed in gravy they transcend their humble selves and become poutine - perhaps Canada's single greatest contribution to the culinary world.

Poking around the local P-Chops a few days ago, I found something almost unheard of here in Connecticut: Cheese curds! Put up in tubs by New York State cheese company Yancy's Fancy, this particular variety of curd were pale yellow - nearly white - curdly chunks of unaged mild cheddar. I immediately bought them along with a bag of frozen crinkle-cut fries, took them home, and made poutine.

Poutine preparation is simple. Deep-fry your potatoes and quickly drain them. While they're still hot, tumble them onto a plate, or better yet into a medium-sized ramekin that can hold your chosen serving size. Scatter the hot fries with a handful of cheese curds and ladle over with hot gravy. Brown gravy is traditional, but use whatever you have (personally, I prefer a good pork gravy.) Then, grab a fork and OM NOM NOM.

If you can get your hands on some cheese curd, try it out. Seriously. You won't be sorry.
.

26 January, 2010

Farmland Sausage Links: A Dollar Store Breakfast Treat


Dollar Tree recently had a selection of Farmland brand sausage links in 8-ounce packages. Buying them seemed a good idea at the time - the price worked out to just two dollars a pound, and Farmland isn't a bad brand - their deli ham is decent, and there's nothing wrong with their bacon.

I first started having misgivings, though, when I opened up the packages and found that they were "skinless" sausages, not links. Links should be in casings, twisted into individual sausages and linked together. That's why they're called "links," Farmland, get it? No, these were extruded cylinders of bumpy stuff bearing a strong resemblance to those nasty "brown and serve" things they sell in the supermarket.

Although leery of them by now, I fried them up anyway.

Original were fairly standard-tasting, with typical spice and herb aromas and flavors. The texture was bad, though: spongy and soft and oozy.

Pork and Bacon had an amazing bacon flavor and such an intense bacon aroma as it was cooking that the whole house smelled delicious as I made breakfast. They were the best of the three, though still somewhat hampered by the off-putting texture.

Hot and Zesty smelled wonderful as we cooked them, but unfortunately the spiciness was provided by cayenne pepper, which added a rough and scratchy heat without enhancing the flavor of the sausage in any way. That meant two strikes against this flavor because of that texture issue again.

In the time since I first tried these sausages, Farmland seems to have discontinued the Pork and Bacon flavor, and introduced several others (Honey & Maple, Cider House, and Lower Sodium) which I haven't had an opportunity to try. I think they have a great concept here, and for the most part the flavors are spot on (well, except for the misplaced heat in the Hot & Zesty) but the mouthfeel and sponginess of the final product just puts me off of them. I have no idea why they should be like that, since there aren't any fillers or junk listed on the ingredients list, but despite the evident quality of the ingredients, I can't recommend them.

You might want to look for them in the supermarket anyway, though, because of the box art. Check out this closeup of one of the boxes and tell me what those sausages look like. Especially the ones I've pointed out with arrows.

.

25 January, 2010

Making Bresaola

On Saturday, I headed over to the local wholesale/retail meat market to buy a whole pork belly. I want to make some pancetta, and I still have plenty of room to hang stuff in my curing room in the attic. Unfortunately, there were no bellies available that day; I'll have to check back later in the week.

But they did have whole beef eye round for the very reasonable price of $2.29 a pound (untrimmed) and so I decided to make bresaola instead. In much the same way that my capicola is a cured and aged whole boneless pork loin, bresaola is a cured and aged whole eye round.

The process is somewhat longer, though. For one thing, the curing process is longer - my capicolas are only left in their salt cure for 2 days. The beef stays in its cure for 10 to 14 days. Following Ruhlman & Polcyn's method, I'll be draining off the first accumulation of brine after 5 to 7 days, then reapplying fresh brine to finish the aging for another week. After that, I'll be casing the beef in a natural beef bung cap casing, just like my cappy, and hanging it to age for a month or two...or longer, depending on how it goes. This is a learning process for me, and it's the first time I've ever tried making bresaola. So, welcome to the first steps and I hope you stop back every so often as I update and monitor the beef's progress.

This is the eye round I started with, right out of the cryovac. Untrimmed, it weighed in at about 6½ pounds. Before I can start curing it, I'll have to trim off all the visible fat and any silverside that is still on it.

Trimming the round is fairly simple. I use a good sharp boning knife with a narrow blade, and pass it between the fat cap and the meat, in the same direction as the grain of the muscle. If there is any silverside, I just pull it away from the meat and use the knife in the same way as when I remove the fat. Small bits of fat or silverside might remain, but those are easily removed with small trim strokes.

All trimmed and ready for the cure, the round is down to a little shy of 6 pounds. At this point, I set it aside and made up the cure.

For the cure ingredients, I knew that I'd want salt, sugar, and InstaCure #2 ("pink salt") as a minimum, with perhaps some other aromatic ingredients to taste. After researching several recipes, I came up with the following proportions, which makes enough cure for up to an 8-pound round. Note that I am giving the amounts in metric weights rather than my customary American method of teaspoons/tablespoons. I did this to avoid clumsy measurements like "1/8 teaspoon" etc. and fractions of ounces. Decent digital scales are available for ten dollars or less online and in many stores, and nearly all of them can be toggled between ounces and grams.


Dave's Bresaola Cure
Sufficient for 8 pounds of beef

50 grams Kosher salt
60 grams sugar
10 grams InstaCure #2 ("pink salt" )
10 grams ground black pepper
15 grams fresh rosemary leaves, finely chopped
12 grams dried thyme, crushed
12 juniper berries, ground in a spice or coffee grinder

Combine all ingredients thoroughly until evenly distributed.

Once the cure was made up, I put the round into a large shallow bowl, pulled on a pair of vinyl gloves to protect my hands, and went to work rubbing the cure into the meat. I rubbed the entire round with the cure, making sure that all of the meat was covered. It only took a couple of minutes, and I had some cure left over when I was done (which I put away in a jar for next week. Saving the leftovers means I won't have to mix so much when the cure gets reapplied.)

When the meat was thoroughly coated, I sealed it in a cryovac pouch using my vacuum packer. If you haven't got one, don't sweat it. Use a big ZipLoc bag and push as much of the air out of it as you can when you seal it up. Check it out: the meat had been for less than five minutes when I sealed it, and the cure had already begun to pull juices out of the meat to form a brine:

Right now the curing beef is sitting on the bottom shelf of my fridge. Every so often - whenever I open the fridge for something - I turn the bag and give it a quick massage. I'll be doing that for the next week. Sometime over the coming weekend, I'll open the package, rinse and dry the round, and apply fresh cure. Check back with me later and follow the progress.

.

24 January, 2010

Vintage Sunday: A Half Gallon of Ice Cream

Remember when ice cream came in foldable cardboard cartons that held half a gallon? I do. It's only been a couple years since ice cream got hit with the Supermarket Shrink Ray.


Anyway, these two ice cream cartons date from 1956. They're "new old stock" from the former Redman Dairy, which was at 384 Farmington Avenue in Bristol CT for more than 50 years (today the location hosts a bicycle shop.) Both of the cartons are brand new and were originally unfolded, just like they would have been before filling at the dairy. I folded the strawberry carton carefully, just enough so it could pose for the photo.

Although Redman Dairy is long gone, a small piece of it survives. The original 1940's-era soda fountain is still in operation at the Imagine Nation Children's Museum in Bristol.

Link:

Imagine Nation Children's Museum website.


.

23 January, 2010

Fishy Delights 27: Bar Harbor Wild Herring Fillets

I can't believe that it's taken me this long to write about Bar Harbor Foods' canned products; they are a pantry staple for me, especially the chowders and canned fish, and since this is the 27th entry in my "Fishy Delights" series, you'd think that I would have gotten to them sooner.

Anyway, today's review covers two of Bar Harbor Foods' Wild Caught Fish varieties: Wild Herring Fillets Seasoned with cracked pepper, and Wild Herring Fillets in Stone Ground Mustard Sauce. Both offer big meaty herring fillets and all-natural ingredients.

Wild Herring Fillets Seasoned with Cracked Pepper are delicious, with a lightly smoked flavor and lots of relatively fine-grained cracked black pepper. The pepper's natural fruitiness compliments the fish very well, and the spice comes through without being overwhelming. I loved them as is for lunch, but I'm betting these would be an awesome alternative to tuna in a salad-sandwich filling.

Wild Herring Fillets in Stone Ground Mustard Sauce are just as good. The mustard sauce wasn't harsh or obtrusive - again, it complimented the fish nicely without overpowering it. As with the cracked pepper fillets, I ate these as is for lunch, with some sesame flatbread crackers and paper-thin onion slices on the side. Excellent.

I've got some other Bar Harbor stuff to review as well, thanks to a sale at my favorite discount store, Ocean State Job Lot, and I'll try to get to them over the next few weeks.

Link:

Bar Harbor Foods website. The site includes a search page where you can find a store in your area carrying their products.

.


21 January, 2010

Soup In A Tube

Awhile ago I bought a bunch of soup mixes packaged in cellophane tubes. I had almost forgotten about them until a couple days ago when I discovered them lurking in the bottom of an airtight container in the pantry. Because it was a cold and rainy day that afternoon, I figured it was a good time to try one out.

This particular variety, Goodman's Minestrone Vegetable Soup Mix, was the first one that came to hand when I reached into the tub, so that's the one that got cooked up.

Goodman's Minestrone is rather unlike any other minestrone I've had. It's got macaroni, yellow peas, corn, some dehydrated veggies, and lots of rice in the mix. Despite the difference from more traditional minestrone soups, it was very tasty and enjoyable and made a great lunch.

The prep was pretty simple - just boil some water, add the soup mix, and simmer until done - and I have to admit it was as good as any other packaged mix I've ever had. While that sounds like "damning with faint praise," I can assure you it really isn't. I enjoy many kinds of packaged soup mixes, especially Lipton's chicken noodle varieties, and I'd be happy to pick up more Goodman's soups to have on hand for quick soup fixes.

.

19 January, 2010

Capicola 2010

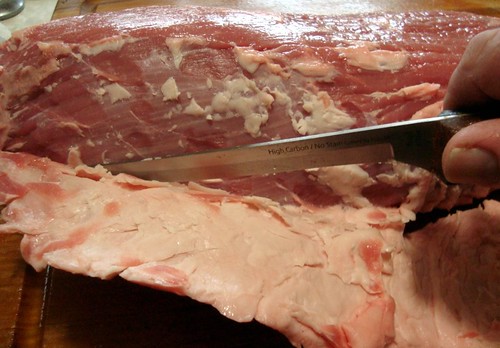
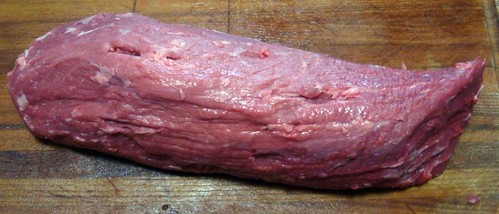
It's that time of year again - even though I'm about a week or so later than last year - and the pork loins are hanging in my attic curing room, slowly and magically turning into capicola. You can refer back to this post from last year as a starting point if you'd like to see how to make your own, step by step. This time around, I'm only going to go over some changes we made in the process.

Also, I'd like to thank the many people I've corresponded with via email, and who've shared their own methods and memories about curing capicola.

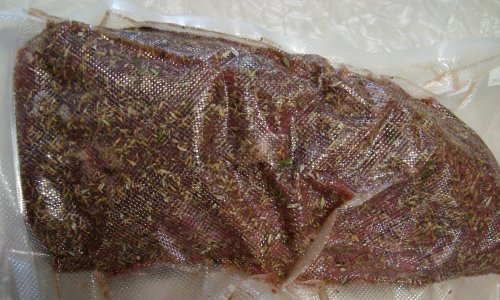
One of the changes we made this year was in the way we season our hot capicola. Traditionally, sweet capicola is made by coating the loin with coarsely ground black pepper before casing them and hot capicola is made by coating the pork with powdered cayenne or other hot red pepper. But cayenne pepper is not a big favorite of mine; in my opinion, it gives heat without lending flavor and I've never been a fan of heat for heat's sake. So my friend Roger and I developed a hot seasoning that would give a pleasant burn and also allow the flavor of the peppers to enhance the concentrated porkiness of the cured capicola.

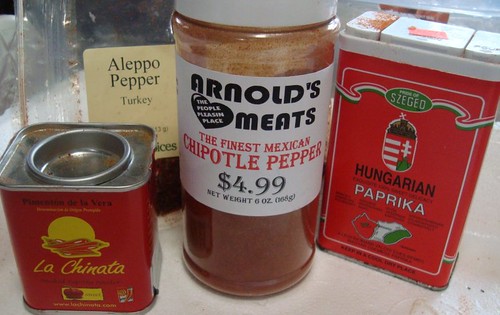
We started with about a quarter cup of coarsely ground black pepper, which was left over from coating the sweet cappies. That will give a fruity base to seasoning and means we won't be wasting any leftovers (which I don't keep after having raw pork rolled around in it.) Then we added about 3 ounces of chipotle pepper powder, 1/4 cup of imported Hungarian paprika (we used sweet for flavor, but you could use hot for an extra kick,) a little over an ounce of smoked imported Spanish paprika, and a handful of coarsely ground Turkish Aleppo pepper (a lit like crushed Italian red peppers, but a bit moister and with a much richer red-pepper flavor.) Measurements are approximate because I cook as much "by eye" as I do "by spoon." As with any other ingredients, quality is key. Buy the best spices you can afford. My favorite sources are Penzey's (where I got the Aleppo) and Nutmeg Spice Company (which puts up big canisters of spices for many different markets such as Arnold's Meats, where I bought the one shown above.)

The other change we made this year was in the actual process of putting up the capicola itself. First off, we didn't use butcher's string to tie off the casings at the ends. We used small plastic wire-ties. They gripped the casings quite effectively and were much easier and tighter than string.
We also used elastic netting over the casings, rather than wooden slats, to provide compression as the capicola cures. Several readers wrote in and told me they get great results with the netting, so I ordered a roll of it and we're trying it out. There's a trick to getting it over the capicola, though - you need some sort of tool to do it, because it's nearly impossible to just pull it over the cased meat like a sock.

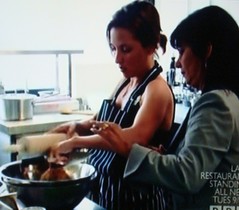
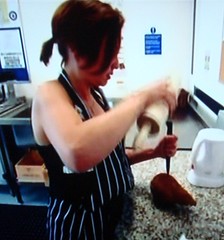
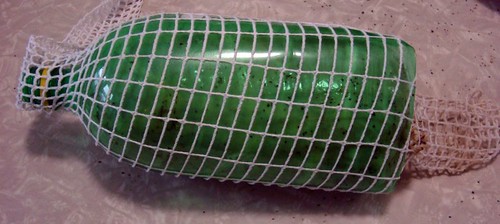
I cut the bottom end off of a 2-litre plastic soda bottle. To wrap the capicola, we put each capicola into the bottom of the bottle and pulled the elastic over the tapered end. Then we tied off the bottom end of the netting and pulled the bottle out the other side, leaving the capicola perfectly encased in the elastic web. This took about half the time that it would have taken us to strap them. We left extra at the top end to curl around to accomodate a hanging hook.

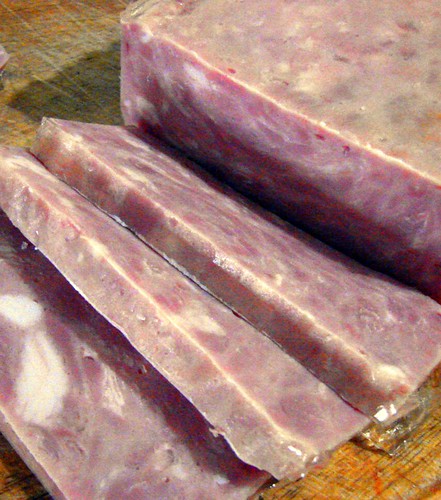
I hope the texture comes out as well as it does with the straps. It should - the netting provides compression evenly over the entire ham, while the slats concentrate the pressure at four points.

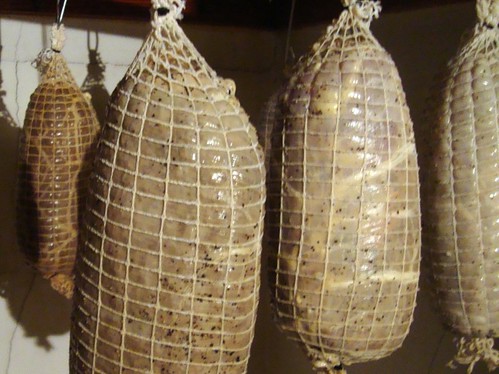
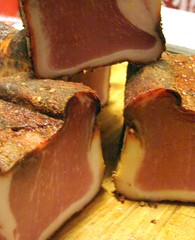
At right you can see the capicola, hanging deliciously in the curing room. We'll visit them periodically to see how they're doing, just like we did last year.

Links:

Penzey's Spices - You owe it to yourself to pay them a visit; one of the best selection of high-quality herbs and spices anywhere. I've been buying stuff from them since before the internet!!

Nutmeg Spice Company - A local Connecticut company that provides exceptionally hig-quality merchandise under both their own label and custom grocery-store and other private labels in New England. I've never had a bad experience with them.


17 January, 2010

Vintage Sunday: Bernardin Speed-E-Freeze Containers

Bernardin Speed-E-Freeze aluminum containers are another of those once-popular household items that today are nearly forgotten.

The Bernardin Bottle Cap Co. of Evansville Indiana marketed them as the ideal freezer containers when they were introduced about 1950. Their lightweight aluminum construction allowed foods inside to freeze quickly; the lids were recessed so that stacked containers were stable, and the slight taper to the sides allowed cold air to circulate freely around the stacks. And they were airtight. The lids snapped on tightly and needed to be pried off (inserting a dime in the small slot between the container and the lid and giving it a twist was enough.)

Bernardin had a whole list of alternative uses for the Speed-E-Freeze tubs. They suggested them for rustproof hardware and small tool storage, small baking pans, and even a pocket-sized tote for lures and fishing flies.

In 1950, this box of four pint containers with lids cost $1.40 and were competing against storage alternatives such as heat-sealable cellophane-lined cardboard boxes, polyethylene freezer bags, and even heavily-waxed paper tubs - all of which were a fraction of the cost (though not reuseable.) Convenience eventually won out over economy, and by the mid 1960s cheap plastic containers - especially single-use plastic bags - had virtually replaced almost every other kind of freezer container.

Today, Bernardin Speed-E-Freeze containers occasionally show up on eBay and at rummage sales, most often as single items but occasionally as sets, complete with boxes and instruction sheets.

speed e freeze 4

.

16 January, 2010

Sadness at KFC

Well, it's over.

On December 31, KFC quietly pulled the Double Down sandwich from the menu in their Providence RI test market. We found out because we had planned a road trip to the Westerly KFC on US1 this weekend. Just to be sure Double Downs were going to be available, Lynnafred phoned first.

LYNNAFRED: "Hi. I was wondering if you've still got Double Downs on the menu? Some friends and I were planning to stop in this weekend, but it's a long drive so we thought we'd call first."

KFC: "Um...I have to check. Where are you calling from?"

LYNNAFRED: "Enfield, Connecticut. We're about an hour and three-quarters away."

KFC: "Hahaha, wow, really? [pause] No, sorry, we stopped serving those on December 31. Seriously, you were going to drive that far for a Double Down? That's hardcore."

We're going to miss it. The Double Down was, quite simply, the single most badass sandwich in the fast food industry.

.

15 January, 2010

Ramen Review 14: Gefen Instant Noodle Soup - Tomato

I found these ramen noodles at a local bargain emporium and decided to give them a try. The cups are slightly bigger than the standard Nissin Cup Noodles, and they were 85 cents apiece - sounds cheap, but I get Cup Noodles 12 for $4.95 at the Asian market, making 85 cents pretty costly for instant soup.

Ease of Preparation: 8/10 - Most ramen cups require only the addition of water. Gefen wants you to add water and stir. Wait 2 minutes, then add contents of seasoning pack; stir again and wait another 2 minutes. I'm not sure what the extra step is for, or why the seasoning can't go in right at the start as with other ramen cups. Seems unneccessarily fussy to me.

Vegetable Pouch: N/A - Any vegetables in this meal are powdered and included in the seasoning.

Seasoning Pouch: 4/10 - A small pouch with a picture of a tomato on it; not very tomatoey; tastes more like salt, celery, and onion

Taste: 4/10 - Somewhat nasty, like extremely cheap bouillon with extra salt. I never would have guessed this was supposed to be "tomato soup" if it didn't have it on the label. The broth is thin and kind of brownish-red and lacks any real flavor. The noodles hold up well in texture, but had a slightly rancid "old oil" flavor to them despite the cup being well within it's "sell by" limit.

Spiciness: N/A - This isn't marketed as a spicy ramen.

Overall: 5/10 - Acceptable as an emergency ration only. If you're stuck with one, keep it in your desk at work for those times when you get caught working late and need a snack to hold you over until you can find real ramen.
.

14 January, 2010

Mannheim Steamroller Cinnamon Hot Chocolate

I was at Ocean State Job Lot and this brightly-colored canister of hot chocolate caught my eye. My whole family enjoys cinnamon-tinted hot chocolate (Nestles Abuelita Mexican chocolate for example,) and the price of this big 24-ounce container was quite attractive at just $2.00.

When I think "Mannheim Steamroller" (which is somewhat less than one time per decade) several things come to mind, none of them very complimentary. "Mediocre Christmas music," for example, or "Albums That Suck." I never think of "delicious hot chocolate." In fact, when I bought the stuff, I didn't even notice the "Mannheim Steamroller" banner at the top of the label.

As it turns out, this is really good hot chocolate. Really good. Unlike some mass-market just-add-water hot chocolates, this one isn't incredibly sweet. It has a rich chocolate flavor with a hint of cinnamon as a backnote - just the right amount. Two scoops in a mug with water just this side of boiling makes an amazingly awesome mug of hot chocolate. One heaping scoop in a mug of coffee makes fantastic mocha.

New Englanders can look for it at Ocean State Job Lot stores, where it is an astonishing bargain at two bucks. If you simply must have some and hang the cost, Mannheim Steamroller Cinnamon Hot Chocolate can also be purchased online from the Mannheim Steamroller Online Store (something else I had never heard of) for the astonishing non-bargain price of $7.98 plus $4.50 shipping, I kid you not.

.

13 January, 2010

I Expected To See Blood

BBC America runs a series called Last Restaurant Standing, which is a rebroadcast of the BBC Two reality series The Restaurant. The premise of the show is simple: a number of couples are given "trial restaurants" to run as they compete for the chance to own a "permanent" restaurant in partnership with French chef Raymond Blanc; over the course of the series couples are eliminated via challenges and assignments until one couple remains and open their establishment. The first two series were captivating - the contestants were a mix of professional workers in the restaurant or hospitality industry and talented, passionate amateurs. It was fascinating to see them face the problems M. Blanc presented to them. Occasionally, circumstances conspired against the contestants, but more often than not they were their own worst enemies.

And so it was that when the third series arrived in the US on BBC America, my family and I were eagerly anticipating it. We all watch Last Restaurant Standing together, chatting and laughing and occasionally slapping our foreheads at the successes and failures of the people chasing their dreams. But this season seems different than the previous two.

For one thing, there are fewer challenges. And here it is, Week 2, and the contestants haven't even been assigned their trial restaurants yet. But worse yet, the caliber of contestants is shockingly low. We expect some lack of experience among the hopefuls, but this time there seems to be a level of actual incompetence involved.

On the premier episode of the lastest season, each couple was asked to prepare a "signature dish" for Raymond and his judges. One couple, a mother-daughter team named Sandy and Natalie, decided that their signature dish would be fresh fruit with a coconut mousse. From the instant they hit the kitchen and tried to open their coconut, it was clear that these two had no business competing to run a restaurant.


Attempt No. 1:
It is important that they catch every drop of coconut milk for their mousse, so obviously the best way to crack the coconut is to do it inside a stainless steel bowl. At left, Sandy looks on as Natalie gets to work - holding a chef's knife by the blade, she hammers the back of the knife with a rolling pin in an effort to split the shell.


Attempt No. 2 (above): Apparently, the bowl was not a very stable platform for hacking through the shell of a coconut, so Natalie decided to try a slightly different approach. Sandy carefully steadied the coconut while Natalie lined up the chef's knife (again, holding it by the blade) and whacked at it with the rolling pin. The level of risk and stupidity involved here isn't quite clear in the screen capture on the left above, so I also added the closeup on the right to properly display Natalie's blade-gripping technique.


Attempt No. 3: Natalie decides that the chef's knife is the wrong tool for the job, so she changes over to a paring knife. She gets a good strong grip on the blade of the knife - wrapping her fist around the blade and part of the handle) and begins beating on the butt of the knife with that trusty rolling pin. After several tries, she finally gives up and lets Sandy try on her own.Sandy , displaying somewhat more common sense than her daughter, leaves the knife behind and just pounds on the coconut with the rolling pin until it splits open. Hooray! Now they can finally continue with the recipe!


Above: Natalie once again demonstrates her mad chef knife skillz by attempting to open a can of sweetened condensed milk using the "rolling pin plus handheld knife" technique. By this time, Raymond Blanc is sufficiently horrified to step in and demonstrate the use of a bench-mounted can opener.

I was surprised (and a little disappointed) that Natalie didn't open her hand instead of the tin of milk.

Natalie and Sandy's mousse was a disaster. They served it in a martini glass, and by the time it was brought out for the tasting, it was runny and starting to separate. Raymond took a taste and actually spit it into a napkin - the first time I've ever seen him do that with any food a contestant presented to him - and immediately told them that, thanks to the horrible quality of the dessert and the terrifying knife handling they had demonstrated in the kitchen, that they "must leave now."

Wow. Where the hell did the BBC find these people? And don't they have some sort of screening process? It's pretty obvious that the standards are going to be a bit lower in Series 3. In previous seasons, we watched the show and enjoyed the process that the contestants went through as they learned the ins and outs of the restaurant business. This time, I think we'll be watching for the trainwrecky lulz.

Check out Last Restaurant Standing Tuesdays at 8 pm on BBC America.

.

12 January, 2010

Slab Bacon That Can Not Be Unseen

Sometimes when you buy slab bacon the piece you get is cut from the teat section of the belly. Yes. Delicious cured and smoked pig nipple:


Slab bacon has to be sliced before frying. If you do it just right, you can cross-section the nipple:


Don't be squeamish; once the bacon is cooked, you can't tell the difference:

So feel free to serve fried pig nipples to your guests. They'll never know the difference, though they might wonder why you're snickering while they NOM NOM the bacon.
.

11 January, 2010

Wendy's Spicy Chicken Nuggets

I've been seeing the ads for Wendy's Spicy Chicken Nuggets for a couple weeks now, and finally decided to give them a try.

They're okay, I guess, but nothing really special. The spongy, meatlike chicken patties are solidly average. The breading is crispy, tinted red with paprika and cayenne pepper, and studded with bits of cracked black pepper. The contrast between the crunchy coating and soft meat inside is pretty enjoyable.

The flavor isn't all that great, though. Salty with a canned-chicken-broth flavor, they are disappointing as a spicy food. The characteristic cayenne heat hits at the back of your mouth as you swallow, with a harsh and flavorless heat that offers little else than a vague burning sensation.

That's not really what I look for in a spicy food. I don't generally use cayenne pepper at all because I prefer hot and spicy foods to have a depth of flavor that cayenne can't offer. I can't really recommend these, but if Wendy's in on your way home and want a fast spicy hit, check it out for youself.
.

10 January, 2010

Vintage Sunday: Strange Products from the Past

Today we're going to take a look back at a few food products from the pre-internet era which were too unusual to survive in the competitive environment of the American supermarket.

Compliment Complete Cooking Sauces - Introduced by PET in 1969, Compliment was billed as kind of a "gourmet dinner in a can." It was available in five varieties (Compliment for Meat Loaf, Compliment for Swiss Steak - Tomato Style or Brown Style - Compliment for Pork Chops, and Compliment for Chicken Supreme.) Most of these were pretty straightforward sauces: brown the meat of your choice, add a can of Compliment, and simmer until done for a delicious supper. The Meat Loaf variety, though, was truly odd:
"Just open a can of Compliment for Meat Loaf and add the ground beef. Shape it. Bake it. That's it! No eggs. No bread crumbs. No fixing. Everything is ready...already in the can."
Cream of Mushroom soup was the long-standing king of "add-a-can cuisine" and PET was obviously hoping to use that as a springboard for Compliment. But cream of mushroom soup was well-entrenched in American kitchens and incredibly cheap as well. Compliment was never able to make much of a dent in the market and was soon discontinued. Meanwhile, forty years later, cream of mushroom soup is still the king of "add-a-can cuisine."


Reddi-Bacon was brought to market in 1964, by the makers of Reddi-Wip aerosol whipped cream. Pre-cooked bacon was packaged with absorbent paper between sheets of aluminum foil. These packets were designed to be inserted into a standard toaster and heated to serving temperature. Thanks to the Internet Bacon Meme, Reddi-Bacon has attracted a lot of attention lately, most of it negative in the "What the hell were they thinking?" way. There are plenty of bloggers out there telling stories about blazing toaster fires caused by rivers of bacon fat flowing from leaky foil packages. The stories are entertaining, but they're also mostly bullshit.

Reddi-Bacon was precooked and there was very little extra fat involved when the foil packets were heated. However, there was occasional slight leaking from torn or damaged foil packages, and that undoubtably caused some smoking and ruined toasters. The problems with the packaging was vexing enough to the company that Reddi-Bacon never really made it out of test markets before the product was pulled from the market.

Those who mock Reddi-Bacon should remember, however, that this really wasn't a failed product in the long run. In 1964, microwave ovens were not common household appliances, and American kitchens just didn't have the kind of technology that would enable the pure awesomeness of SIZZLING BACON ON DEMAND. Today with microwaves in nearly everyone's kitchen, fully-cooked bacon - ready to heat and eat - is available everywhere and relatively safe to heat up in the ol' nuker.

You can view a PDF of the patent for Reddi-Bacon's packaging here.

And you can read about the introduction of Reddi-Bacon in the American marketplace in the 22 November 1964 Hartford [CT] Courant.


Gerber Singles - Gerber had the best of intentions with their line of Singles, introduced in 1974: Heat-and-eat foods packaged for people with limited time, culinary skills, or kitchen access. By most accounts, the offerings were fairly tasty (for canned foods) and might have been accepted more readily had Gerber not decided to hold down costs by using their existing stock of baby food jars as packaging. Apparently, no one likes to think of themselves as so pathetic that they have to eat their meals out of baby food jars. Alone.

Like Reddi-Bacon, though, Gerber Singles weren't really a bad idea, just too far ahead of their time. After all, Abbott Labs sells millions of cans of Ensure every year, and that's little more than baby formula for adults.


09 January, 2010

Mountain Dew and Pepsi Throwback Are Back!


PepsiCo certainly took their sweet-ass time getting them into stores around here, but Throwback versions of Mountain Dew and Pepsi - the vintage-style formulations that use good ol' sugar instead of high-fructose corn syrup - are finally on retail shelves here in Southern New England. Stock up while you can - this is a limited-time release.
.

08 January, 2010

Last Call For Coconut M&Ms

If you missed out on Coconut M&Ms during their very limited release last summer, your second (and perhaps last) chance has arrived. Right now, as I type this, the candy aisles of Dollar Tree stores have what are probably the very last Coconut M&Ms available. Get there quick!

.

07 January, 2010

Easy Bake Kids' Dessert Kits: Cotton Candy Parfaits

When Dave and I hit the food section of job lot stores, it's always going to be a unique experience. But there's a huge difference in what we look for when we go. Usually, while Dave is inspecting some kind of dubious canned meat and prowling for oddly shaped pastas, I'm busy looking for some kind of strange confection or decent quality chocolate that I haven't tasted before. But on one of our latest outings, we were both struck by the same thing: a box of Easy Bake Cotton Candy parfaits. At $1.50 per box, we decided to try it out.

Preperation for these is as easy as making instant pudding, because that's essentially what they are: Two packets of colored cotton candy flavored pudding (in attractive pastel pink and it's-a-boy blue), and a packet of those hard marshmallows you get in hot cocoa or a box of Lucky Charms cereal. After mixing up the pudding according to the package directions, I spooned it into the plastic cups that were included in the box. After filling each cup halfway, it was time for the marshmallows to go in.

The package said to divide them evenly between the four cups. Now, partly because I'm a loser and partly because I had nothing better to do at the time, I decided to count up the hard, dehydrated bricks to see how many were in the packet. The total was 220.5, making that about 55 marshmallows per cup. After adding the marshmallows as the middle layer, I topped the desserts off with the remaining pudding and chucked them in the fridge to set.

Acouple of hours later, Mom, Dave, and I enjoyed them for dessert. Overall, they weren't bad. Artificial cotton candy flavor is very much like a burnt sugar taste, and these were no exception. It's nowhere near as delicious as pulling apart fresh cotton candy at a county fair or something, but these little treats were certainly passable. After sitting in the fridge, the marshmallows had begun to soften and start to melt between the wet layers of pudding, so those were kind of nasty. However, the package says to eat the pudding within three hours, and with good reason: the fourth parfait got to sit in the fridge overnight, and when I looked at it the next morning, the marshmallow center had melted into a very odd layer of pale white slime. Yuck.


The best place to look for these dessert kits are in job lot stores, I guess. They're made by Jel-Sert, the same company that makes Royal Gelatine, Royal Pudding, and My-T-Fine Pudding and Pie Fillings. A check at their website doesn't even mention Easy Bake Kid's Dessert Kits, so I think it's safe to say they're no longer in production.

Link:

Jel-Sert Website
.

06 January, 2010

Capicola Reminder

If you're planning to make your own capicola this year, now's the time to get to your local butcher and order the boneless pork loins you'll need. Most butchers who can take special orders will also be able to get you the beef bung cap that you'll need for the casings.

05 January, 2010

Royale Canned Ham

I've always considered canned ham to be a somewhat inferior product. Every time I've encountered one, it's been of less-than-optimal quality, and I'm not really willing to pay five dollars a pound and up for something that seemed more like unseasoned SPAM than real meat.

But I broke down recently on a trip to Ocean State Job Lot and bought a Canadian-made Royale brand canned ham, partly out of curiosity to see if these things were really as bad as I remembered them, and partly because they were only $2.50.

The picture on the front of the can - the Serving Suggestion - depicts a meaty and fairly solid ham. The photo looked a lot like slices of high-quality ham, which should have been my first clue that something was amiss. I know damn well there are no laws saying that the photographic representation on packaging must have anything to do with the actual contents of the container, and most of the time the picture provided is simply an outright visual lie. When I dumped the ham out onto the cutting board to slice it, the quivery pinkish meat inside was exactly as I suspected it would be: randomly-sized chunks of ham ranging fron marble-sized hunks to tiny flecks, compressed together with clumps and lines of fat. Fairly typical canned ham, as a matter of fact.

The resemblance to SPAM was remarkable, though the aroma was much fresher and, of course, not as spicy since this was just a ham and not dressed with Hormel's proprietary seasonings. The canned ham sliced easily and cleanly and fried up nicely in the pan, though the texture was rather strange and spongy as the fat and added water rendered out from the interior of the slices.

The final verdict: Okay-minus for a fried breakfast meat; would probably be much better and more suitably used as an omelet filling, quiche ingredient, or on a breakfast sandwich (as long as it was sliced thinly enough.)

For the most part, though, if I were tempted to buy a canned ham again for actual culinary use, I would probably just go to my local deli and buy a 1-pound chunk of Krakus deli ham (unsliced.) Krakus' deli ham is gorgeous, solid, delicious real ham, not this chopped and formed bastardization, and my local market sells it for $4.99 a pound - the same price most places charge for a 1-pound canned ham.
.