28 July, 2008

Summertime is Steamer Time


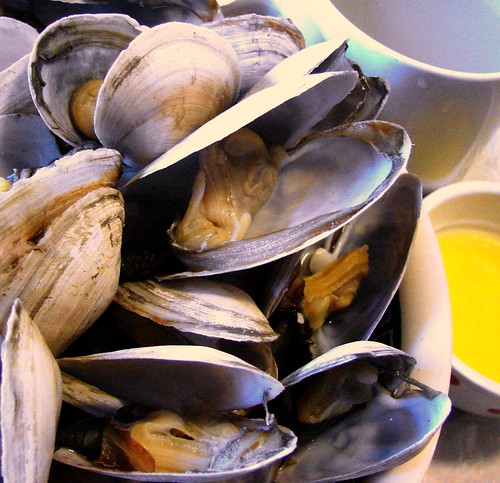
New England soft-shelled clams - Steamers - are one of my all-time favorite foods. They're easy to prepare, they're delicious, and they're perfect as either an appetizer or as a light meal all by themselves.

Steamers are sandier than their hard-shelled cousins, so there's a bit more preparation involved. I dump them into a big colandar and then gently scrub them all around - including the edges - with a stiff vegetable brush. Discard clams with broken shells, or those that don't close up tightly when you grab and scrub them, or any that stink. (Clams smell fresh and briny, like the salt spray from a cold wave breaking on the rocks of a North Atlantic shore. If you get any that smell like low tide at the salt flats, chuck it.) As I scrub each one, it gets placed in a large Dutch oven and set aside. When all of the clams are scrubbed, I add a bit of fresh cool water to the pan - not too much, and no salt, they'll have plenty of their own - cover, and put the pan over medium heat to let the little bivalved morsels steam. When the clams have yawned open in their sauna, they're ready to eat. I serve them with melted butter and a mug of the clam broth from the pan. Swish the clams in the broth before dipping them in butter and any remaining grit you couldn't scrub away earlier is left behind.


Somehow, word spread around that steamers were "better" if they were allowed to set a while before cooking, sprinkled with cornmeal. Supposedly, the clams would eat the cornmeal and purge out whatever clam food they'd been eating, and this would make them "sweeter." I've tried that, and there are a couple problems with it.

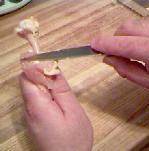
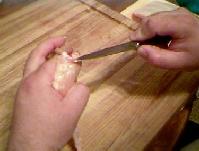
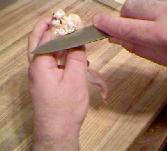
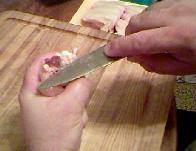
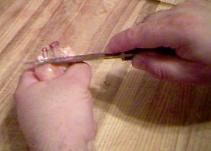
The clams don't really eat much cornmeal in the time before scrubbing and cooking, if they eat any at all. Checking out the bellies of sprinkled and unsprinkled clams shows hardly any cornmeal in their stomachs - certainly not enough to replace all the other stuff in there.

It adds an extra step to the preparation/cooking process. The clams can't be steamed with the cornmeal still in the pan with them - cornmeal expands and gets thick when it's cooked, so the pan has to be dumped and the clams and pan rinsed out and the water replaced.

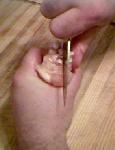
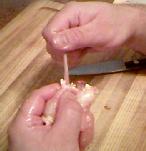
And finally, soaking in fresh water doesn't do the clams any good. Their "feet" - that funny-looking tube thingy that sticks out of their shell - gets swollen up and sick-looking from prolonged exposure to fresh water. You're better off just scrubbing the clams and steaming them, without any intermediate tricks.


Local Food: Sussmann's Wild Blueberries, Granville MA

In late July, a small sign goes up on Route 57 in Granville MA, right at the turn for North Lane. It's handpainted and it says "BLUEBERRIES" and for a few short weeks in the middle of summer it will guide you to the best-kept secret in Western Massachusetts: Sussmann's Farm.

For more than 20 years, my family and I have taken an annual drive to Sussmann's to buy delicious wild low-bush blueberries. Gathered on the farm and on other land in the area, the blueberries are sorted and packed for purchase at the Sussmann Berry Barn on North Lane.

The Berry Barn - about half a mile down North Lane on the right - is marked only by a light blue flag and a sign over the door, but it's hard to miss. The weathered barn with the rusty tin roof is typical of so many other old New England outbuildings; still sound and sturdy but with a bit of a tilt that gives the impression it's still standing almost from force of habit. Drive past the front door and you'll find a small gravel parking area just on the far side of the barn, right by a small vegetable garden.

Inside, the Berry Barn is open and airy. It gets hot and humid even on the hill here, but the open doors and windows and shade in the barn make it a little more tolerable inside. Flat wooden boxes of freshly-picked unsorted berries are stacked near the back by a large blue-painted machine filled with belts and pullies that drive a big leather conveyor belt. The berries are dumped on that belt and as they travel down to a catching area, workers pick through them to pull out stems, leaves, and unripe fruit. The berries then go into plastic-lined corrugate cartons which hold 25 pound lots of fruit. These cartons are either shipped as-is to wholesalers, or portioned out according to the preferences of folks who walk in looking to buy berries.

The best thing about buying fruit from the source like this is the freshness. We bought a gallon of berries on this trip, and they had been picked that very morning. The second best thing is, of course, the price. Our gallon of berries cost $25.00, or a little over $3.30 a pound, which is a fraction of the price supermarkets are charging. The 20-pound box at $50.00 is an even better deal. Wild blueberries freeze beautifully, so that would be the way to go for longer-term storage.

The wild blueberry season is short. Sussmann's opened for business this year on July 21st, and they expect to be all done by the third week of August (maybe a little longer if conditions are good.) It's always a good idea to call before making the drive.

Contact information:

Sussmann's Farm
North Lane
Granville, MA 01034
(413) 357-8898

Opening dates, hours, and current prices are available on their website - click here (opens in new tab).


26 July, 2008

Burger King Burger Shots WITH BACON

I really like Burger King's Burger Shots. Flame-broiled beef patties, tasty orange cheese, just the right size to share - they're just made of win. When I first reviewed them back in June 2008, I said:
"The only thing that could make me happier with them would be if they were topped with BACON. You got that, Your Highness? Get some bacon on those Shots and you'll have an unstoppable juggernaut of flame-broiled goodness."
Last night, looking for a quick supper, I stopped at the local BK and decided to take a chance. I ordered a six-pack of Burger Shots and then asked the kid behind the counter how customizable those burgers were.

"What do you mean?" he asked.

"Well, I know I can get cheese on them. I was wondering if I could get bacon on them, too," I said.

"Um...I think so. I can check..."

"Can I get extra meat, too?" What the hell - might as well go for a six pack of Bacon Double Cheeseburger Shots, right?

"Woah. I have to ask my manager. Can you hang on a sec?"

"Sure."

He called over the manager and explained what I was asking for. The manager looked a little puzzled. She looked up at me and said, "You want extra meat?"

"Yeah. Wouldn't that be awesome? A sixpack of miniature Bacon Double Cheeseburgers."

"I, um, I'm sorry," she said, "But I don't have any way to ring that up. There's no key on my register for extra meat. I can give you bacon, and cheese, but I can't ring something up if there's no key for it." I looked down at the keypad registers that they use, and it was true: there was truly no provision for them to charge for extra meat.

I could have been one of those asshole customers that bitches and causes a scene until they get what they want, but I'm not like that and besides, I was taking a wild shot that I'd be able to get something that really was off the menu. So I smiled and said, "A six-pack of Bacon Cheeseburger shots is just as good, thanks." And that's what I got.

Before I left, I asked the manager to pass my suggestion up the line. Bacon Double Cheeseburger Shots would indeed be awesome. In the meantime, though, I'll be happy with the bacon.


24 July, 2008

EveryBurger


EveryBurger is an amazing little Japanese snack food - tiny little burgers about the diameter of a penny, made by sandwiching a milk chocolate "burger" and light-chocolate "cheese" on a sesame cookie "bun." They're astounding to look at and fun to eat, and the the combination of flavors is just right: a nearly perfect balance of creamy chocolate and crunchy cookie.


Made by Bourbon Corporation in Japan, EveryBurger can be hard to find in the US. Your best bet is to look in Asian supermarkets, in the candy/snacks aisle, but check back frequently because they sell out quickly.

At the time I wrote this blog post, the box looked like this. But the company likes to keep the packaging fresh, so they redesign the labels periodically. You may be better off looking for the name rather than the box design.

23 July, 2008

Fishy Delights 16: Roland Herring Fillets in Mushroom Sauce

The herring fillets in Roland's Herring Fillets in Mushroom Sauce are pretty good: Fairly generous in size, tender, thin-sliced and flaky. It's rather unfortunate, then, that they decided to smother them in such a peculiar "mushroom sauce."

The ingredient listing shows herring fillets (from wild-caught herring,) water, flour, canola oil and/or soybean oil, mushrooms, modified starch, sugar, salt, spices. I presume that just about everything after the "herring fillet" in that list is an ingredient of the sauce but even now, poking tentatively at my fishy lunch with a fork, I can't be sure. The fillets are surrounded by a golden-colored oil, and there are gelatinous blobs of whitish-looking stuff clustered all around. The white stuff isn't very sauce-like - it's more like the white fatty stuff that people from Away don't eat when they crack open a lobster.

I drained off the oil and tipped the contents of the can out onto a plate. The fish was good (not too salty, maybe even a little bland) and the blobby white stuff was not so good (really bland, felt funny on my tongue, and had some kind of weird mildew-like flavor that I bet was supposed to be the mushrooms.) All of the mushrooms listed in the ingredients were probably right there, invisibly pureed into the sauce, because there weren't any chunks or slices to be found.

If I were pressed to rate these, I'd probably give them a 5/10. It's not that they're not bad, it's just that the sauce is flavorless and superfluous and tinned herring are so much better smoked.


Shopping Carts

Here's something you can easily do to help fight higher prices at your local grocery store:

Every time you go to a store, bring a shopping cart or two in from the parking lot with you. If you're not going alone, have everyone coming into the store with you grab a cart and wheel it into the store with them. Drop off any extras in the cart area by the door.

It sounds like a small and worthless gesture, doesn't it? It isn't. If everyone walking into the store brought a single carriage in from the lot, there'd only be one round-up a day - at closing time - and it would be just a few dozen carts left from the last few shoppers. Even if only some people do it, it can still reduce the amount of time an employee needs to spend out in the parking lot. Remember that stores pass along overhead costs to customers. Hold down the overhead, and you help hold down prices.

And bringing in a cart isn't going to cost a kid his job, either. Store employees have to be taken off other jobs to fetch carriages; no one is ever hired specifically for Carriage Patrol.


22 July, 2008

Herr's Blossoming Onion Flavored Crisps

Now that virtually every restaurant has come out with their own version of the "blossoming onion" fried appetizer, it was only a matter of time before a snack food company released their own version. This wasn't too much of a stretch for Pennsylvania-based Herr Foods - they've had an onion ring snack in their lineup for years.

And so I present to you Herr's Blossoming Onion Flavored Crisps, a snack based on those ubiquitous fried whole onions.

Unlike traditional ring-shaped onion snacks, these crisps are petal-shaped in imitation of slices of onion. Crisp and light in texture, they have a complex flavor that nicely evokes fried onions dipped in a ranch-like dressing. There is a predominant onion flavor, but with a hint of buttermilk, herbs, and a sudden background of pleasant spiciness (not enough to be hot, but enough to build in your mouth as you eat a handful.)

I like these crisps a lot. They're lighter and crispier than Frito-Lays Funyuns, and have a sweeter, fresher onion taste that reminds me of Vidalias or Texas Sweets - probably the most delicious oniony snack I've had in a long time.

Herr's is a regional company and they don't distribute to the entire US - here's a link to their distribution map - but if you live east of the Mississippi you might find their stuff. These Blossoming Onion crisps are certainly worth looking for.


21 July, 2008

A. Dong Supermarket, West Hartford CT

I've written before about A. Dong Supermarket, the large Asian market in West Hartford CT. My wife and I were back there yesterday and stopped to buy a roasted duck to take out for supper.

The photo at right shows the display case where the roasted goodies are kept hot pending customer's orders. In the background, whole red-roasted chickens hang, followed by strips of "baby BBQ pork" (bright red ovals of sweet barbecued pork cut from the shoulder.) Hanging on hooks in the center of the photo are a number of roasted five-spice ducks, with the head and neck still on. To the right, whole roasted pigs hang from steel hooks as a deli employee sections them with a razor-sharp Chinese chef's knife. In the foreground, three or four roasted pig's heads gaze at the ceiling next to several "long feet" (roasted pig's feet which include the leg all the way up to and including the hock.)

Since we arrived at Dong's early in the afternoon, this deli/lunch counter was busy. Some girls in front of me in line ordered a couple of ducks, and the woman behind the counter took two down from the case and brought them to a massive chopping block. Within a minute or two, she had the two ducks expertly cut into inch-wide strips, packed and arranged in an eye-pleasing manner in lunch-sized aluminum pans - half a duck per pan.

I ordered our duck, and the woman picked one down. "Don't throw away the head, OK?" I asked her.

She looked at me strangely. "You want duck head? You sure?"

"Yes, thanks."

"Okay. You like tail, too?" she asked. When I said yes, I wanted the tail too she gave me a big smile. "I give you extra tail, we have some from other duck."

When the cutting and packing were done, she handed me two lunch-sized aluminum pans artfully packed with inch-wide strips of duck...and a plastic bag with four duck tails and the head from the duck I ordered.


By the time we got home, the duck skin had lost its crispiness. I fired up the charcoal grill and very carefully gave the duck a few minutes over the hot coals, warming the meat back up and making the duck skin crispy and delightful. "Very carefully" is not an exaggeration, because duck is fatty and if not watched closely can turn an outdoor grill into an inferno. It turned out delicious.


20 July, 2008

Doritos Collisions - Hot Wings and Blue Cheese

Doritos Collisions is an interesting concept from Frito-Lay - they take two distinct but complimentary flavors of Doritos (often with contrasting colors as well) and combine them in a single bag. This latest Collision, Hot Wings and Blue Cheese is an excellent example of a combination that works beautifully.

The Hot Wings flavor, although not very "wingy," is delicious. The main flavor components are paprika oleoresin (for heat) and tomato powder (tangy "wing sauce" flavor.) They're great together, and offer a good spicy burn that lingers in the mouth. Much like the Blazin' Buffalo and Ranch flavor, there's heat to spare without being overwhelming.

The Blue Cheese flavor is perhaps one of my favorite Doritos flavors ever, and I would buy them in a heartbeat if I ever found them packaged by themselves. They're similar to the standard Doritos nacho flavor, but with less of a sour edge and the distinct backnote of blue cheese.

Either of these chips would be great on their own, but Frito-Lay knows that hot wings and blue cheese are traditional partners. If you see them in your local market, grab a bag. They're made of win.


19 July, 2008

Mixed Summer Fruit Jam

I have this love/hate relationship with canning.

On the one hand, I love it. I love making pickles, jams, jellies, and more all through the growing season - my wife and I start putting up jars of stuff with the very first rhubarb stalks in the spring, and we don't stop until the last of the tomatoes are harvested in October. I make double and triple batches of baked beans just to be able to can off eight or ten pints for days when we want beans but don't want to spend a day waiting for them. My canning kettle stays handy on the bottom shelf of my rollaway cart year-round so it's at my fingertips when needed, and my pressure canners are atop the fridge, ready at a moment's notice to put something by.

On the other hand, my kitchen isn't air-conditioned and we're in the midst of a mid-July heat wave. And yet, here I am, fruit cooking on the stove, the canning kettle boiling away, and the temperature in the kitchen coming up close to 90F even with fans in the window and it being 8:00 at night. There's nothing I can do about it; the fruit is ripe and has to be processed, and I can't let it stand around until the heat breaks. So I wait until after dark when it's a little cooler outside and sip iced tea as the preserves simmer, and retreat every now and then for short breaks in the haven of my air-conditioned living room.


One of the supermarkets in my town marks down produce as it starts to get less than perfect. I always check the markdown bin when I go there because I regularly get some great deals, especially on fruit destined for jellys, jams, or juicing. Cosmetic flaws, bruises, and overripe spots don't bother me that much when all I'm going to do is cut the stuff up into the kettle anyway.

And so, today I came home with some slightly underripe strawberries (high in pectin) and an assortment of nectarines, yellow peaches, white peaches, and limes, all for about 39 cents a pound.

Mixed Summer Fruit Jam

Strawberries
Peaches
Nectarines
1 lime
Sugar

Hull and slice strawberries; scald peaches and nectarines and then plunge into cool water to loosen their skins; skin and stone the fruit and cut into chunks. Prepare a total of 8 cups of fruit. Place cut fruit into a large heavy Dutch oven. Add the juice, pulp, and zest from the lime.

Bring to a simmer over medium low heat, then gradually stir in 6 generous cups of sugar. Continue cooking and stirring until sugar dissolves. Allow to cook, uncovered, over medium low heat, stirring occasionally. Simmering jam will foam up - keep an eye on it and stir down the foam if it looks like the pot will boil over.

Continue cooking until temperature reaches the jelly point, 220F. Test the jam by dropping a little bit onto a cold plate and chilling for a few minutes in the fridge; if the jam on the plate wrinkles when pushed with your finger, it's ready.

Turn off heat and allow the foam to settle. Skim off the foam with a spoon, then ladle the jam into jars, cap, and process in a boiling water bath 10 minutes to seal.

Makes about 9 half-pints.


18 July, 2008

How to Bone A Chicken Wing, Step By Step

One of my favorite appetizers is stuffed boneless chicken wings. Although boning wings takes a little bit of effort, it's worth it. Done correctly, a boneless chicken wing is a perfect, unpunctured pocket which will delight and amaze your guests.


Here's what you need to get started: Some chicken wings, of course, a sharp paring or boning knife, a clean work surface, and a scrap pan to hold the bones as you go along. It may also help if you put the wings into the freezer for an hour or two - not long enough to freeze them, but enough to make the flesh firmer and easier to work with.


The first step is to disjoint the wings. Do this by bending back the joints until you feel the bones pop from their sockets at both knuckles. This frees the bones from the grip of the knuckle joints and makes them easier to remove.


Use a sharp paring knife to go all around the cut end of the chicken wing, right down to the bone. There are several tendons in the wing that need to be severed here.


When the tendons at the end of the bone are all cut, scrape the meat down the bone to expose the end.


Pull the meat and skin back along the bone, turning the meat "inside out" as you go. When the first bone is completely exposed, hold it back with one finger and use the knife to carefully free it at the knuckle. Take care not to cut through the meat or skin here. You can remove the large bone at this point.


Now the cartilage-covered tips of the two smaller bones will be exposed. Like before, use the knife to cut around the ends of the bone, severing any tendons that might be attached.


After running the knife around the two small bones, use it to carefully cut between them and split the cartilage that covers their ends. Be expecially careful here! There is nothing between this joint and the thin skin of the wing, and you don't want to break the skin or make a hole in the side of the wing!


Use the knife to pry off the small cartilage caps on the tips of the bones. With the cartilage caps pried off, scrape the meat down these bones just like you did with the larger bone before.


As you scrape down the two small bones, continue pulling the meat down and "inside out" as you go. you only need to expose about three-quarters of an inch of bone in this part of the wings, just enough to get a grip on with your fingers. this photo gives you an idea of about how far you need to go.


One at a time, grasp the bones at the tips and pull them firmly straight out, twisting the bone to release it from the cartilage at the wing tip if necessary.


With the bones pulled out and the meat pulled back around the wingtip, the chicken wing should now be pretty much inside-out, as shown here. Just reach inside the end, grab the wingtip, and pull it right-side-out again.


The final product will look like the picture above.

Even though it would be nice, don't expect perfect results the first time you try this. Buy a small package of wings, sit down at the table and just go to it. By the time all the wings are boned, you should have the hang of it. the first couple are going to take a while but as you get better at it, you should be able to bone out a package the size of the one shown on this page in less than fifteen minutes.


You can stuff the wings with just about anything you like, from standard bread stuffing to more exotic blends. Stuffed wings are popular in Thai cuisine, so thumbing through a Thai cookbook or searching a database of Thai recipes is likely to come up with a couple of good ideas. In the meantime, this recipe was given to me by Earlene Phillips of Chicopee MA. She's also the person who taught me how to bone wings in the first place.

----- Now You're Cooking! v4.60 [Meal-Master Export Format]

Title: Stuffed Chicken Wings
Categories: appetizers, poultry
Yield: 18 wings

3 lb carrots
1 lb sausage meat
1 celery; chopped
1 lg green pepper; chopped
1 lg onion; chopped
oregano to taste
1 pk sazon goya
1 black pepper to taste

Mix all ingredients together. Stuff into boned chicken wings. Coat
wings with seasoned bread crumbs, bake at 325 for about 1 1/2 hours.

Mixture will stuff about 18 to 23 wings, depending on size.

By Earlene Phillips

MM format by Dave Sacerdote

-----


This information was originally presented on my now-defunct homepage in 1998. (A May 2001 text-only capture of the page can be found here, at the Internet Archive.)

.

16 July, 2008

Cowboy Charcoal Company Cheats Customers

There are two reasons I like to cook outside on my charcoal grills. First, of course, is that so many things taste better when they're cooked over live coals. And second, when it's a hot summer's day, I prefer to cook outside and not add any more heat to the kitchen from running the stove or the oven.

Economy, however, is one thing that doesn't enter the equasion. No matter how you look at it, using charcoal outside is more expensive than using the stove or the oven. And because the cost is already higher than indoor cooking, it pisses me off that a company would deliberately game the system in order to cost me even more money.

But that's what Cowboy Charcoal does. There have been rocks packed in with the charcoal in two consecutive bags I purchased. I don't usually find them when I'm pouring the charcoal into the chimney to light it. I find it later, when I'm emptying ashes or raking out unburned charcoal to re-use. They're not small pieces, either - one of the rocks I found was a pound-and-a-half chunk of sandstone. That might not sound like a big deal, but it's a good percentage of an eight-pound bag of charcoal.

I sent the company email last week, asking if they were having some problems with quality control (after all, it has to be a mistake, right? Right??) but they've ignored me so far. So the hell with them. Whether it's a deliberate attempt to short their customers or just a problem with their process, I don't give a damn any more. They've lost my business permanently.

Here's an example of what I'm finding in my grill after the charcoal has burned off. The rock on the left is a piece off of a much larger chunk of quartz that was cracked and split by the heat. The piece on the right is a chunk from a large piece of sandstone that was indistinguishable from a large chunk of charcoal when it was poured from the bag.

Their website is w­ww.co­wboycharcoal.com. I'm not going to make it a link, because they don't deserve it.

15 July, 2008

Doritos Spicy Sweet Chili

In the seemingly endless parade of hit-or-miss Doritos flavors from Frito-Lay comes this most recent "miss," Spicy Sweet Chili. From the name, I suppose that it's supposed to be kind of like a spicy chili pepper flavor with sweet overtones, but it falls far short of anything that enjoyable.

Mostly, what they taste like is salt with sugar thrown in. There's kind of a half-hearted attempt at spiciness, but until you've gone through nearly the entire serving, there's very little heat evident.

Maybe Frito-Lay should just go back to making nacho cheese flavored chips. At least those were pretty good.

Playing with my food

There isn't anything as much fun for breakfast as Alpha-Bits cereal when you have an eight-year-old's sense of humor.

.

14 July, 2008

Kraft Macaroni & Cheese Crackers

Kraft has a new offering in the snack cracker category: Kraft Macaroni & Cheese Crackers. Available in three flavors - Mild Cheddar, Cheddar, and White Cheddar - Kraft's website says they've "taken that Kraft Macaroni & Cheese taste your kids love and baked it into a new crispy cracker they can crunch!"

If you're a fan of Kraft Macaroni and Cheese you'll probably like these crackers; I have to admit they do taste just like their namesake product, and that includes the criticism that they're too salty and have a distinct sour-milk aftertaste.

Kraft Macaroni and Cheese is known as Kraft Dinner in Canada. I wonder if Kraft is marketing Kraft Dinner Crackers there?


11 July, 2008

My First Award!

Recently, I was pleasantly surprised to find that KianLam Kho, proprietor of Red Cook - Adventures from a Chinese Home Kitchen, had passed along to me the Arte Award. The Arte Award originated on the Arte y Pico blog and is given by award recipients to fellow bloggers who, in their opinion, display creativity, present interesting material, and contribute to the blogging community in some way.

Kian and his blog certainly deserve the honor. I'm flattered that he thinks enough of my own humble scribblings to similarly honor me. And although it should inspire me towards some sort of higher standard, I promise that receiving the Arte Award won't keep me from opening the next tin of nastiness I find at the dollar store and writing about what I find within.

As part of the fun, I am allowed to choose five of my own recipients among the bloggers I read regularly.

The Royal Bacon Society
- Of all the bacon blogs on all of teh Internets, this is my favorite. Marianne has it all covered, sweet or savory, meal or snack, for people or for pets.

Food for Thought - Chef John Hughes' recipes are wonderful, his restaurant reviews come from the unique perspective of a professional chef, and his blog and website are friendly and welcoming. Most of all though, I salute his commitment to seasonal dining and sustainable seafood harvests.

Just Cook It - Alex introduced me to the writings of Fergus Henderson, a celebrated English chef of whom I had never heard until I read a few references in Just Cook It. I guess one of the things I really like about Alex's writing is that his attitudes about food and cooking are so similar to mine, but with a British perspective.

Lobstersquad - I adore Ximena Maier's blog not only for the recipes and commentary, but for her illustrations. They're beautiful and whimsical and touching, and they make Lobstersquad a total delight to visit. Also, I'll slip in an extra plug for her drawing and artwork blog as well.

Fritter - Reading Sarah's blog is like sitting down for coffee and a visit with an old friend. There's always something delicious on the kitchen table as she shares recipes and reminiscences; she has the rare gift of writing with a smile in her pen, and it shows.
The Rules for the Arte Award:
  1. Pick 5 blogs that you consider deserve this award with their creativity, design, interesting material, and also contribute to the blogger community, no matter what language.
  2. Each award has to have the name of the author and also a link to his or her blog.
  3. Each award-winner has to show the award and put the name and link to the blog that has given her or him the award.
  4. Award-winners and the one who has given the prize have to show the link of “Arte y Pico” blog, so everyone will know the origin of this award.
  5. Display these rules on your blog.

08 July, 2008

Local Food: Collins Creamery Ice Cream

In the 1990's, with bulk milk prices falling, two dairies in Enfield Connecticut took very different approaches to adapting to the new market. Trinity Farms, on Oliver Road near Interstate 91, started processing and selling their milk directly to the public at their dairy and has developed a loyal area following with their high-quality milks and creams, yogurts, and butter.

Powder Hill Farms, owned by the Collins family and located on the other side of town, went in a different direction. In 1997, they opened The Collins Creamery to sell ice cream made on the premises from dairy's own milk. It was a huge success and has not only helped the farm to prosper, it has helped the family raise public awareness of local agriculture. The farm welcomes tour groups and school field trips for a nominal fee, which includes a one-hour tour of the farm followed by ice cream at the Creamery.

The sign at the Creamery says "On the quiet side of town," and there's no doubt; located on Powder Hill Road in Enfield, the farm is surrounded by pastures, cornfields, and tobacco fields. It's off the beaten track to be sure, but the ice cream is well worth the extra few minutes it takes to drive there. They make over 20 flavors, ranging from the simple and delicious vanilla and chocolate, to more complex delights like red raspberry chocolate chip.

Hard ice cream is their specialty, but they do have a softserve machine if that's what you're after, and they'll hand-pack any ice cream flavor you desire into pints, quarts, or half-gallons to bring home.

On a warm and sticky summer evening, there's nothing like pulling into the parking lot at the Creamery and getting a cone or a dish of ice cream to take the edge off the sultry weather. The ice cream stand is near one of the old red barns, and part of the parking area borders a small pasture. Sometimes, a few of the cows are behind the stout wooden rail fence, and they'll come over to the fence to have their heads scratched, eat a handful of clover from your hand, or give you a friendly lick.


The Collins Creamery is pet-friendly, too. Well-behaved dogs (on leashes, please) are welcomed, and one of the items on the menu is the "Doggie Dish," a small portion of vanilla soft-serve ice cream in a cup, topped with a small dog biscuit.

The Collins Creamery
9 Powder Hill Road
Enfield CT 06082
860.749.8663

Links:

The Collins Creamery Website


Heirloom Tomatoes and Saving Seeds

Early July always drives me crazy. My tomato plants are doing great but we're still three weeks out from being able to actually pick anything, and the farm stands have nothing but hothouse tomatoes that are just a step or so up from the same watery bland "winter tomatoes" that I boycott anyway.

So it was a real surprise to me when I saw this huge, half-pound purple-tinted heirloom tomato at the supermarket the other day. It was the size of a garden-raised Beefsteak tomato with a blackish-purple blush to its skin. A gentle squeeze revealed it to be at just the right stage of ripeness, and it passed my best indicator of true worth: it smelled like a fresh-picked sun-ripened back yard tomato.

You can see from the picture above what I found when I sliced into this beauty. I can't believe how meaty it was - there were hardly any seeds at all, just firm ripe tomato bursting with sweet and tangy summer flavor. The near-seedlessness really intrigued me, because I grow six or eight different varieties of tomatoes every year and I've never found one yet that gave me a fruit with so few seeds. That's important to me because my daughter loves tomatoes but doesn't care for the icky mouthfeel of what she calls "the tomato guck." I decided that I'm going to save the seeds from this fruit and try to grow them next season. I'm trusting the label on the fruit calling it an "heirloom" tomato, which means it should reproduce true from a seed, but i don't know what variety it is or if it has a name.

By the way, it turned out that this tomato is a Sunset brand tomato, from the same Ontario hydroponics company that I have written about twice before - Mastronardi Produce Ltd. I guess I shouldn't be surprised at the quality of this one, given how good their other stuff has been.


Saving Tomato Seeds

Whenever I find a variety of tomato I really like, whether it's at a grocery store, farmers market, or roadside stand, I save some of the seeds to try out in my garden. Most of the time I have pretty good results with saved seeds. There is a bit of commitment involved in saving tomato seeds, but it isn't that difficult.
  1. Scoop out the seedy pulp with a spoon or your finger, and put it goo and all into a small glass container like a jar or a juice glass. Something small.
  2. Add some water to the seeds and swish them around a little.
  3. Cover the top of the glass with some plastic wrap. Poke a few holes in the plastic to let some air in.
  4. Put the glass in a warm place, like a window sill. It will ferment after a day or two. This is what you want. Fermentation gets rid of the goo and frees the seed. It also helps kill off any seed-borne illness that might be lurking in your tomato plant.
  5. Every night while you're waiting for the fermentation, take off the plastic wrap and give the seed liquid a gentle stir. Soon you'll notice some foamy scum at the top of the glass. You're ready to take out your seeds.
  6. With a spoon, skim off the scum at the top of the glass. Don't worry about any seeds that are in the scum, you can throw then away as well because they're dead.
  7. Pour the liquid through a fine-mesh kitchen strainer and rinse with cool running water, swishing the seeds around gently, to remove any remaining traces of the goo. Put the seeds on some mesh or screening or a paper coffee filter to completely drain and air-dry. It will take a couple of days, during which time you should stir them around a little and keep them in a single layer so they dry evenly.
  8. When they're completely dry, put them away in a paper envelope in a cool dark place until early spring when you can start them indoors.
.

06 July, 2008

Figs at Breakfast

Yesterday I picked up a big tray of plump, delicious fresh figs. I love them eaten just as they are, out of hand; when I was a kid, my uncle in Florida had a fig tree in his back yard and he'd always encourage us to pick and eat all the figs we wanted from that tree. Fresh figs still remind me of him and those summer visits.

Even so, I can't eat this whole package of figs by myself and my wife and daughter aren't so fond of fresh figs as I am. I thought about making that classic appetizer, grilled figs wrapped with prosciutto, only I haven't got any prosciutto in the house right now. But what's this? SCRAPPLE! How joyous!

I drizzled a bit of olive oil on a hot griddle and set a few halved figs, cut side down, on it to caramelize. While they cooked, slices of scrapple were sizzling nearby to crispy-outside-creamy-inside porky perfection. I served them up as a side to sunny-side-up eggs.

Now grilled figs wrapped in prosciutto is pretty wonderful, but grilled figs with scrapple is pretty damn good too. Fresh figs lose a lot of their "greeny" flavor when they're lightly browned, developing a rich and deep earthy sweetness that just seems perfectly at home with the sagey peppery porkiness of the scrapple. We will certainly do it again.

.

05 July, 2008

Garden Update: Hubbard Squash

I was checking on my Blue Hubbard squash vines, trying to keep them steered to the edge of the lawn, when I noticed three or four little blossom-topped balls among the leaves!

Yes, they're less than an inch in diameter right now, but come October they'll be big 20-pound bumpy blue-green footballs. My favorite winter squash.

04 July, 2008

Sunset Brand Long Sweet Peppers

Whenever I'm at the supermarket, I check the markdown bins to see what kind of interesting things I can scoop up on the cheap. Yesterday, I was there buying rolls so we could make sausage subs, and these slightly wrinkled but still quite useable long red sweet peppers were deeply discounted - the regular price was $2.49 a package, but I got them for 40 cents each. Score!

First thing I noticed was the label - Sunset brand, produced in the massive greenhouses of Mastronardi Produce Ltd. of Ontario. The same company that makes the best out-of-season tomatoes I've ever eaten. I'm happy to say that, even though these peppers were a little past their prime, they were completely awesome.

At first glance, these "Ancient Sweets" as Mastronardi calls them don't seem to be your average cubanelle peppers that have been allowed to ripen to red. Cubanelles are a thin-walled pepper and seem a little broader than these. The Ancient Sweets have a succulent thick wall, and were easy to peel after pan roasting. They were also absolutely delicious! Rich ripe pepper flavor, full-bodied and not overly sweet.

After roasting and skinning them I removed the small seed pod from the stem end and cut the peppers into long strips to put in the subs, and they were perfect, with a much better flavor than the common red bell pepper I would have used if these weren't available.

Right now, I'm drying two of the seed pods from the peppers. It's too late in the season to start pepper plants, but next year I plan to start a flat of them and see how many I can get to germinate. I'd like to nurse at least six of them to transplantable size and set them in the garden.


02 July, 2008

Dollar Store Stupidity

Job lots and dollar stores are great sources of inspiration for me. They've always got interesting food sections, thanks to failed product introductions, store bankrupcies, and short production runs. And then there are the crappo manufacturers who contract for huge numbers of shoddy gadgets they can buy for a nickle and sell for a buck.

Take this "dog food can opener," for example. It is, quite frankly, a piece of shit. Cheap bearings, soft scrapmetal parts, and a shoddy plastic handle practically guarantees this junk a short life. And it's a good thing they put "DOG FOOD CAN OPENER" on the card, because you sure as hell can't tell what kind of animal that bow-tied bastardization is supposed to represent.

But the text on the card is the best part:

"Perfect for easy opening of canned dog food." Of course it is. It's a can opener, right?

"Prevents mixing of dog and human food." What? WHAT?? Are they kidding? What kind of stupid bullshit is this? And are there really people out there so gullible as to think this is a problem? Damn.

Hoan - the manufacturer - used to be pretty reliable, a good source of inexpensive but well-made kitchen sundries. I still use a set of biscuit cutters made by Hoan almost 25 years ago. But somewhere along the way, I suspect they've gone a little downhill.

.

01 July, 2008

The Best Crab Cake Recipe Ever

I love crab cakes. They're pretty easy to prepare, make a great "impress-your-friends" appetizer for a dinner, or you can serve them as a main course for a light summer supper with a salad, corn on the cob, and chips. The secret to great crab cakes is excellent quality meat, a minimum of filler, and a light hand with seasonings that enhance rather than mask the wonderful flavor of the crab.

Any type of crab is good in a crab cake, but most of the native crabs here are on the small side and would take forever to pick. So, I start with a pair of good-sized Dungeness crabs. They're cooked on the boat and frozen for shipping to me here on the East Coast. Put them in a steamer for five or ten minutes and they'll be thawed and ready to use. Dungeness crabs also have a very good meat-to-weight yield. You'll need about a pound or so of crabmeat, so plan on buying two crabs, about 2 pounds each (heavier is okay - the ones in the picture were just over two pounds each.)


Pick the crab well; try not to break up the big meaty pieces that will come out of the legs and claws. Save any body fat and tomalley in a separate small container. You can use that later to make a delicious spread for bread and crackers, or blend it with cream cheese to make an awesome crab dip for chips.

When you're done picking the body and legs of the crabs, you'll have just over a pound of meat. Set it aside while you prep the other ingredients.


In addition to the crabmeat, you will need:

1 egg
2 tablespoons mayonnaise
1 tablespoon Worcestershire sauce
1/2 teaspoon of celery salt
1/2 teaspoon of Old Bay Seasoning
Paprika to taste
2 slices of fresh soft bread, grated into soft, bulky crumbs
A small amount of dried panko breadcrumbs


In a large bowl, combine the egg, mayonnaise, Worcestershire sauce, celery salt, Old Bay, and paprika. Whisk it until smooth.


Add the picked crabmeat to the egg mixture in the bowl and lightly fold the meat into the liquid until all the crabmeat is coated.


Next, add the soft fluffy breadcrumbs you made by grating the fresh bread. As you did before, lightly fold the crabmeat and breadcrumbs together until the crumbs are incorporated into the mixture. The mixture will look rather dry, but that's okay - you only want a small amount of binder to hold the crab cakes together. Remember - crabmeat should be the main ingredient in a crabcake, not breadcrumbs.


Prepare a tray large enough to hold all your crabcakes by sprinkling it with the dried panko breadcrumbs. The panko will help make the crabcakes crispy later, when they are fried.

You can form your crabcakes by hand, but it's easier if you use a biscuit cutter as a form (and they will come out more uniform, too.) For a main course, use a large or medium cutter. If you're making appetizers, you may want to use the smallest size cutter to produce bite-sized crab cakes.


Pack the biscuit cutter with crabmeat. Be gentle so larger pieces remain intact. Press the crabmeat firmly but carefully into the form, using some pressure so the patty will stay together.


Lift the cutter to the platter with the panko, and carefully unmold the crab cake onto the platter. Repeat until all the crabmeat mixture is formed into patties. With a medium-sized biscuit cutter as a form, you should get about eight or nine crab cakes (exact number will vary depending on the size of the crabs and how much meat you've gotten out of them, of course.)


Sprinkle the tops of the patties lightly with a little more panko and place the tray in the refrigerator for about an hour to chill thoroughly.

Refrigerating the crab cakes before cooking them is important. It allows the egg-and-crumb binder to "set" so the crab cakes don't fall apart when they are cooking. Don't omit this step!


Melt a few tablespoons of butter in a heavy skillet until foamy, then carefully transfer the crab cakes to the hot skillet. Fry over medium heat three or four minutes, until browned, then turn over and brown the other side as well.


Delicious crab cakes are delicious.


.